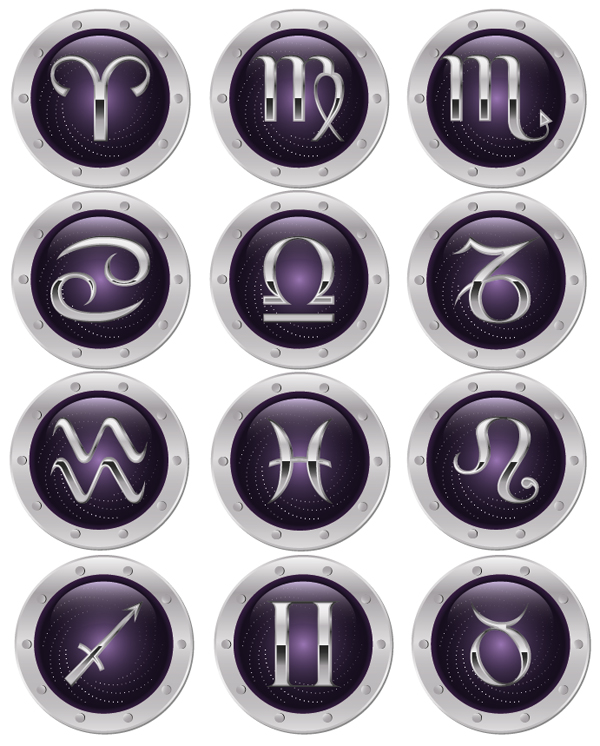
In this tutorial you will learn how to create A complex graphic style, using only the Appearance palette and commands from the Effect menu. We will be creating a style based on the signs of the zodiac. All the style elements are created from a single character. Is it hard to believe? Let’s get started!
Step 1
Start with finding a suitable font which contains the signs of the zodiac. I decided upon an Astro font. The table below shows how the signs of zodiac correspond with the letters on the keyboard (notice that these are all capital letters).
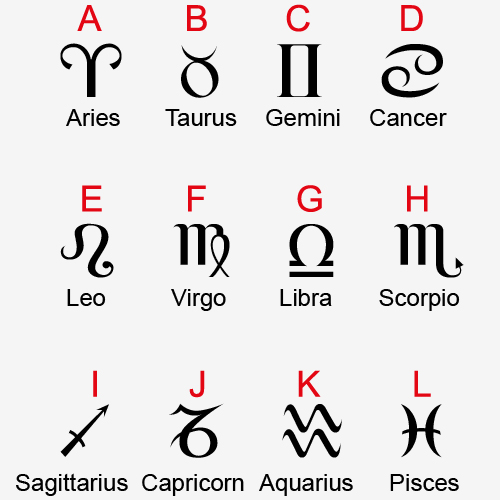
Choose a large font size, so it will be more convenient to work with. I chose a font 300 px in size. All the transformations we be carried on the example of the Scorpio symbol.
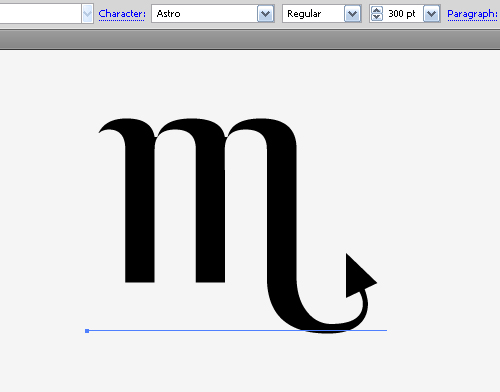
Step 2
Expand the text to make it into an object. Select the Scorpio symbol, and go to Object > Expand. It is represented by Compound Path, which is located in a group. Ungroup the object (Shift + Command + G).
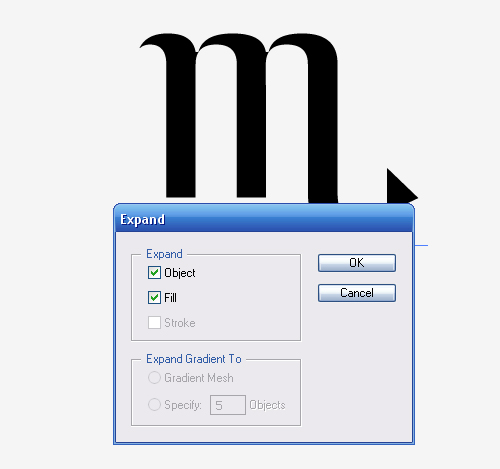
Step 3
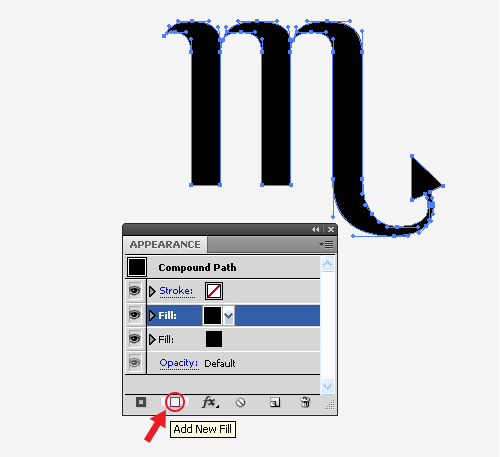
The sign of the zodiac will be the focus of the stylized image. Open the Appearance palette, select the object and add a new fill in the palette.
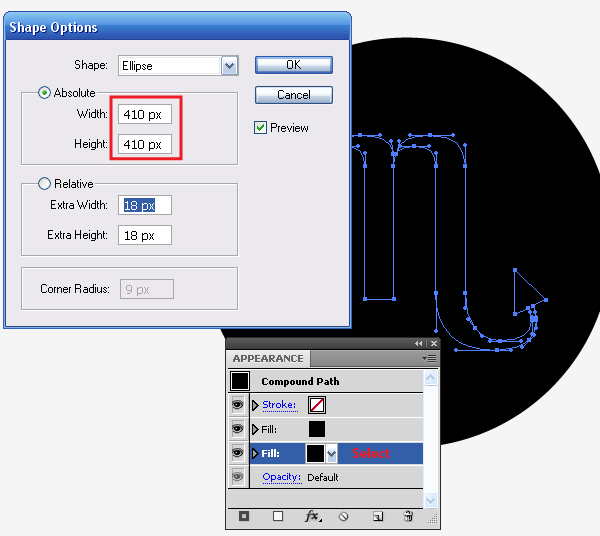
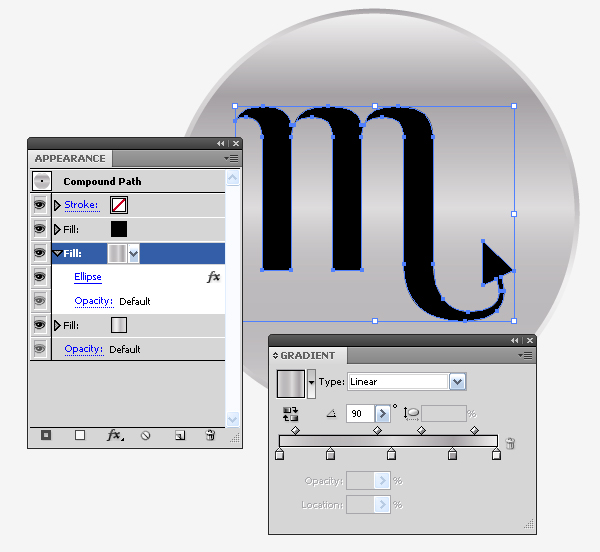
Keep the object selected, select the bottom fill in the Appearance palette, and go to Effect > Convert to Shape > Ellipse. Now set the size of the ellipse equal to 410 by 410 px.
Step 4
Apply linear gradient to this fill, consisting of various shades of grey. Light and dark shades rotate in the gradient, forming a striped fill.
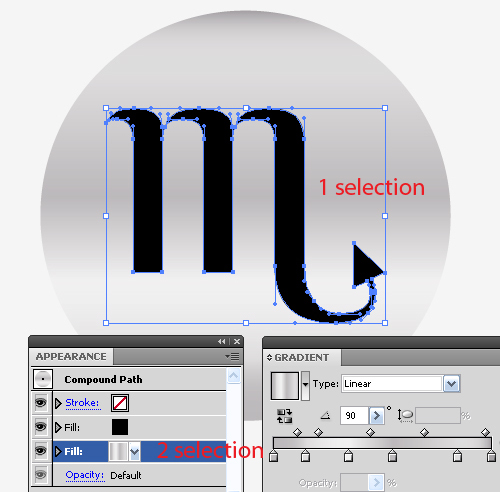
"When working with the Appearance palette, you have to learn one rule: the object and fill we work with should be selected. When it is only an object selected, the created effect will be applied to entire element."
Step 5
Keep the gradient fill selected, hit the Duplicate Selected Item button. As a result, we get a new fill with the same effects as the original one. Now, edit the parameters of this fill. Click on the Ellipse function in the Appearance palette and set new Absolute sizes of the ellipse in the open dialog box.
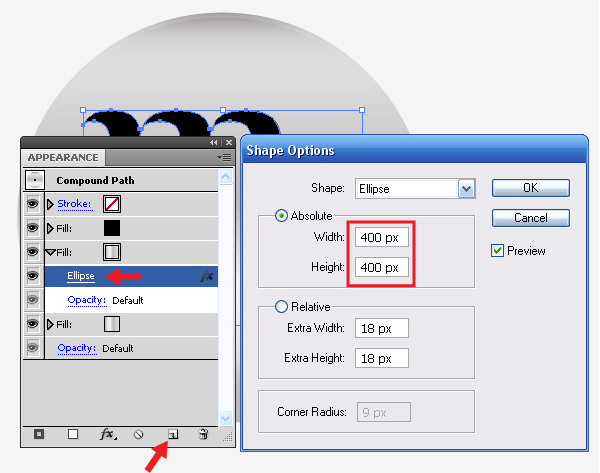
Use another gradient for this fill, the sequence of light and dark shades in it will be different from the bottom gradient.
Step 6
Create the shadow of an illuminator. Duplicate the fill on the very bottom in the Appearance palette.
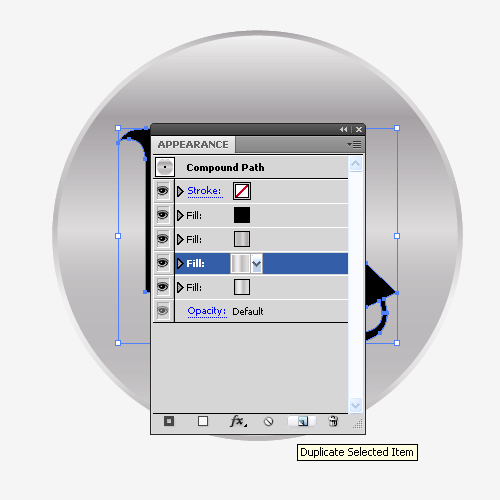
Proceed to editing the bottom fill. Replace the color for this fill with the solid dark grey.
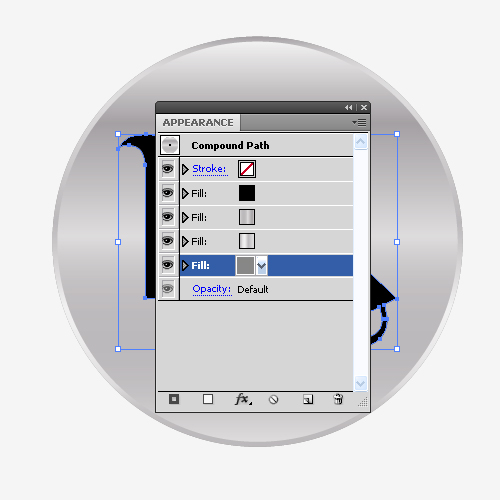
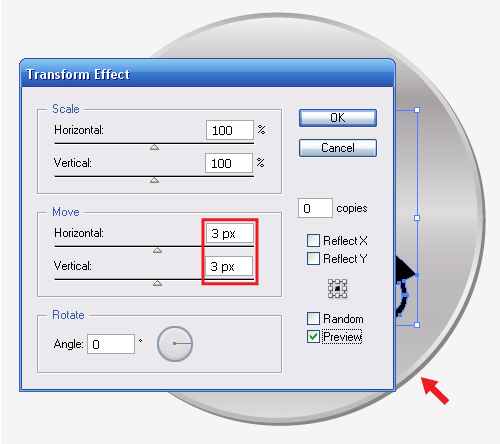
Now move this fill 3 px down to the right. To do this, go to Effect > Distort & Transform > Transform, and set the Move value in the dialog box.
Step 7
Now it’s time to create the rivets. Duplicate the top gradient fill in the Appearance palette and edit the sizes of the ellipse.
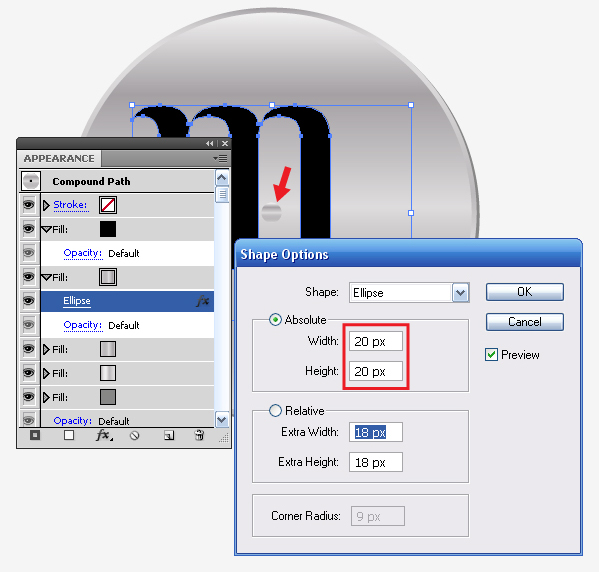
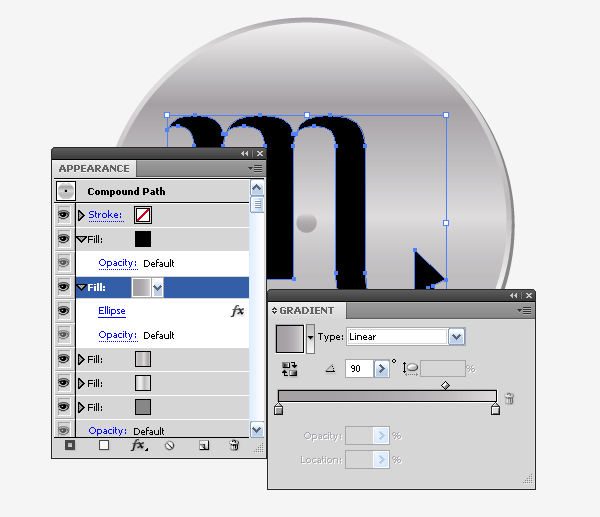
Now replace the fill with linear gradient, consisting of two shades of gray.
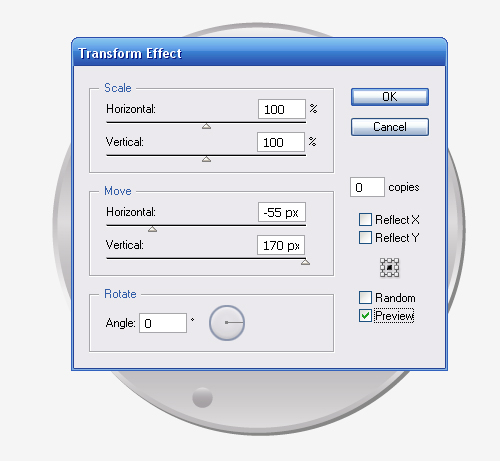
Change the location of the rivet, to do this, go to Effect > Distort & Transform > Transform, and set the offset values in the dialog box.
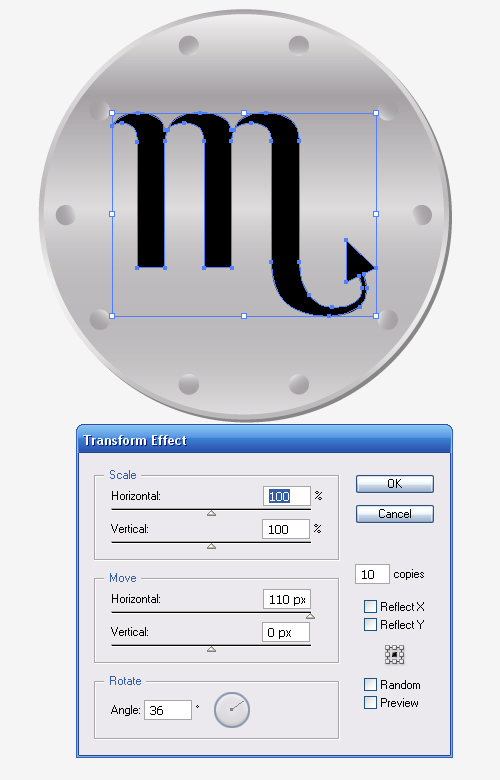
The rivets should be placed evenly all around the illuminator, to do this, we will have to apply another Transform Effect. So, go to Effect > Distort & Transform > Transform and set the parameters in the dialog box as shown in the figure below.
Step 8
Create shadows under the rivets. Duplicate the fill with rivets in the Appearance palette. The original fill with rivets will be edited. Replace the gradient of this fill with linear gradient from grey to black.
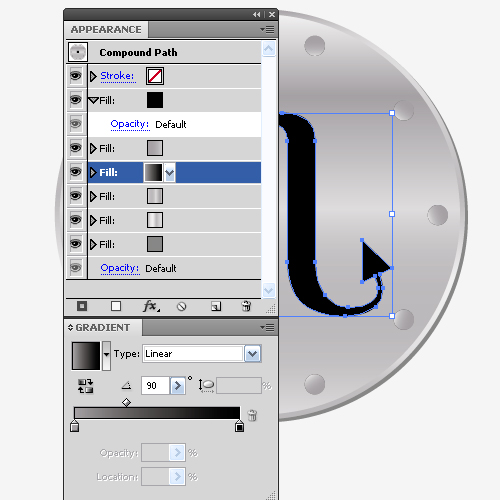
Now, edit the offset parameters. Open the dialog box of the first transformation and edit the parameters of the horizontal offset.
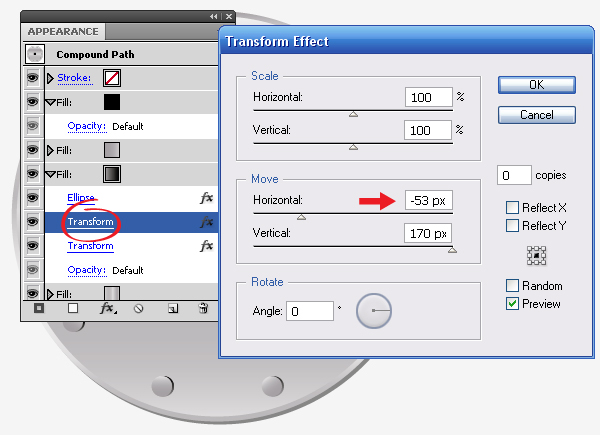
Step 9
Now it’s time to create the purple universe. Duplicate the fill with illuminator shape.
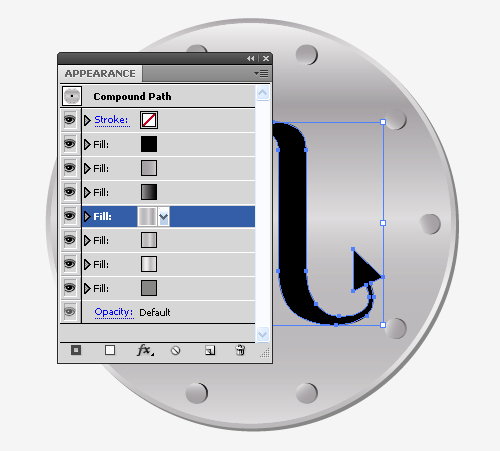
Change the sizes of the ellipse.
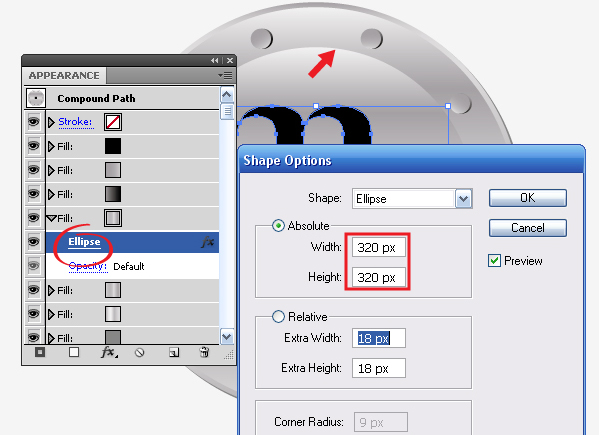
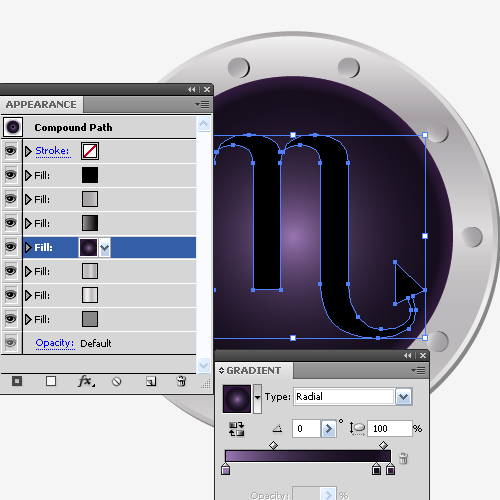
Now replace the fill with a radial gradient, consisting of three shades of purple.
Step 10
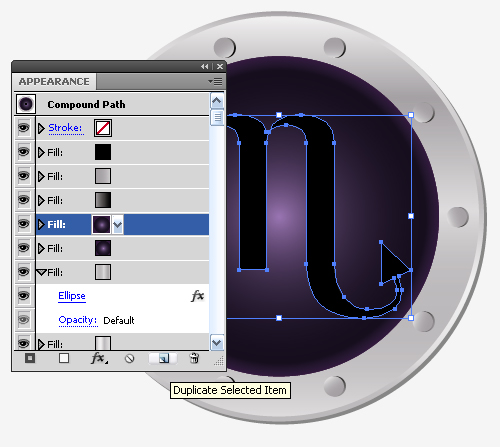
Now add volume to the illuminator glass. To do this, create a reflection in the upper part of the glass. Duplicate illuminator window.
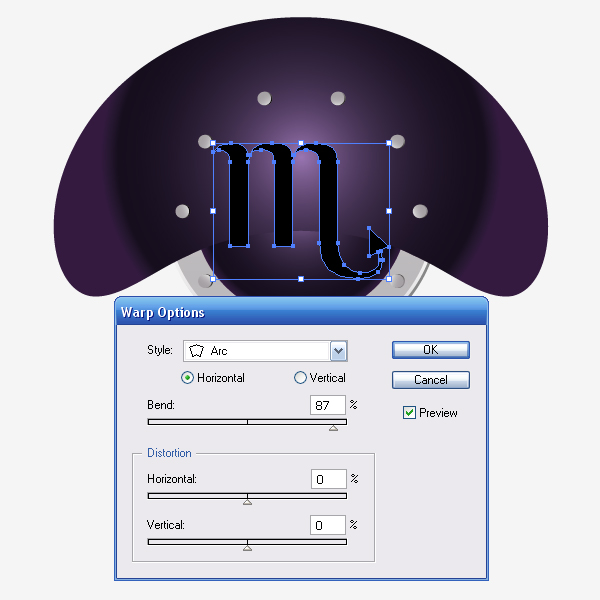
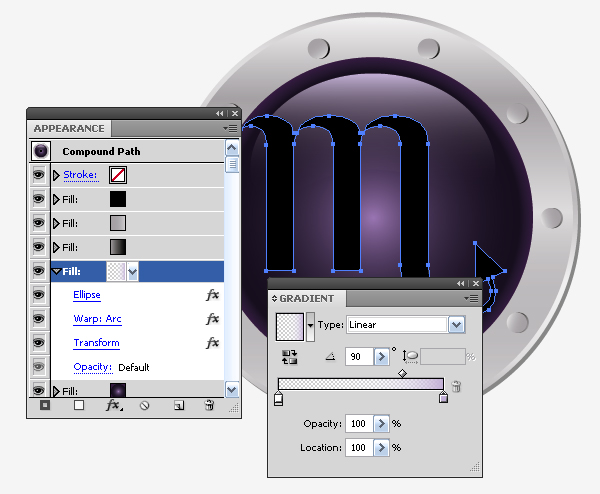
Distort the shape of this fill, to do this, go to Effect > Warp > Arc, and set the parameters shown in the figure below.
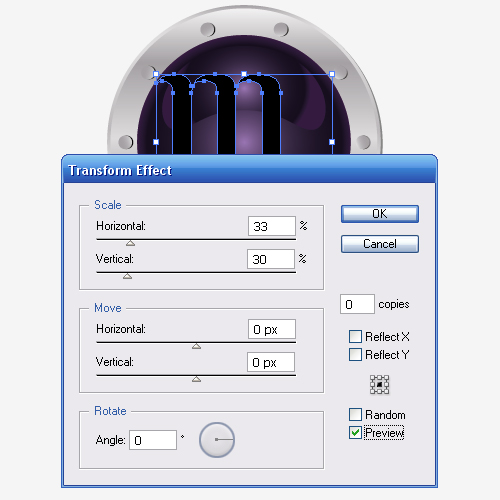
Obviously, the reflection should be reduced, go to Effect > Distort & Transform > Transform and set the following values.
Now replace the fill with a linear gradient consisting of a light purple color with 100% opacity, and white with 0% opacity.
Step 11
Now, create a stylized galaxy. Duplicate the fill with the purple radial gradient and change the sizes of the ellipse.
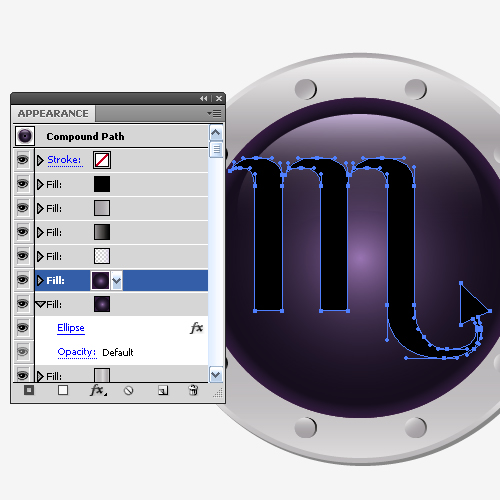
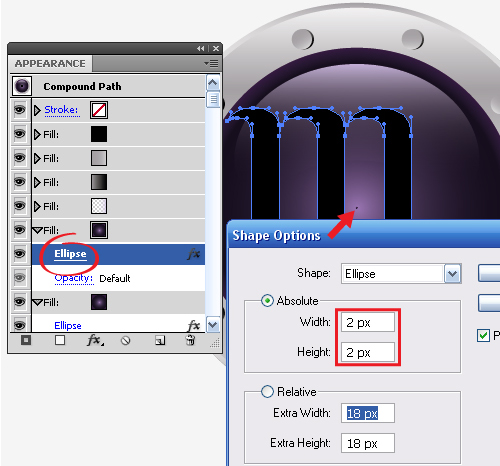
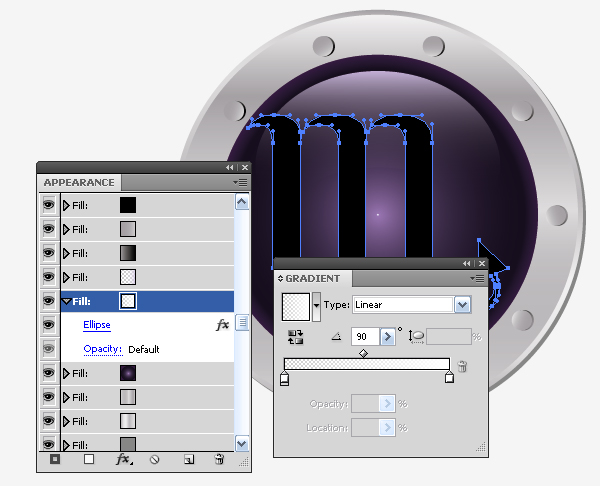
Now replace the fill with a linear gradient from white to white with 0% opacity.
Step 12
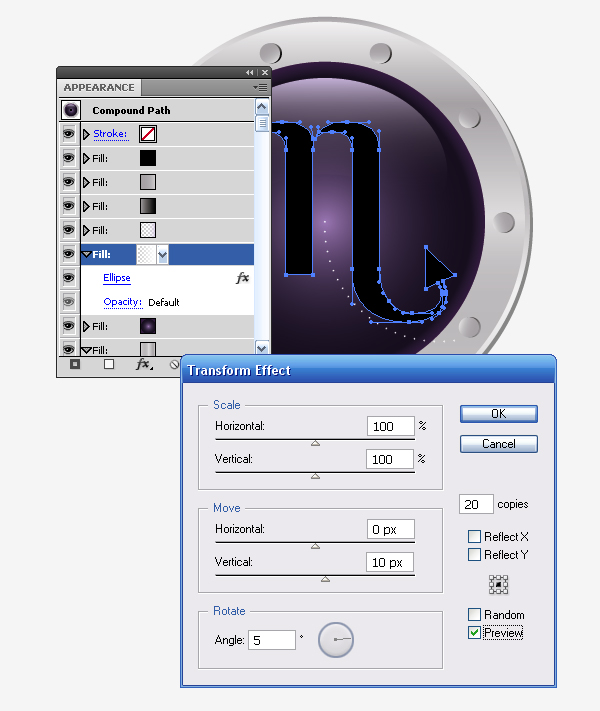
Now we will create plenty of stars. Keep the fill selected, go to Effect > Distort & Transform > Transform and set the following values.
And once again Effect > Distort & Transform > Transform.
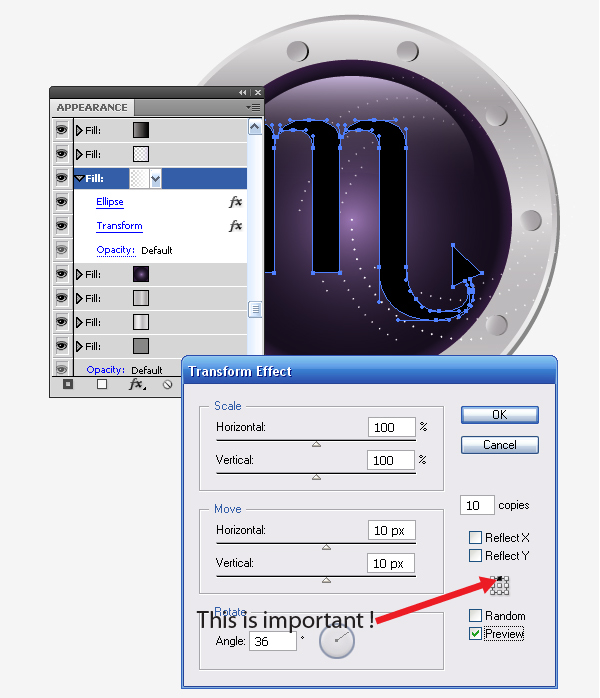
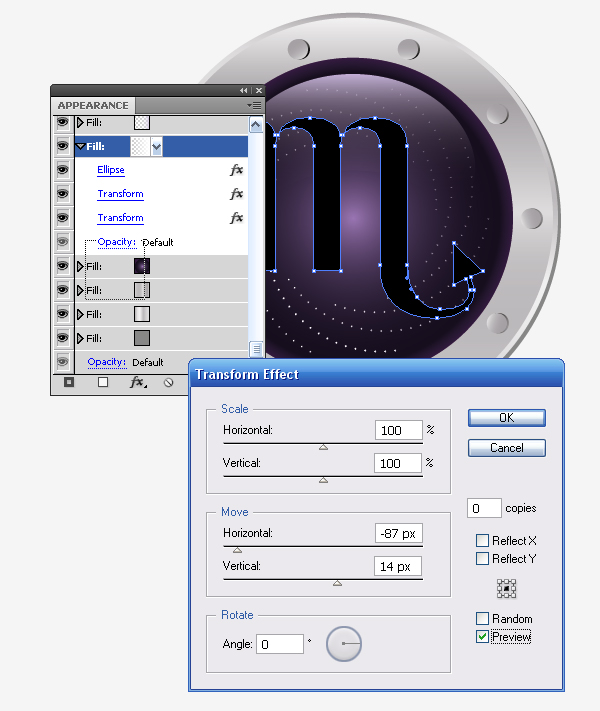
With the gradient fill of stars we have achieved a twinkling phenomenon. Now place the galaxy in the center of illuminator, go to Effect > Distort & Transform > Transform.
Step 13
Now start working on the Zodiac sign. Select the top fill in the Appearance palette and apply a linear gradient to it, consisting of light and dark rotating shades of grey.
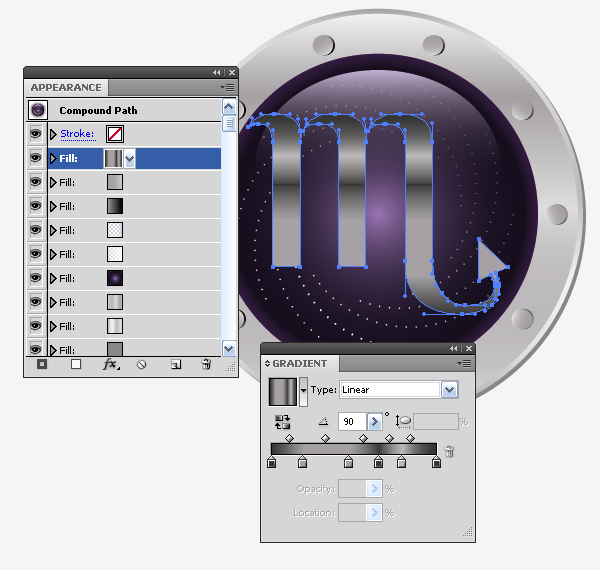
Duplicate this fill and go to Effect > Path > Offset Path.
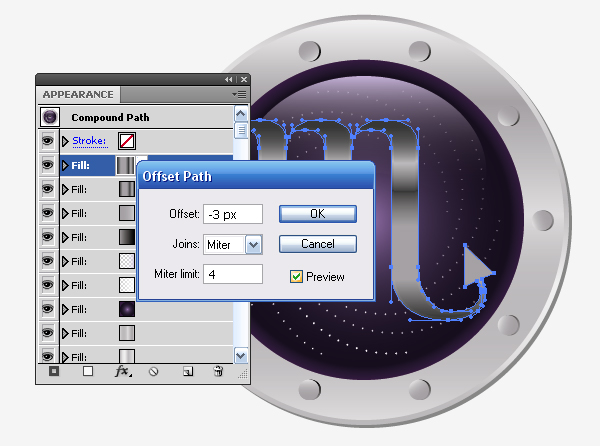
Now we replace the gradient of this fill with linear gradient containing lighter shades of grey than the first one.
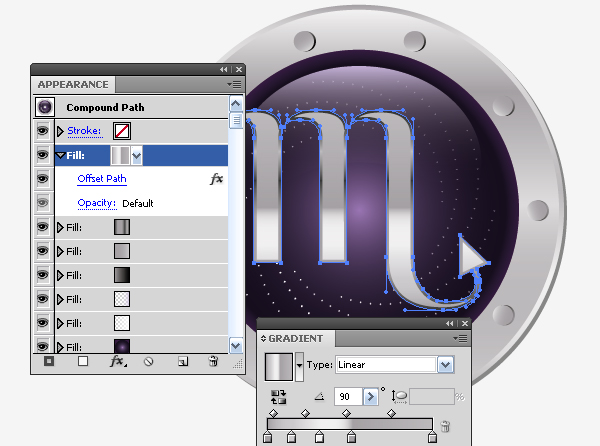
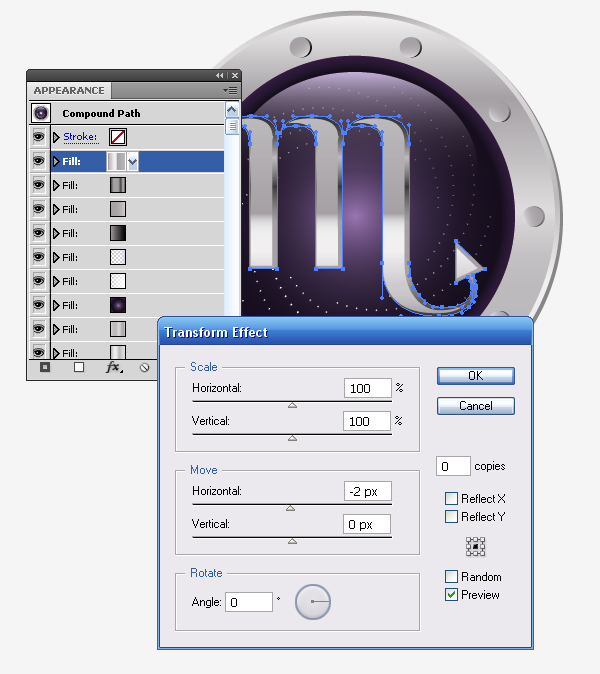
To create the illusion of volume move this fill slightly to the left. Proceed to Effect > Distort & Transform > Transform and set the parameters in the dialog box shown in the figure below.
Step 14
Duplicate the fill we worked in the previous step. Change the value of the Offset Path effect to -6 px.
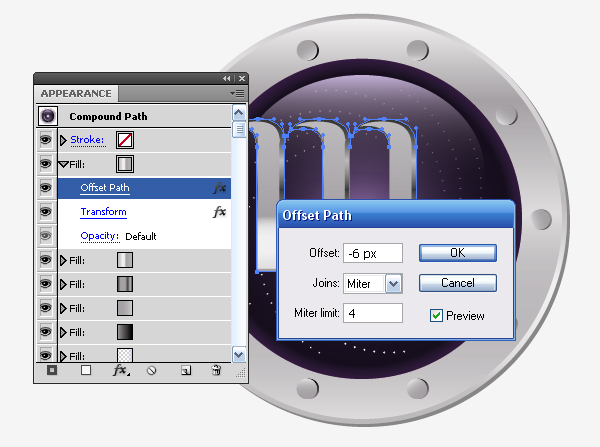
Now create a gradient fill for this fill resembling the one shown below.
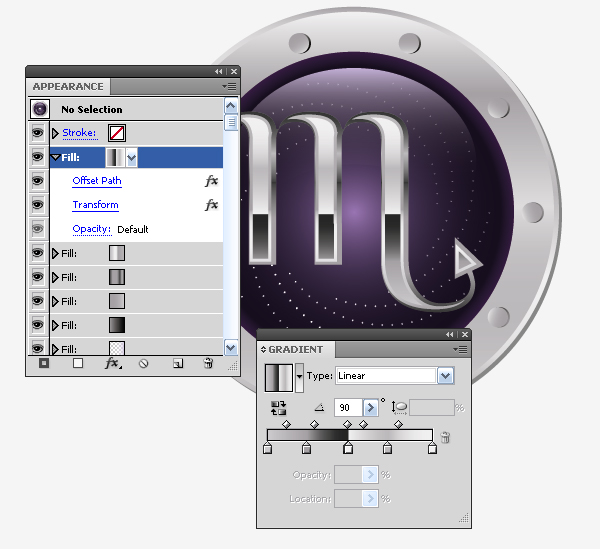
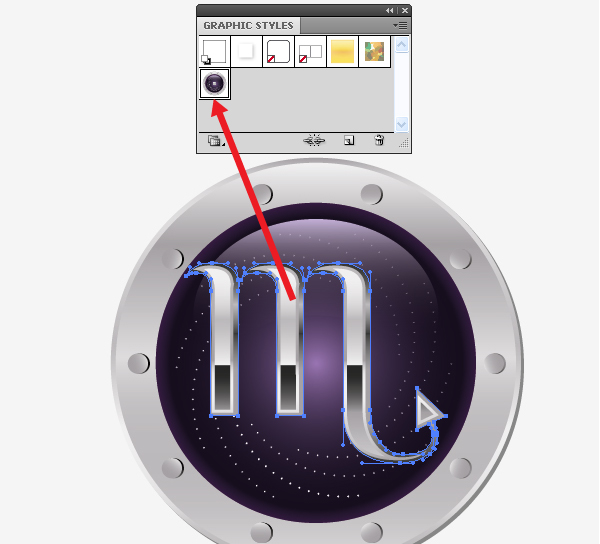
At this point the dovelopment of the graphic style is completed. Save the created style, to do this, drag it to the Graphic Styles palette.
Conclusion
Now, apply a new style to the remaining signs of the zodiac. And there you have it, a quick and easy Zodiac style. You can apply this style to other characters and shapes, experiment and have fun!
