Twice a month, we revisit some of our reader’s favorite posts from throughout the history of Nettuts+. This tutorial was first published in January, 2010.
Give me an hour of your time, and I’ll take you on a fly by of the Ruby on Rails framework. We’ll create controllers, models, views, add admin logins, and deploy using Heroku’s service in under an hour! In this article we’ll create a simple bookshelf application where you can add books and write thoughts about them. Then we’ll deploy the application in just a few minutes. So buckle up because this article moves fast!
This article assumes that you may know what Ruby on Rails is, but not exactly how it works. This article doesn’t describe in-depth how each step works, but it does describe what we need to do, then the code to do that.
Zero
Ruby on Rails is a full stack MVC web application framework. Full stack means you get everything: a simple web server you can use to test your apps, a database layer, testing framework, and an MVC based design. MVC stands for Model-View-Controller.
Model
A model stores information. Models are stored in the database. Rails supports MySQL, PostgreSQL, or SQLite. Each model has its own class and table. Say we want to model a “game.” A game has things like number of players, a start time, end time, teams playing, and a winner. These attributes become columns in the “games” table. Table names are lowercase, underscored, and pluralized. The model’s class name is Game. In Rails you create models through migrations and generators. A migration describes how to add/remove columns and tables from the database.
Controller
A controller is the manager. It takes information and does some logic like CRUD, or maybe import some stuff from a file, add/remove permissions–you name it a controller can do it. Controllers are the part of your app that does. How do we call controllers? Rails uses routes. A route is a formatted url that is tied to an action with a set of parameters. Going back to the Game model, we need a controller for functionality. At some point we’ll to need to list all the games in the system. A basic REST url for this route looks like “/games” How does Rails know what controller to look for and what action to call? It looks at your routes.rb file. You may have a route that looks like this “GET /makes {:name => ‘games’, :action => ‘index’”}. This translates to GamesController and it’s index method. Just like models, class names are CamelCase and file names are underscored. So our GamesController would be stored in /app/controllers/games_controller.rb. After the logic, the controller renders a view.
View
A view is the easiest part to understand. It’s what you see. It’s the HTML you generate to show the user what they need. Views are ERB templates. ERB stands for Embedded Ruby. You use ERB similar to how you embed php into a document. If you want to insert an instance variable @game.time into some html write <%= @game.time %>
Ten
First install Rails. Installing Rails is very easy depending on your platform. If you are on a Linux/OSX, it’s no problem. Windows is more complicated and I have no experience with it. This section will give you a brief overview of installing Rails through RubyGems, the Ruby package manager. A gem is a bundle of ruby code in a package that can be used in your programs. For UNIX based system, install RubyGems, then install the Rails gem. This process will go something like this:
    # ubuntu
    sudo apt-get install rubygems
    # fedora
    sudo yum install rubygems
    # gentoo
    sudo emerge rubygems
    # OSX
    sudo port install rubygems

    # after you have rubygems installed
    sudo gem install gemcutter # ruby gem hosting service
    sudo gem tumble
    sudo gem install Rails
Here are some links to help you through the setup process
- Instant Rails, like instant LAMP but for Rails
- Ubuntu Community Docs about Ruby on Rails
- Getting Rails running on Windows
- Snow Leopard on Rails by a guy I know
- The mandatory google link
Once you can run the “rails” command you’re ready for the next step.
Fifteen
Now it’s time to install database support before we get started. Rails has support for all the popular DB’s, but for this example we’ll use SQLite because it’s lightweight.. Depending on your platform (again) installing sqlite support can be easy or painful. It can be a pain since the gem has to be built against C extensions, which means the sqlite3 package has to be installed on your system. Again the process will go something like this:
    # ubuntu
    sudo apt-get install sqlite3 sqlite3-devel
    # fedora
    sudo yum install sqlite3 sqlite3-devel
    # OSX
    sudo port install sqlite3

    # then once you have the sqlite3 package installed
    sudo gem install sqlite3-ruby
Read the previous links if you’re having problems with these steps. They describe installing sqlite as well.
Twenty
Time to generate our app. The rails command creates a base application structure. All we need to do is be in a directory and run it like so:
  $ cd ~/projects
  $ Rails bookshelf #this will create a new directory named bookshelf that holds our app
  $ cd bookshelf
It’s important to note that the Rails default is an SQLite based app. You may be thinking, what if I don’t want that? The rails command is a generator. All it does is copy stored files into a new directory. By default it will create sqlite3 databases in /bookshelf/db/development.sqlite3, /bookshelf/db/production.sqlite3, and /bookshelf/db/testing.sqlite3. Database connection information is stored in /bookshelf/config/database.yml. You don’t need to edit this file since it contains default information for an sqlite setup. It should look like this:
    # SQLite version 3.x
    #   gem install sqlite3-ruby (not necessary on OS X Leopard)
    development:
      adapter: sqlite3
      database: db/development.sqlite3
      pool: 5
      timeout: 5000

    # Warning: The database defined as "test" will be erased and
    # re-generated from your development database when you run "rake".
    # Do not set this db to the same as development or production.
    test:
      adapter: sqlite3
      database: db/test.sqlite3
      pool: 5
      timeout: 5000

    production:
      adapter: sqlite3
      database: db/production.sqlite3
      pool: 5
      timeout: 5000
Notice there are different environments assigned. Rails has three modes: Development, Testing, and Production. Each has different settings and databases. Development is the default environment. At this point we can start our app to make sure it’s working. You can see there’s a directory called /script. This directory contains ruby scripts for interacting with our application. Some important ones are /script/console, and /script/server. We will use the /script/server command to start a simple server for our application.
    bookshelf $ ./script/server
    # then you should see something like this. Rails will start a different server depending on your platform, but it should look something like this:
    => Booting Mongrel
    => Rails 2.3.5 application starting on http://0.0.0.0:3000
    => Call with -d to detach
    => Ctrl-C to shutdown server
Time to visit the application. Point your browser to “http://localhost:3000″ and you should see this splash page:
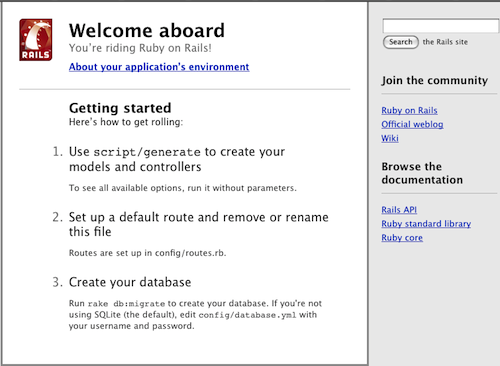
You’re riding on Rails. Now that the code working on a basic level, it’s time to delete the splash page and get started with some code.
bookshelf $ rm /public/index.html
Twenty Five
Our application needs data. Remember what this means? It means models. Great, but how we generate a model? Rails comes with some generators to common tasks. The generator is the file /script/generate. The generator will create our model.rb file along with a migration to add the table to the database. A migration file contains code to add/drop tables, or alter/add/remove columns from tables. Migrations are executed in sequence to create the tables. Run migrations (and various other commands) with “rake”. Rake is a ruby code runner. Before we get any further, let’s start by defining some basic information for the books. A book has these attributes:
- Title : String
- Thoughts : Text
That’s enough to start the application. Start by generating a model with these fields using the model generator:
  bookshelf $ ./script/generate model Book title:string thoughts:text
  # notice how the attributes/types are passed to the generator. This will automatically create a migration for these attributes
  # These are optional. If you leave them out, the generator will create an empty migration.
  exists  app/models/
  exists  test/unit/
  exists  test/fixtures/
  create  app/models/book.rb
  create  test/unit/book_test.rb
  create  test/fixtures/books.yml
  create  db/migrate
  create  db/migrate/20091202052507_create_books.rb
  # The generator created all the files we need to get our model up and running. We need to pay the most attention to these files:
  # app/models/book.rb # where our code resides
  # db/migrate/20091202052507_create_books.rb # code to create our books table.
Open up the migration file:
  class CreateBooks < ActiveRecord::Migration
    def self.up
      create_table :books do |t|
        t.string :title
        t.text :thoughts

        t.timestamps
      end
    end

    def self.down
      drop_table :books
    end
  end
Notice the create_table :books block. This is where columns are created. An id primary key is created automatically. t.timestamps adds columns for created_at and updated_at. Now, run the migration using the rake task db:migrate. db:migrate applies pending migrations:
  bookshelf $ rake db:migrate
  ==  CreateBooks: migrating ====================================================
  -- create_table(:books)
     -> 0.0037s
  ==  CreateBooks: migrated (0.0038s) ===========================================
Cool, now we have a table, let’s create a dummy book just for kicks in the console. The Rails console uses IRB (interactive ruby) and loads all classes for your project. IE you can access to all your models. Open the console like this:
  bookshelf $ ./script/console
  >> # let's create a new model. You can specify a hash of assignments in the constructor to assign values like this:
  >> book = Book.new :title => 'Rails is awesome!' , :thoughts => 'Some sentence from a super long paragraph'
  => #<Book id: nil, title: "Rails is awesome!", thoughts: "Some sentence from a super long paragraph", created_at: nil, updated_at: nil> # and ruby will display it back
  >> book.save
  => true # now are book is saved in the database. We can query it like this:
  >> Book.all # find all books and return them in an array
  => [#<Book id: 1, title: "Rails is awesome!", thoughts: "Some sentence from a super long paragraph", created_at: "2009-12-02 06:05:38", updated_at: "2009-12-02 06:05:38">]
  >> exit # now that our model is saved, let's exit the console.
Now that we can create books, we need some way to show them to the user
Thirty
Remember controllers? We need a controller to display all the books in the system. This scenario corresponds to the index action in our BooksController (books_controller.rb) which we don’t have yet. Just like generating models, use a generator to create the controller:
  bookshelf $ ./script/generate controller Books
  exists  app/controllers/
  exists  app/helpers/
  create  app/views/books
  exists  test/functional/
  create  test/unit/helpers/
  create  app/controllers/books_controller.rb
  create  test/functional/books_controller_test.rb
  create  app/helpers/books_helper.rb
  create  test/unit/helpers/books_helper_test.rb
  # notice Rails created the file app/controllers/books_controller.rb? This is where we are going to define our actions or methods for the BooksController class
We need to define an action that finds and displays all books. How did we find all the books? Earlier we used Book.all. Our strategy is use Book.all and assign it to an instance variable. Why an instance variable? We assign instance variables because views are rendered with the controllers binding. You’re probably thinking bindings and instance variables…what’s going on? Views have access to variables defined in actions but only instance variables. Why, because instance variables are scoped to the object and not the action. Let’s see some code:
  class BooksController < ApplicationController
    # notice we've defined a method called index for a BooksController instance. We tie this together with routes
    def index
      @books = Book.all # instance variables are prefixed with an @. If we said books = Book.all, we wouldn't be able to access books in the template
    end
  end
Now the controller can find all the books. But how do we tie this to a url? We have to create some routes. Rails comes with some handy functions for generating RESTful routes (another Rails design principle). This will generate urls like /makes and /makes/1 combined with HTTP verbs to determine what method to call in our controller. Use map.resources to create RESTful routes. Open up /config/routes.rb and change it to this:
  ActionController::Routing::Routes.draw do |map|
    map.resources :books
  end
Routes.rb can look arcane to new users. Luckily there is a way to decipher this mess. There is routes rake task to display all your routing information. Run that now and take a peek inside:
  bookshelf $ rake routes
      books GET    /books(.:format)          {:controller=>"books", :action=>"index"}
            POST   /books(.:format)          {:controller=>"books", :action=>"create"}
   new_book GET    /books/new(.:format)      {:controller=>"books", :action=>"new"}
  edit_book GET    /books/:id/edit(.:format) {:controller=>"books", :action=>"edit"}
       book GET    /books/:id(.:format)      {:controller=>"books", :action=>"show"}
            PUT    /books/:id(.:format)      {:controller=>"books", :action=>"update"}
            DELETE /books/:id(.:format)      {:controller=>"books", :action=>"destroy"}
  # as you can see this command can display a lot of information. On the left column we have a helper to generate a url, then the HTTP verb associated with the url, then the url, and finally the controller and action to call.
  # for example GET /books will call BooksController#index or
  # GET /books/1 will call BooksController#show
  # the url helpers are very important but we'll get to them later. For now know that we are going to create a /books page to list all books
Now we need to create a template to display all our books. Create a new file called /app/views/books/index.html.erb and paste this:
  <% for book in @books do %>
    <h2><%=h book.title %></h2>
    <p><%= book.thoughts %></p>
  <% end %>
This simple view loops over all @books and displays some HTML for each book. Notice a subtle difference. <%= is used when we need to output some text. <% is used when we aren’t. If you don’t follow this rule, you’ll get an exception. Also notice the h before book.title. h is a method that escapes HTML entities. If you’re not familiar with ruby, you can leave off ()’s on method calls if they’re not needed. h text translates to: h(text).
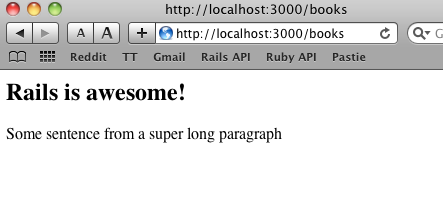
Time to run the server and see what we’ve got. Start the server, then go to http://localhost/books.
bookshelf $ ./script/server
If all goes according to plan you should see some basic HTML.
Thirty Five
We have one book in our system, but we need some more books to play with. There are a few ways to go about doing this. I like the forgery gem. Forgery can create random strings like names, or lorem ipsum stuff. We are going to set a gem dependency in our app, install the gem, then use it to create a rake task to populate our data. Step 1: open up /config/environment.rb and add this line:
config.gem 'forgery'
  # now let's tell Rails to install all gems dependencies for this project
  # gem install gemcutter # if you haven't already
  # gem tumble # again, if you haven't already
  bookshelf $ sudo rake gems:install
Now we’re going to use the Forgery classes to create some fake data. The Forgery documentation is here. We’ll use the LoremIpsumForgery to create some basic data. We can define our own rake tasks by creating a .rake file in /lib/tasks. So create a new file /lib/tasks/populate.rake:
  begin
    namespace :db do
      desc "Populate the development database with some fake data"
      task :populate => :environment do
        5.times do
          Book.create! :title => Forgery::LoremIpsum.sentence, :thoughts => Forgery::LoremIpsum.paragraphs(3)
        end
      end
    end
  rescue LoadError
    puts "Please run: sudo gem install forgery"
  end
This rake task will create five fake books. Notice I added a begin/rescue. When you run a rake task it looks at all possible tasks in the rake initialization. If you were to run any rake task before you installed the gem, rake would blow up. Wrapping it in an begin/rescue stop rake from aborting. Run the task to populate our db:
  bookshelf $ rake db:populate
  bookshelf $ ./script/console # let's enter the console to verify it all worked
  >> Book.all
  => [#<Book id: 1, title: "Rails is awesome!", thoughts: "Some sentence from a super long paragraph", created_at: "2009-12-02 06:05:38", updated_at: "2009-12-02 06:05:38">, #<Book id: 2, title: "Lorem ipsum dolor sit amet, consectetuer adipiscing...", thoughts: "Lorem ipsum dolor sit amet, consectetuer adipiscing...", created_at: "2009-12-02 07:28:05", updated_at: "2009-12-02 07:28:05">, #<Book id: 3, title: "Lorem ipsum dolor sit amet, consectetuer adipiscing...", thoughts: "Lorem ipsum dolor sit amet, consectetuer adipiscing...", created_at: "2009-12-02 07:28:05", updated_at: "2009-12-02 07:28:05">, #<Book id: 4, title: "Lorem ipsum dolor sit amet, consectetuer adipiscing...", thoughts: "Lorem ipsum dolor sit amet, consectetuer adipiscing...", created_at: "2009-12-02 07:28:05", updated_at: "2009-12-02 07:28:05">, #<Book id: 5, title: "Lorem ipsum dolor sit amet, consectetuer adipiscing...", thoughts: "Lorem ipsum dolor sit amet, consectetuer adipiscing...", created_at: "2009-12-02 07:28:05", updated_at: "2009-12-02 07:28:05">, #<Book id: 6, title: "Lorem ipsum dolor sit amet, consectetuer adipiscing...", thoughts: "Lorem ipsum dolor sit amet, consectetuer adipiscing...", created_at: "2009-12-02 07:28:05", updated_at: "2009-12-02 07:28:05">]
  >> exit
Start the server again and head back to the /books pages. You should see:
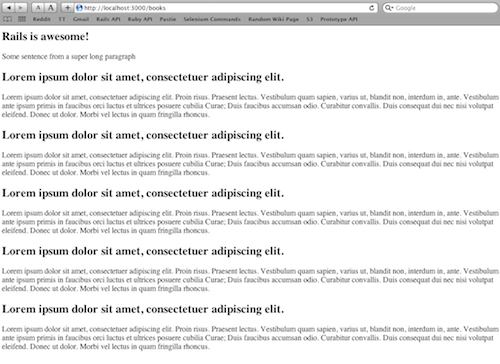
Now we have a listing of more than one book. What if we have a lot of books? We need to paginate the results. There’s another gem for this. The gem is ‘will_paginate.’ Following the same steps as before, let’s add a gem dependency for ‘will_paginate’ and rake gems:install:
  # in environment.rb
  config.gem 'will_paginate'
  # from terminal
  bookshelf $ sudo rake gems:install
  # then let's add more books to our db
  bookshelf $ rake db:populate # run this a few times to get a large sample, or change the number in rake file
Head back to your /books page and you should be bombarded by books at this point. It’s time to add pagination. Pagination works at two levels. The controller decides which books should be in @books, and the view should display the pagination links. The will_paginate helper makes this very easy. We’ll use the .paginate method and the will_paginate view helper to render page links. All it takes is two lines of code.
  # books_controller.rb, change the previous line to:
  @books = Books.paginate :page => params[:page], :per_page => 10

  # index.html.erb, add this line after the loop:
  <%= will_paginate @books %>
Head back to your /makes page and you should see some pagination links (given you have more than 10 books)
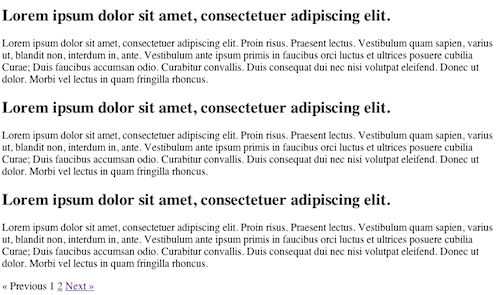
Sweet! We are movin’ through this app. It’s time to spruce up our page a little bit. One key Rails principle is DRY (Do Not Repeat Yourself). We could work through the exercise of doing some basic CSS to get a page looking OK, or we could keep things DRY and use some code to do it for us. We are going to use Ryan Bate’s nifty-generators gem to generate a layout for the site. A layout is a template your views can fill in. For example we can use a layout to determine the over all structure of a page, then define where the views fill it in. Since this isn’t a project dependency, we don’t have to add it to environment.rb. We can just install it regularly.
  # console
  $ sudo gem install nifty-generators
Run the generator to create a layout file and stylesheets.
  $ ./script/generate nifty_layout
  exists  app/views/layouts
  exists  public/stylesheets
  exists  app/helpers
  create  app/views/layouts/application.html.erb  # this is our layout file
  create  public/stylesheets/application.css      # css file that styles the layout
  create  app/helpers/layout_helper.rb            # view helpers needed in the generator
Take a look at the application.html.erb file and see what’s inside:
  <!DOCTYPE html PUBLIC "-//W3C//DTD XHTML 1.0 Strict//EN"
    "http://www.w3.org/TR/xhtml1/DTD/xhtml1-strict.dtd">
  <html>
    <head>
      <title><%= h(yield(:title) || "Untitled") %></title>
      <%= stylesheet_link_tag 'application' %>
      <%= yield(:head) %>
    </head>
    <body>
      <div id="container">
        <%- flash.each do |name, msg| -%>
          <%= content_tag :div, msg, :id => "flash_#{name}" %>
        <%- end -%>

        <%- if show_title? -%>
          <h1><%=h yield(:title) %></h1>
        <%- end -%>

        <%= yield %>
      </div>
    </body>
  </html>
See those yields? That’s where a view fills in the layout. The last yield has no argument. Default content goes there. Yields with an argument must have content defined using content_for. Fix up index.html.erb view to go with the new layout:
  <% title 'My Books' %>

  <% for book in @books do %>
    <h2><%=h book.title %></h2>
    <p><%= book.thoughts %></p>
  <% end %>

  <%= will_paginate @books %>
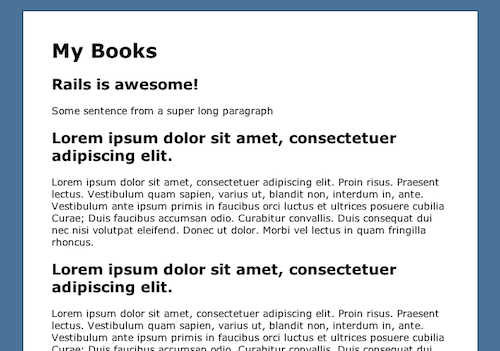
All we did was add the title method which sets the title for a page. The title helper calls content_for :title and sets it to the argument. Our view fills in the last yield. Check out the results!
Forty
Now that our application is looking better, let’s add some interaction. In typical Web 2.0 style we’re going to allow users to comment on our content, but we aren’t going to require the user to register. We need to create new model called Comment. A comment is going to have some text, an author, and an associated Book. How do we link these two models together? Associations. Rails provides these associations: belongs_to, has_many, has_one, and has_and_belongs_to many. It should be easy to see that a book has many comments, and a comment belongs_to a book. So we’ll use a generator to create the comment model and migration:
  $ ./script/generate model Comment text:text author:string
  exists  app/models/
  exists  test/unit/
  exists  test/fixtures/
  create  app/models/comment.rb
  create  test/unit/comment_test.rb
  create  test/fixtures/comments.yml
  exists  db/migrate
  create  db/migrate/20091202081421_create_comments.rb
Astute readers will notice that this migration is lacking the foreign key column. We’ll have to add that ourselves. Open up your create_comments.rb migration:
  class CreateComments < ActiveRecord::Migration
    def self.up
      create_table :comments do |t|
        t.text :text
        t.string :author
        t.belongs_to :book # creates a new integer column named book_id
        t.timestamps
      end
    end

    def self.down
      drop_table :comments
    end
  end
  # now migrate your database
  $ rake db:migrate
  rake db:migrate
  (in /Users/adam/Code/bookshelf)
  ==  CreateComments: migrating =================================================
  -- create_table(:comments)
     -> 0.0021s
  ==  CreateComments: migrated (0.0022s) ========================================
Now it’s time to associate our models using the Rails associations. We’ll call the method inside the model’s class body. Rails uses metaprogramming to generate the methods needed to make our association work. We’ll edit our comment.rb and book.rb files:
  # book.rb
  class Book < ActiveRecord::Base
    has_many :comments
  end

  # comment.rb
  class Comment < ActiveRecord::Base
    belongs_to :book
  end
Now Book instances have a method .comments with returns an array of all its comments. Comment instances have a method called .book that return the associated book. Use the << operator to add objects to arrays. Let’s see how it works in the console:
  $ ./script/console
  >> book = Book.find(1)
  => #<Book id: 1, title: "Rails is awesome!", thoughts: "Some sentence from a super long paragraph", created_at: "2009-12-02 06:05:38", updated_at: "2009-12-02 06:05:38">
  >> comment = Comment.new :text => "This is an comment", :author => "Adam"
  => #<Comment id: nil, text: "This is an comment", author: "Adam", book_id: nil, created_at: nil, updated_at: nil>
  >> book.comments << comment
  => [#<Comment id: 1, text: "This is an comment", author: "Adam", book_id: 1, created_at: "2009-12-02 08:25:47", updated_at: "2009-12-02 08:25:47">]
  >> book.save
  => true
  >> book.comments
  => [#<Comment id: 1, text: "This is an comment", author: "Adam", book_id: 1, created_at: "2009-12-02 08:25:47", updated_at: "2009-12-02 08:25:47">]
  >> comment.book
  => #<Book id: 1, title: "Rails is awesome!", thoughts: "Some sentence from a super long paragraph", created_at: "2009-12-02 06:05:38", updated_at: "2009-12-02 06:05:38">
  >> exit
In the console session I found one of the existing books, then created a new comment. Next I added it to the book.comments. Then I save book. The book must be saved for the association to be stored. What’s next? We need to create a page where the user can view a book and all it comments. That page should also have a form where the user can add their comment. Create a new action in the books controller to show the details for a specified book. The book is found by id. Pop into books_controller.rb and add this:
  def show
    @book = Book.find params[:id]
  end
Make a new template for this action at /app/views/books/show.html.erb and paste this:
  <% title @book.title %>

  <h2><%=link_to(h(@book.title), book_path(@book)) %></h2>
  <p><%= @book.thoughts %></p>
Now let’s add some links for the index actions to link the show action:
  # update index.html.erb contents to:
  <% title 'My Books' %>

  <% for book in @books do %>
    <h2><%=link_to(h(book.title), book_path(book)) %></h2>
    <p><%= book.thoughts %></p>
  <% end %>

  <%= will_paginate @books %>
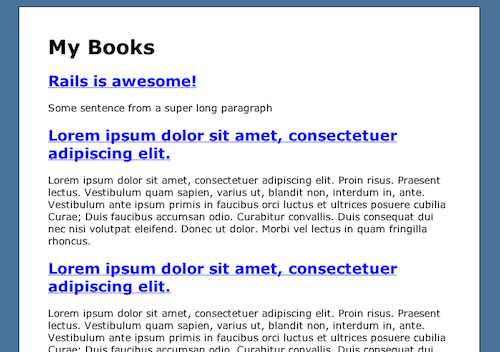
Remember our url helpers from rake routes? We’re using book_path to generate a url to the book controller’s show actions. If you don’t remember check rake routes again. link_to is a helper to generate a link tag. Now let’s fire up our server and click through the app. Now you should have some ugly blue links. Click on your book title and it should go to /books/:id aka BooksController#show:
Time to display some comments. Remember that console session we did a little bit back? One of our books has some comments. let’s update our controller to find the comments and our show.html.erb to display them.
  # books_controller.rb
  def show
    @book = Book.find(params[:id])
    @comments = @book.comments
  end

  # show.html.erb
  <% title @book.title %>

  <h2><%=link_to(h(@book.title), book_path(@book)) %></h2>
  <p><%= @book.thoughts %></p>

  <% if @comments %>
    <h3>Comments</h3>

    <% for comment in @comments do %>
      <p><strong><%=h(comment.author) %></strong>: <%=h comment.text %>
    <% end %>
  <% end %>
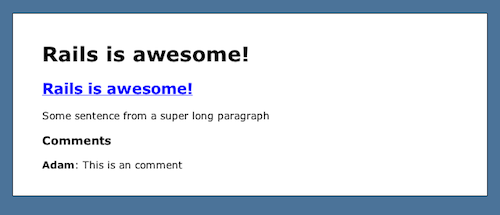
So we assign @comments in the controller to be all the book’s comments, then do a loop in the view to display them. Head over to /books/1 (1 came from Book.find(1) in the console session). Check this out:
Now we need the form to create a new comment. We need two things. 1, A comments controller to save the comment, and 2 a route to that action. let’s tackle #1 first.
bookshelf $ ./script/generate controller Comments
Create action that instantiates a new comment, sets its attributes (text/author) from the submitted form data, and saves it.
  class CommentsController < ApplicationController
    def create
      book = Book.find params[:book_id]
      comment = book.comments.new params[:comment]
      comment.save
      flash[:notice] = 'Comment saved'
      redirect_to book_path(book)
    end
  end
First the code finds the book, then creates a new comment form the form data, saves it, sets a message, then redirects back to that book’s page. params holds a hash of all GET/POST data with a request. Now we need to create a route to the controller’s action. Open up routes.rb:
  ActionController::Routing::Routes.draw do |map|
    map.resources :books do |book|
      book.resources :comments,  nly => :create
    end
  end
  bookshelf $ rake routes
  # We needed to add a route to create a new comment for a book. We need to know what book we are creating a comment for, so we need a book_id in the route. Look at the book_comment line.
  # book_comment is tied to our CommentsController#create
  book_comments POST   /books/:book_id/comments(.:format) {:controller=>"comments", :action=>"create"}
          books GET    /books(.:format)                   {:controller=>"books", :action=>"index"}
                POST   /books(.:format)                   {:controller=>"books", :action=>"create"}
       new_book GET    /books/new(.:format)               {:controller=>"books", :action=>"new"}
      edit_book GET    /books/:id/edit(.:format)          {:controller=>"books", :action=>"edit"}
           book GET    /books/:id(.:format)               {:controller=>"books", :action=>"show"}
                PUT    /books/:id(.:format)               {:controller=>"books", :action=>"update"}
                DELETE /books/:id(.:format)               {:controller=>"books", :action=>"destroy"}
  # every time you modify routes.rb you'll need to restart the server
  # kill the server process you have running with ^c (ctrl + c) and start it again
Head back to the /books page and make sure nothing has blown up. Everything should be fine and dandy. Now for constructing the form. We need a form that submits POST data to /book/:book_id/comments. Luckily Rails has the perfect helper for this: form_for. form_for takes some models and generates a route for them. We pass form_for a block to create form inputs. Go ahead and paste this into the bottom of your show.html.erb:
  <h3>Post Your Comment</h3>
  <% form_for([@book, Comment.new]) do |form| %>
    <p><%= form.label :author %></p>
    <p><%= form.text_field :author %></p>

    <p><%= form.label :text, 'Comment' %></p>
    <p><%= form.text_area :text %></p>

    <%= form.submit 'Save' %>
  <% end %>
We call form_for to create a new form for the book’s comment, then use the text_field/text_area to create inputs for attributes. At this point we can go ahead and make a comment. Fill in the form and viola you now have comments!
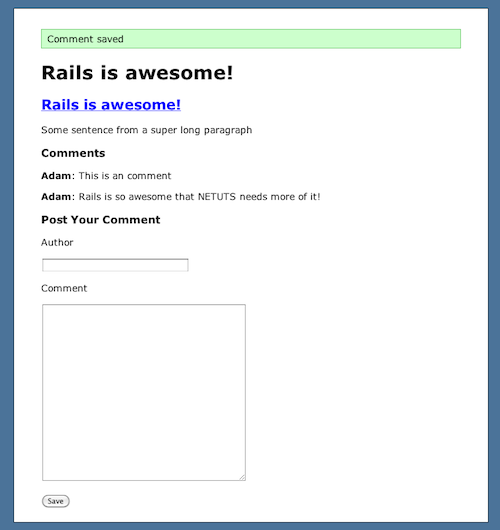
See that green thing? That’s the flash. The flash is a way to store messages between actions. It’s perfect for storing little messages like this. But what do we do if a book has too many comments? We paginate them just like did before. So let’s make some changes to the controller and view:
  # books_controller.rb
  def show
    @book = Book.find(params[:id])
    @comments = @book.comments.paginate :page => params[:page], :per_page => 10,  rder => 'created_at ASC'
  end
  # show.html.erb

  <% title @book.title %>

  <h2><%=link_to(h(@book.title), book_path(@book)) %></h2>
  <p><%= @book.thoughts %></p>

  <% if @comments %>
    <h3>Comments</h3>

    <% for comment in @comments do %>
      <p><strong><%=h(comment.author) %></strong>: <%=h comment.text %>
    <% end %>

    <%= will_paginate @comments %>
  <% end %>

  <h3>Post Your Comment</h3>
  <% form_for([@book, Comment.new]) do |form| %>
    <p><%= form.label :author %></p>
    <p><%= form.text_field :author %></p>

    <p><%= form.label :text, 'Comment' %></p>
    <p><%= form.text_area :text %></p>

    <%= form.submit 'Save' %>
  <% end %>
Start commenting on your books and you should see some pagination.
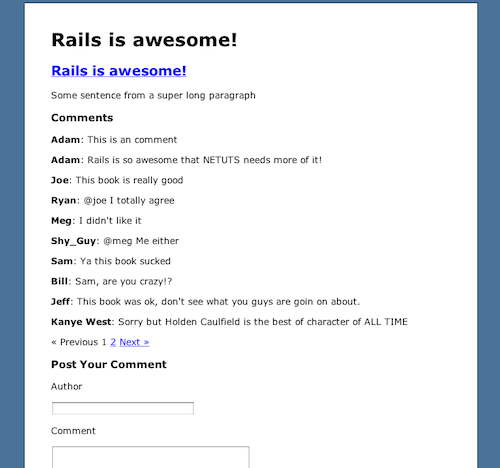
Now people can comment, and everything is paginated but we’re missing something. We have no web interface for creating books. We need to create a form for that. Also we are the admin so only I should be allowed to create books. This means we need to create a user, login, and check to see if they can do an action.
Fifty
Now we’re going to implement CRUD functionality for admins. First we’ll implement actions to create, edit, and delete books. Then we’ll create an admin login. Finally we’ll make sure only admins can do those actions.
Creating a new books requires two new actions. One action that renders a form for a new book. This action is named ‘new’. The second is named ‘create.’ This action takes the form parameters and saves them in the database. Open up your books_controller.rb and add these actions:
  def new
    @book = Book.new
  end

  def create
    @book = Book.new params[:book]
    if @book.save
      flash[:notice] = "#{@book.title} saved."
      redirect_to @book
    else
      render :new
    end
  end
We also need a new view that shows a form. Create a new file /apps/views/books/new.html.erb and paste this:
  <% form_for(@book) do |form| %>
    <p>
      <%= form.label :title %><br/>
      <%= form.text_field :title %>
    </p>

    <p>
      <%= form.label :thoughts %><br/>
      <%= form.text_area :thoughts %>
    </p>

    <%= form.submit %>
  <% end %>
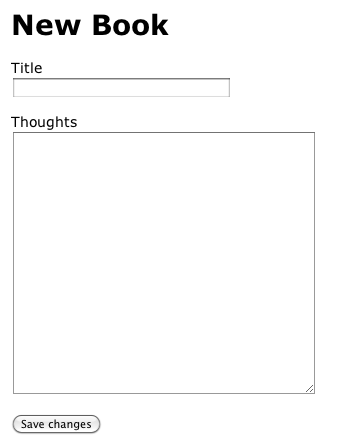
Now we’re ready to create a new book. Point your browser to /books/new and you should see this form. Go a head and create a new book. After you fill in your form you should see your new book.
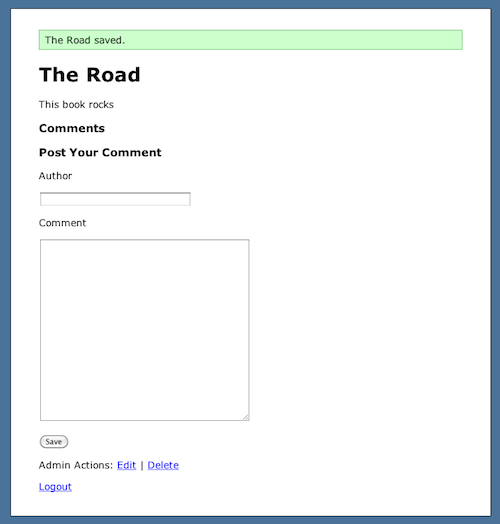
Get rid of the double header in /app/views/books/show.html.erb and add some links to actions an admin can do on that book. Open up that file and set it’s contents to:
  <% title @book.title %>

  <p><%= @book.thoughts %></p>

  <% if @comments %>
    <h3>Comments</h3>

    <% for comment in @comments do %>
      <p><strong><%=h(comment.author) %></strong>: <%=h comment.text %>
    <% end %>

    <%= will_paginate @comments %>
  <% end %>

  <h3>Post Your Comment</h3>
  <% form_for([@book, Comment.new]) do |form| %>
    <p><%= form.label :author %></p>
    <p><%= form.text_field :author %></p>

    <p><%= form.label :text, 'Comment' %></p>
    <p><%= form.text_area :text %></p>

    <%= form.submit 'Save' %>
  <% end %>

  <p>
    Admin Actions:
    <%= link_to 'Edit', edit_book_path(@book) %> |
    <%= link_to 'Delete', book_path(@book), :method => :delete, :confirm => "Are you sure?" %>
  </p>
Head over to a book’s page and you should see:
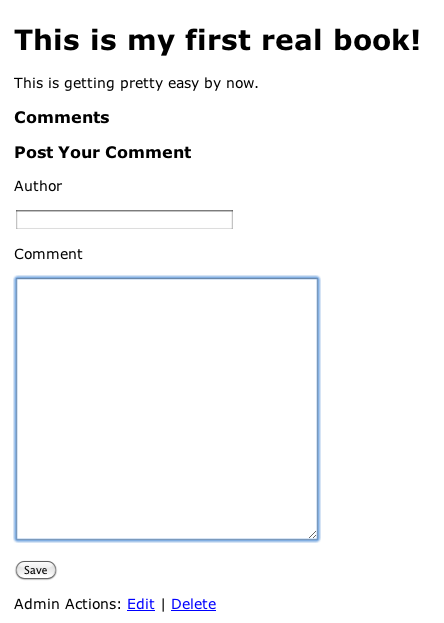
Now that we have some links to edit and delete, you can implement them. Editing a book works just about the same as creating a new one. We need an action that shows an edit form, and one to save the changes. Delete is just one action that deletes the record from the database. Open up books_controller.rb and add these actions:
  def edit
    @book = Book.find params[:id]
  end

  def update
    @book = Book.find params[:id]
    if @book.update_attributes(params[:book])
      flash[:notice] = "#{@book.title} saved."
      redirect_to @book
    else
      render :edit
    end
  end

  def destroy
    book = Book.find params[:id]
    book.destroy
    flash[:notice] = "#{book.title} deleted."
    redirect_to books_path
  end
The edit action finds the requested book from the id in the url. The update action finds the book from the id and uses the update_attributes method to set the new values from the form. Delete finds the book by id and deletes it. Then it redirects you back to the books listing.
Next we have to create an edit form. This form is exactly the same as the create form. We can just about duplicate the show.html.erb to edit.html.erb. All we are going to do is change the title. Create a new file in /app/views/books/edit.html.erb and paste this:
  <% title "Editing #{@book.title}" %>

  <% form_for(@book) do |form| %>
    <p>
      <%= form.label :title %><br/>
      <%= form.text_field :title %>
    </p>

    <p>
      <%= form.label :thoughts %><br/>
      <%= form.text_area :thoughts %>
    </p>

    <%= form.submit %>
  <% end %>
Now from one of the book’s pages, click the edit link. You should see a familiar form:
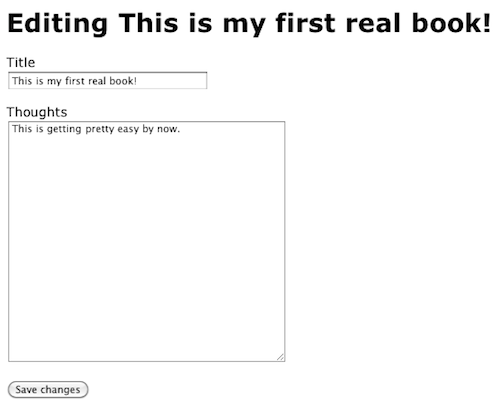
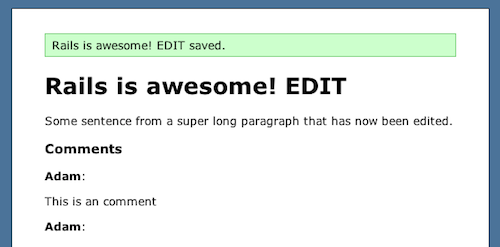
Notice how Rails filled in the inputs with the saved values? Nice huh. Go ahead and save some changes to a book. When you’re done you should see this:
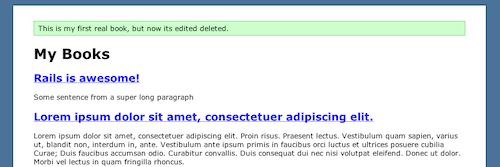
Now delete that book. You should get a confirmation dialog then be redirected back to /books.

Add a link to create a new book on the index page. Open up /app/views/books/index.html.erb and add this to the bottom:
  <p>
    Admin actions: <%= link_to 'New Book', new_book_path %>
  </p>
Now that we have CRUD functionality. We need to create our admin user.
Fifty Five
Maintaing user logins is a solved problem in Rails. You rarely have to write your own authentication system. We’re going to use the authlogic gem. Authlogic provides simple mechanics to authenticate users and store sessions. This is prefect for our app. We need an admin to login so he can create/edit/delete books. First let’s start by installing the authlogic gem.
  # add config.gem 'authlogic' in environment.rb
  bookshelf $ sudo rake gems:install
Create a new model to hold the admins. Since our users are only admins, we’ll name the model Admin. For now the model only needs a login attribute. Generate the model using script/generate model:
  bookshelf $ ./script/generate model Admin login:string
  exists  app/models/
  exists  test/unit/
  exists  test/fixtures/
  create  app/models/admin.rb
  create  test/unit/admin_test.rb
  create  test/fixtures/admins.yml
  exists  db/migrate
  create  db/migrate/20091204202129_create_admins.rb
Now add authlogic specific columns to our admin model. Open up the migration you just created and paste this into it:
  class CreateAdmins < ActiveRecord::Migration
    def self.up
      create_table :admins do |t|
        t.string :login
        t.string :crypted_password, :null => false
        t.string :password_salt, :null => false
        t.string :persistence_token, :null => false
        t.timestamps
      end
    end

    def self.down
      drop_table :admins
    end
  end
Now migrate your database.
  bookshelf $ rake db:migrate
  ==  CreateAdmins: migrating ===================================================
  -- create_table(:admins)
     -> 0.0025s
  ==  CreateAdmins: migrated (0.0026s) ==========================================
Now the admin model is created. Next we need to create an authlogic session for that admin. Authlogic includes a generator for this:
  bookshelf $ ./script/generate session admin_session
  exists  app/models/
  create  app/models/admin_session.rb
Next we need to create some routes for logging in and out. Open up routes.rb and add this line:
map.resource :admin_session
Now we need a controller to handle the logging in and out. Generate this controller using the generator:
  bookshelf $ ./script/generate controller AdminSessions
  exists  app/controllers/
  exists  app/helpers/
  create  app/views/admin_sessions
  exists  test/functional/
  exists  test/unit/helpers/
  create  app/controllers/admin_sessions_controller.rb
  create  test/functional/admin_sessions_controller_test.rb
  create  app/helpers/admin_sessions_helper.rb
  create  test/unit/helpers/admin_sessions_helper_test.rb
Now open up /app/controllers/admin_sessions_controller.rb and paste this into it:
  class AdminSessionsController < ApplicationController
    def new
      @admin_session = AdminSession.new
    end

    def create
      @admin_session = AdminSession.new(params[:admin_session])
      if @admin_session.save
        flash[:notice] = "Login successful!"
        redirect_to books_path
      else
        render :action => :new
      end
    end

    def destroy
      current_admin_session.destroy
      flash[:notice] = "Logout successful!"
      redirect_to books_path
    end
  end
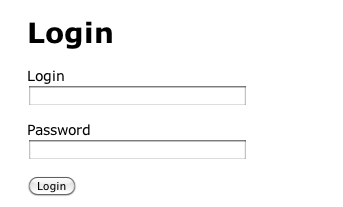
Wow! It seems like we just did a lot, but we haven’t. We’ve just created 2 new models. One model to hold our admins, and the other to hold admin session information. Finally we created a controller to handle the logging in and out. Now we need a view to show a login form. Create a new file at /app/views/admin_sessions/new.html.erb and paste this into it:
  <% title 'Login' %>

  <% form_for @admin_session, :url => admin_session_path do |f| %>
    <%= f.error_messages %>
    <p>
      <%= f.label :login %><br />
      <%= f.text_field :login %>
    </p>

    <p>
      <%= f.label :password %><br />
      <%= f.password_field :password %>
    </p>

    <%= f.submit "Login" %>
  <% end %>
We’re almost done. We still need to tell our Admin model that it uses authlogic and add some logic to our application controller to maintain session information. All controller inherit from application_controller, so it’s a good way to share methods between controllers. Open up /app/controllers/application_controller.rb and paste this:
  class ApplicationController < ActionController::Base
    helper :all # include all helpers, all the time
    protect_from_forgery # See ActionController::RequestForgeryProtection for details

    # Scrub sensitive parameters from your log
    # filter_parameter_logging :password

    filter_parameter_logging :password, :password_confirmation
    helper_method :current_admin_session, :current_admin

    private
    def current_admin_session
      return @current_admin_session if defined?(@current_admin_session)
      @current_admin_session = AdminSession.find
    end

    def current_admin
      return @current_admin if defined?(@current_admin)
      @current_admin = current_admin_session && current_admin_session.user
    end
  end
Now in /app/models/admin.rb add this line inside the class:
  # /app/models/admin.rb
  acts_as_authentic
We’re finally ready to do some logging in and out. All of the stuff we did was almost purely from the authlogic documentation examples. This is a standard setup for many applications. If you want to find out more about how authlogic works you can here. Here’s a run down of what we did.
- Install the authlogic gem
- Create an Admin model to hold the basic information like login/password
- Add authlogic specific columns to the Admin table
- Generated an authlogic admin session
- Created routes for logging in and out
- Generated an AdminSession controller to do all the work
- Created a view that shows a login form
- Added methods to ApplicationController for persisting sessions
- Told the Admin model that it uses authlogic
It’s time to create the admin account. Our application is simple and only has one admin. Since we only have one admin, we can easily use the console. Since we’ll need to recreate that user later when we deploy, it doesn’t make sense to do the same thing twice. Rails now has a functionality for seeding the database. This is perfect for creating the initial records. There is a file /db/seeds.rb where you can write ruby code to create your initial models. Then you can run this file through rake db:seed. In order to create our admin model we’ll need a login, password, and password confirmation. Open up /db/seeds.rb and paste this. Fill in the login with the name you want.
Admin.create! :login => 'Adam', :password => 'nettuts', :password_confirmation => 'nettuts'
We use the create! method because it will throw an exception if the record can’t be saved. Go ahead and run the rake task to seed the database:
bookshelf $ rake db:seed
Now we should be able to login. Restart the server to get the new routes. Head to /admin_session/new. You should see:
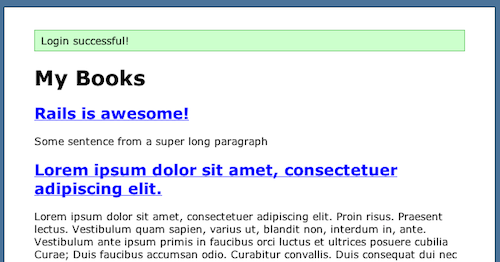
Go ahead and fill it in and now you should be logged in!
Now that admins can login, we can give them access to the new/edit/delete functionality. Rails has these awesome things called filters. Filters are things you can do at points in the request lifecycle. The most popular filter is a before_filter. This filter gets executed before an action in the controller. We can create a before filter in the books controller that checks to see if we have a logged in admin. The filter will redirect users who aren’t logged in, therefore preventing unauthorized access. Open up books_controller.rb and add these lines:
  # first line inside the class:
  before_filter :login_required, :except => [:index, :show]

  # after all the actions
  private
  def login_required
    unless current_admin
      flash[:error] = 'Only logged in admins an access this page.'
      redirect_to books_path
    end
  end
Now we need to update our views to show the admin links only if there’s an admin logged in. That’s easy enough. All we need to do is wrap it in an if.
  # show.html.erb
  <% if current_admin %>
  <p>
    Admin Actions:
    <%= link_to 'Edit', edit_book_path(@book) %> |
    <%= link_to 'Delete', book_path(@book), :method => :delete, :confirm => "Are you sure?" %>
  </p>
  <% end %>

  # index.html.erb
  <% if current_admin %>
  <p>
    Admin actions: <%= link_to 'New Book', new_book_path %>
  </p>
  <% end %>
We still need to add a login/logout link. That should go on every page. An easy way to put something on every page is add it to the layout.
  # /app/views/layouts/application.erb
  <!DOCTYPE html PUBLIC "-//W3C//DTD XHTML 1.0 Strict//EN"
    "http://www.w3.org/TR/xhtml1/DTD/xhtml1-strict.dtd">
  <html>
    <head>
      <title><%= h(yield(:title) || "Untitled") %></title>
      <%= stylesheet_link_tag 'application' %>
      <%= yield(:head) %>
    </head>
    <body>
      <div id="container">
        <%- flash.each do |name, msg| -%>
          <%= content_tag :div, msg, :id => "flash_#{name}" %>
        <%- end -%>

        <%- if show_title? -%>
          <h1><%=h yield(:title) %></h1>
        <%- end -%>

        <%= yield %>

        <% if current_admin %>
          <p><%= link_to 'Logout', admin_session_path(current_admin_session), :method => :delete %></p>
        <% else %>
          <p><%= link_to 'Login', new_admin_session_path %></p>
        <% end %>
      </div>
    </body>
  </html>
Now you should have login/logout links on pages depending if your logged in and logged out. Go ahead and click the through the app. Try access the new book page after you’ve logged out. You should see an error message.

Click through the app. You should be able to login and out, and edit/create/delete books. Time for the final step. Let’s add some formatting to your thoughts and user comments. Rails has a helper method that will change new lines to line breaks and that sorta thing. Add that show.html.erb:
  # <p><%= @book.thoughts %></p> becomes
  <%= simple_format @book.thoughts %>

  # do the same thing for comments
  # <p><strong><%=h(comment.author) %></strong>: <%=h comment.text %> becomes
  <p><strong><%=h(comment.author) %></strong>:</p>
  <%= simple_format comment.text %>
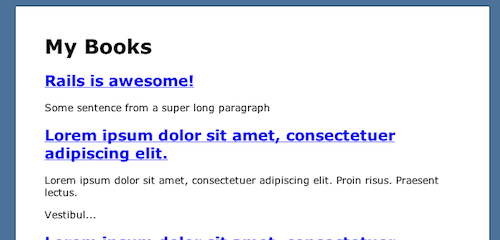
It doesn’t make sense to put the thoughts in the index, so let’s replace that with a preview instead of the entire text.
  # index.html.erb
  # <p><%= book.thoughts %></p> becomes
  <%= simple_format(truncate(book.thoughts, 100)) %>
Now our final index page should look like this:
Finally we need to set up a route for our root page. Open up routes.rb and add this line:
map.root :controller => 'books', :action => 'index'
Now when you go to / you’ll see the book listing.
Sixty
Now we are going to deploy this app in a few steps. You don’t need your own server or anything like that. All you need is an account on Heroku. Heroku is a cloud Rails hosting service. If you have a small app, you can use their service for free. Once you’ve signed up for an account, install the heroku gem:
$ sudo gem install heroku
Heroku works with git. Git is a distributed source control management system. In order to deploy to heroku all you need to do is create your app then push your code to it’s server. If you haven’t already install git, instructions can be found here. Once you have heroku and git installed you are ready to deploy. First thing we need to do is create a new git repo out of your project:
  bookshelf $ git init
  Initialized empty Git repository in /Users/adam/Code/bookshelf/.git/
It’s time to do some preparation for heroku deployment. In order to get your application’s gems installed, create a .gems file in the root project directory. Each line has the name of the gem on it. When you push your code to heroku it will read the .gems file and install the gems for you. So create a .gems file and paste this into it:
  forgery
  will_paginate
  authlogic
There is a problem with authlogic on heroku, so we need to create an initializer to require the gem for us. Create a new file in /config/initializers/authlogic.rb and put this line in there:
require 'authlogic'
Now we should be ready to deploy. First thing you’re going to do is run heroku create. This will create a new heroku app for you. If you’re a first time user, it will guide you through the setup process.
  bookshelf $ heroku create
  Git remote heroku added
No we are ready to deploy. Here are the steps
- Add all files in the project to a commit
- Commit the files
- Push are code to heroku
- Migrate the database on heroku
- Seed the database on heroku
- Restart the heroku server
- Open your running application
  bookshelf $ git add -A
  bookshelf $ git commit -m 'Initial commit'
  bookshelf $ git push heroku master
  bookshelf $ heroku rake db:migrate
  bookshelf $ heroku rake db:seed
  bookshelf $ heroku restart
  bookshelf $ heroku open
Here is the finally app running on the world wide web:
Hit the Brakes
We’ve covered a lot of ground in this article, so where do we go from here? There are few things we didn’t do in this app. We didn’t add any validations to the models. We didn’t use partials. We didn’t do any administration for the comments. These are things you should look into next. Here are some links to help you with the next steps.
- Completed Source Code
- Confused about the form parts? Read this
- Confused about routes? Read this
- Confused about heroku? Read this
- Confused about associations? Read this
- Confused about authlogic? Read this
Links to gems used in this project.
- Follow us on Twitter, or subscribe to the Nettuts+ RSS Feed for the best web development tutorials on the web. Ready
Ready to take your skills to the next level, and start profiting from your scripts and components? Check out our sister marketplace, CodeCanyon.
Write a Plus Tutorial
Did you know that you can earn up to $600 for writing a PLUS tutorial and/or screencast for us? We’re looking for in depth and well-written tutorials on HTML, CSS, PHP, and JavaScript. If you’re of the ability, please contact Jeffrey at [email protected].
Please note that actual compensation will be dependent upon the quality of the final tutorial and screencast.


