Split testing is a way to experiment with a live site and find which headlines and text are the most effective. Amazon uses split testing to determine which versions of their site convert customers better. We’ll use WordPress and Google’s Website Optimizer to test two different headlines, and find which works best at capturing customer emails.
Step 1: Decide on Your Experiment Type
First, we’ll need to decide what sort of an experiment we’d like to run. In Google’s Website Optimizer, we have two choices: Multivariate Testing or A/B Testing.
Multivariate testing is a good way to test a lot of things at once. Big online stores use multivariate testing to figure out which layouts and ad copies work best. For the purpose of this tutorial, however, we’ll use A/B testing.
A/B Testing is a way to test two different types of copy, and see which works best. We start with two different variations of the same page, send some traffic to the pages, and see which converts best statistically. For the purposes of our split test, we’ll want to have at least 100 conversions before deciding which page is the statistically significant winner.
Step 2: Design Your Experiment Flow
In order to have a successful experiment, we’ll need to decide first what page we’d like to test. It’s important that your page have a goal you’d like your user to accomplish. For this page, we want our user to click and sign up for their free eBook. When our user opens their email and confirms their subscription, they’ll be taken to our goal page.

Important: Change One Thing At a Time
For our purposes, we’re only going to change the headline at the top of the page. It’s important to keep the rest of the page the same, so we have a control. This ensures that our changes are responsible for the improvements. We know exactly what’s working, and we keep improving, always testing one thing at a time.
Step 3: Design the Test Page
Log into WordPress, and create a new page. Copy and paste the same text from your inital page, but change the headline. Click “Publish,” and make sure your page is exactly the same, except for your new header text:

In our case, we’re using the headings “Don’t Be a Hacker’s Next Statistic!” and “Protect Yourself Online.”
You’ll need to make a note of the URLs for the two test pages. We’ll need those to set up the experiment in Google’s Website Optimizer.
Step 3: Design the Goal Page
Our goal page will be hidden from the rest of the site. It will only be accessible after our customer signs up for the free eBook.

You’ll notice that all our pages have hidden the WordPress header and footer. You can do this to WordPress pages with a custom page template.
Step 4: Install the Google Website Optimizer Plugin
The Google Website Optimizer Plugin allows us to install the special JavaScript code that Google will give us. This code gives users one random page at a time, and tests to see whether or not they reach our goal page.
Installing the Google Website Optimizer Plugin is easy enough in WordPress 2.8+: log in to your Admin console, click the Plugin drop down, and click Add New.
Search for Google Website Optimizer. Our plugin is called, “Google Website Optimizer Plugin for WordPress.” Click “Install” to the right of the plugin in the drop down.
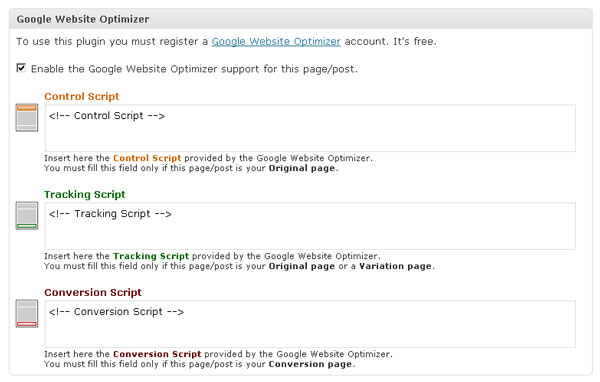
This plugin ads the following form to all your WordPress pages:
Step 5: Set Up the Optimizer Experiment
You’ll need to set up a Google Account if you don’t already have one. Then, go to Google’s Website Optimizer and log in. You’ll be presented with two options:
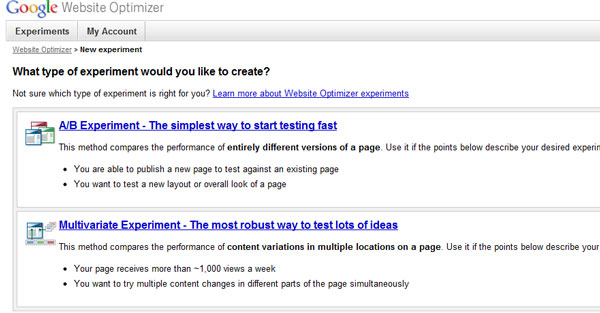
Obviously, for our purposes, we’ll be choosing the A/B Experiment, to try our two different page headlines out for effectiveness. So, click A/B and continue.
On the next page, Google will ask you if you’ve prepared for the experiment. Check “I’ve completed the steps above.” at the bottom of the page and then click “Create” to continue.
Now, we’ll pick a name for our experiment, and let Google know which pages we’ll be testing. Look at the image below to see how our campaign is set up. Notice Google checks to make sure our pages exist and are currently viewable.
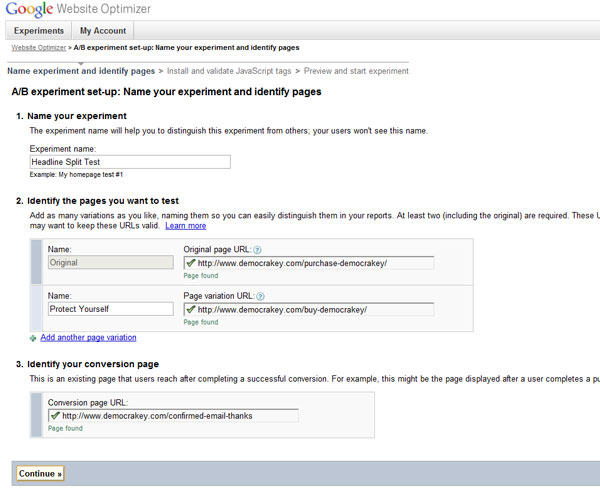
Click continue when you’ve verified your pages, and Google has acknowledged that they can reach the pages.
Step 6: Install Your Optimizer Code
On the next page, Google will give you the code necessary to embed in your pages. First, open up your WordPress control panel and navigate to the first page you made.
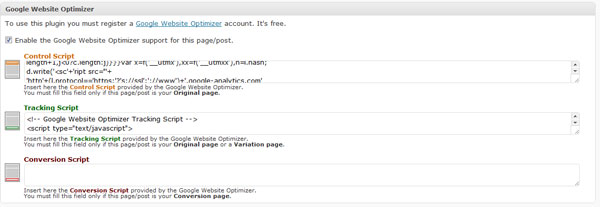
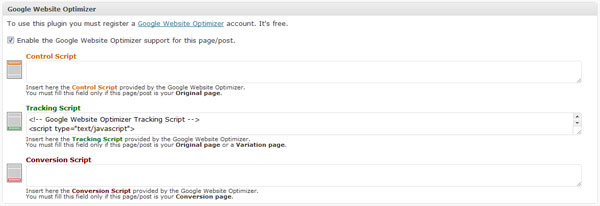
Check the box to enable Google Website Optimizer, and insert the first (Control Script) and second (Tracking Script) pieces of code Google gave you for your experiment.
Save your post, and open up your second page. Insert only the second piece of code (the Tracking Script), as below:
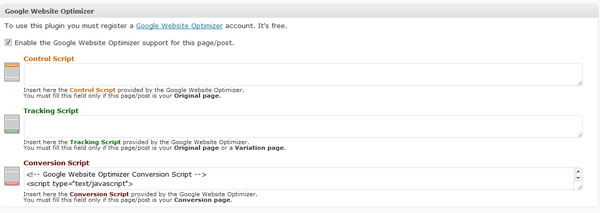
Save this one too, and finally, open up your Goal page, and insert one the final Conversion script:
Publish this page, and make sure Google is reading the Website Optimizer Code. Congratulations, you are now running your first A/B Test!
Step 6: Run Your Experiment, Check Results, Keep Experimenting!
Your experiment will now run, and Google will let you know when one of your pages is a clear winner. It’s important you let the experiment run for at least 100 conversions, because your test must be statistically significant. Again, Google will let you know when you have a clear winner.
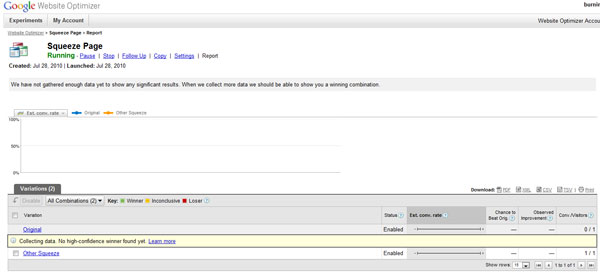
You’ve run your first scientific test using Google Website Optimizer. Now take your clear winner, and keep improving all your sales pages. The more you measure, the more you can improve. Good luck!