Have you ever wondered how professional designers strike the perfect balance between text and image? Using InDesign’s powerful type tools, you will learn techniques to help you set and arrange a magazine layout.
Step 1 Setting up the Document
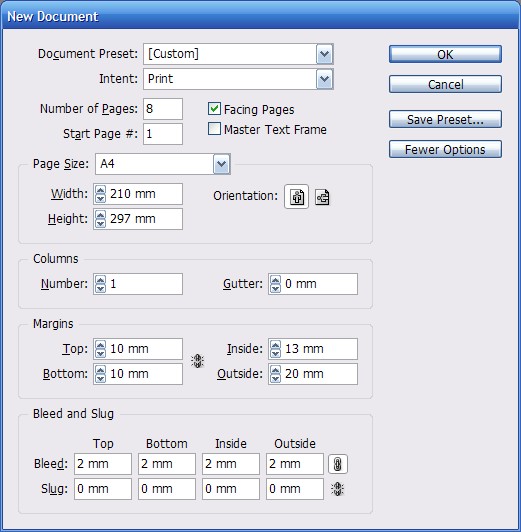
We’ll be using a standard A4 size document for this tutorial. Start with setting the number of pages to 8, the bleed to 2 mm so we have some space for images to overlap, the margins to 10 mm for top and bottom, the inside margin to 13 mm and the outside margin to 20 mm. The reason for these different margins is that in a spread with 2 pages a slightly larger margin on the outside of the page looks better and provides space to hold the printed version. It is also useful for the page grid in the next step.
Step 2 Creating a Grid
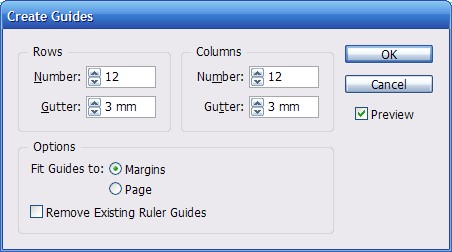
To set up the page grid, go to the "A-master spread" and choose Layout > Create Guides. A grid is used to keep consistency in the page layout and provides a framework for positioning content. A well-used grid is the first thing you need to give your layout a professional look. For this tutorial we’re going to use a 12 rows by 12 columns grid with 3 mm spacing. Choose Fit Guides to Margins to create a grid with a column width of 12 mm.
Why? Our page width is 210 mm, with 20 mm outside and 13 mm inside margins we have 177 mm left for 12 columns and 11 gutters. 12 columns of 12 mm plus 11 gutters of 3 mm is 177 mm.
Step 3 Placing a Background
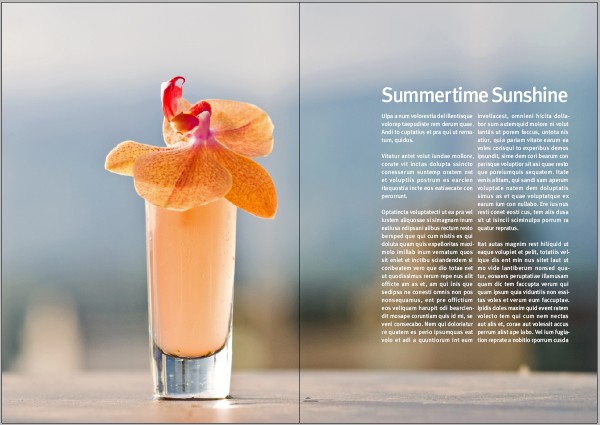
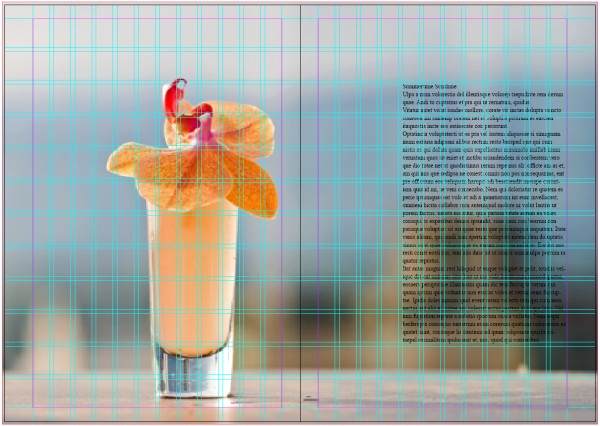
When creating a magazine layout, you’ll want to keep a good balance between the white space, images and text. A good technique is to use an image with a lot of ‘empty’ space, space around the subject has the same function as white space. I’m using a photograph called, Summertime Sunshine by Stewart, it has a nice blurry background that we can place our text on.
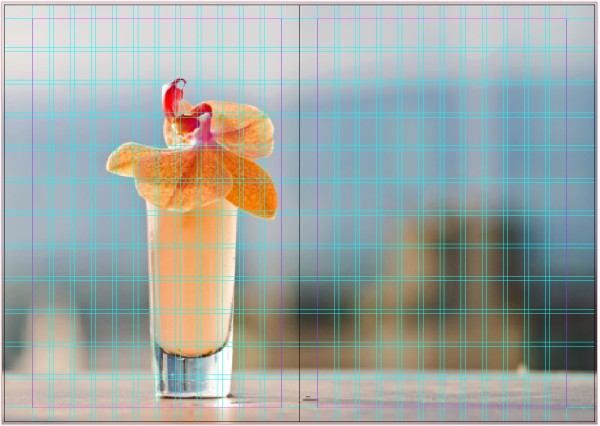
Go to page 2–3 and place your photograph in the bleed space so that the entire spread is covered. Move the photograph in the frame so that the subject is within the margin of the first page and the top of the cocktail is at the edge of a grid row.
Step 4 Creating Body Text
Make a text frame that is placed at the same vertical and horizontal position as the cocktail on the other page, here in the third row, fifth column of the grid. This creates a imaginary line that connects the image with the text. I’ve used the title of the photograph, ‘Summertime Sunshine’ as the heading and filled the rest of the frame with the "Fill with placeholder text" function of InDesign.
Step 5 Setting up a Baseline Grid
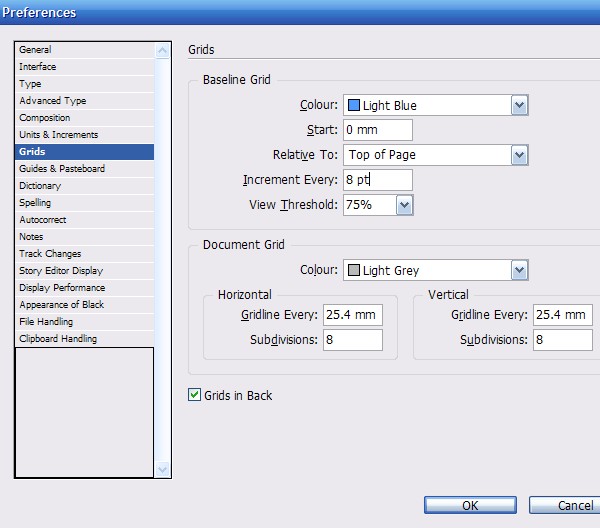
To make our text look good we need to set up a baseline grid. Go to the Preferences > Grids and set an Increment Every to 8 pt. In this tutorial we’ll be using a text size of 12 pts and a leading of 16 pts. A baseline grid of 8 pts,which is half the leading, provides flexibility because we can also use it for smaller text sizes.
Step 6 Changing the Basic Paragraph Style
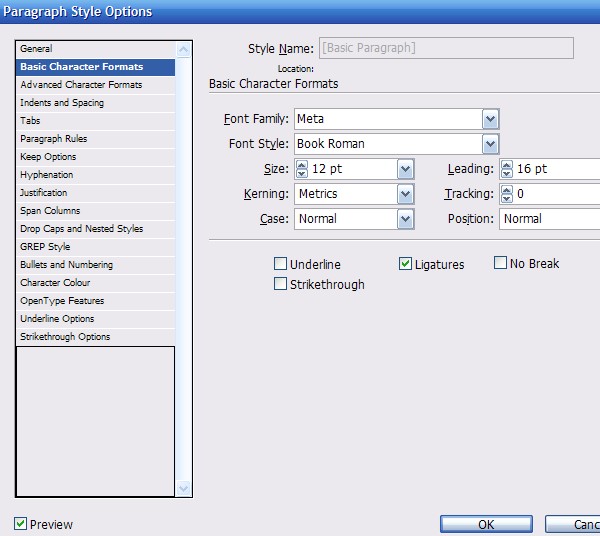
Go tot the paragraph styles palette and change the style of the Basic Paragraph. I’ve used FF Meta Book Roman with a size of 12 pt and a leading of 16 pt. You can also leave the leading at the auto setting because our baseline grid will make sure all the text is nicely aligned.
Step 7 Alignment
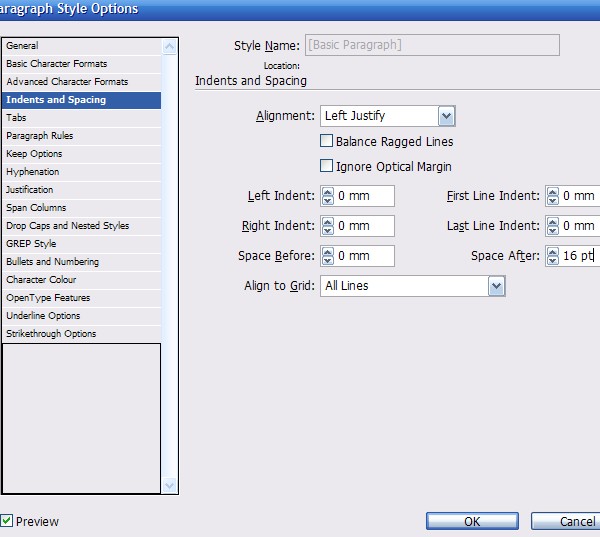
Go to Indents and Spacing and set the Alignment to Left Justify. On the web, good looking justified text is almost impossible to achieve, but InDesign makes it very easy to do. Also, change the Align to Grid setting to All Lines, and add 16 pts of space after a paragraph. This is not necessary and you can also use First Line Indent for separating the paragraphs.
Step 8 Hyphenation
Hyphenation is very important for justified text. It breaks up long words at the end of a column so that the column has a straight edge instead of containing a large amount of gaps. The default hyphenation settings in InDesign need some adjusting to improve the look of our body text. I’m changing the settings to use hyphenation only for words with at least 6 letters, and after the first and before the last 3 letters. The hyphen limit sets how many lines in a row can have a hyphen on the end. I think 3 is way too many and a maximum of 1 looks much better. Further, you should disable the checkboxes for Capitalized Words and Last Word.

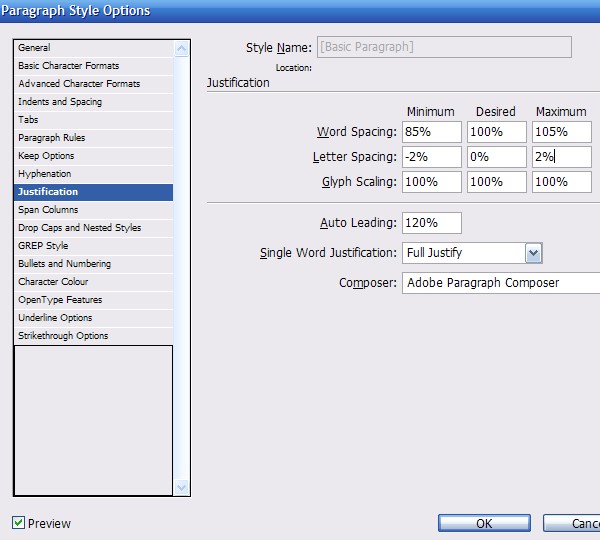
Step 9 Justification
By default, the justification settings are a bit to loose. Set the word spacing to a minimum of 85% and the maximum to 105%. This way the words don’t have large or small gaps between them. For letter spacing, set the minimum to -2% and the maximum to 2%. This improves the justification a lot. You can experiment with glyph scaling as well if needed.
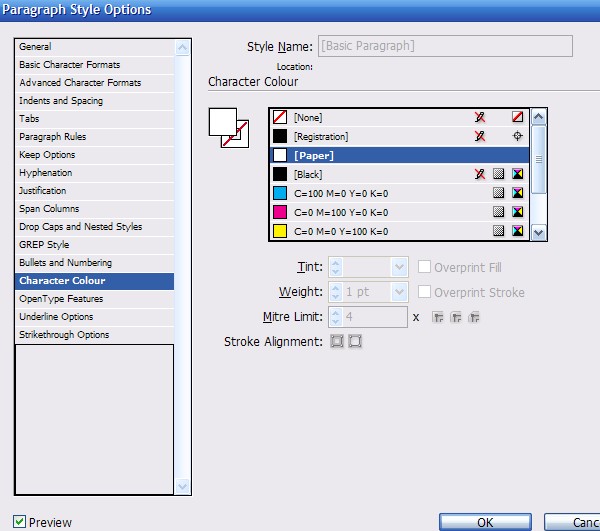
Step 10 Text Color
I’m using white as the color for the text because of the dark background. Choose what looks best but keep the text readable.
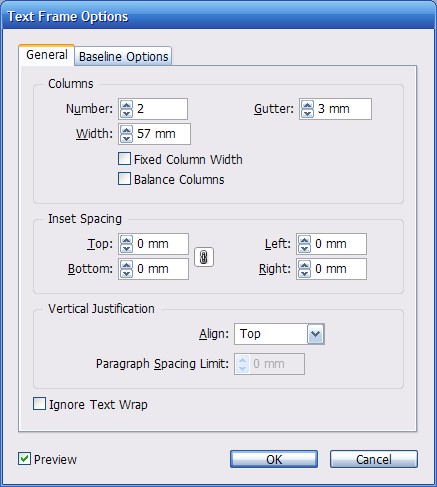
Step 11 Text Columns
Open the Text Frame Options with right click on the text frame and change the columns to a number of 2 with a 3 mm gutter. This way the line length is reduced and the readability increases.
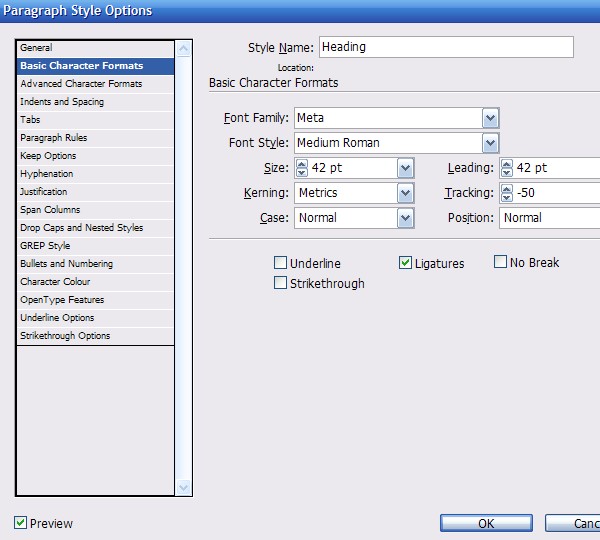
Step 12 Heading
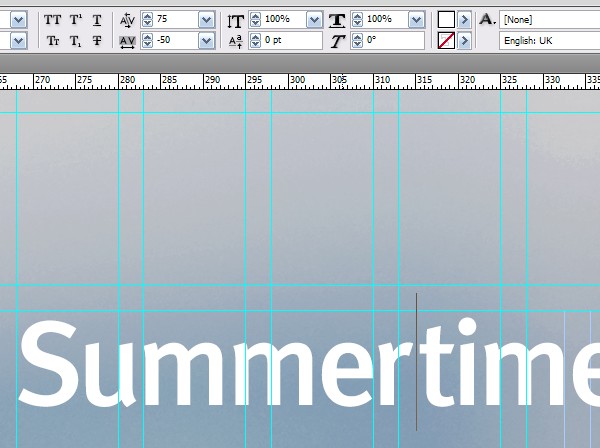
For the heading, we want to use a larger text size of 42 pts and a negative tracking value of -50 to decrease the spacing between the letters. Headlines can often benefit from tracking adjustment.
Step 13 Span Columns
A new function in InDesign CS5 is the possibility for a paragraph to span across columns. We’re going to use that here to make the heading span across both the columns of the text frame. Set the Paragraph Layout to Span Columns and Span to All.

Step 14 Heading Adjustments
Because of the tracking adjustment, the letters "r" and "t" are touching each other now. This is something you want to avoid in general. To solve this I’ve set the kerning to 75 between the letters which creates enough space to separate them.
Step 15 Optical Margin Alignment
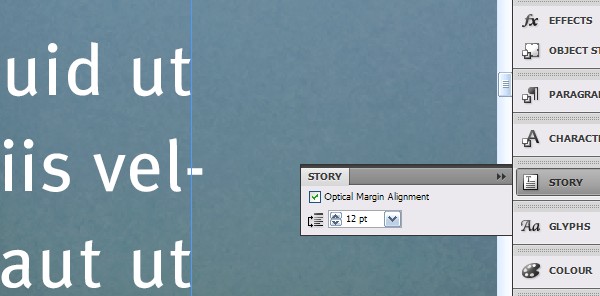
The last thing you want to do is a small setting in InDesign’s Story palette: Optical Margin Alignment. This pushes the hyphens, quotation marks and wide characters such as the W and A outside the text frame. This increases the look of the edges. Click on the text frame, enable Optical Margin Alignment and set the value to your the size of the body text.
Conclusion
You have now created a simple, but well balanced page with good typography and use of white space. You have the basics set up for a consistent magazine layout.