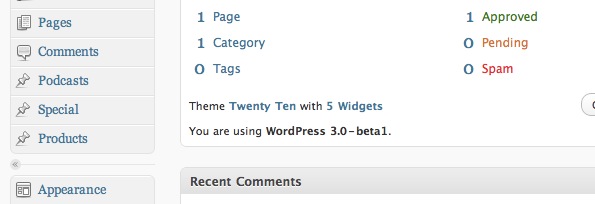
The WordPress community is buzzing with excitement over the soon-to-be-released WordPress 3.0. Currently in Beta 2 now, WordPress 3.0 will have a lot of exciting new features , such as a new default theme and better menu management. Quite possibly the most exciting of these features is custom post types. In this tutorial, we’ll talk about creating and using custom post types to make a rock-solid theme.
What is a Custom Post Type?
Well, according to the WordPress Codex:
“Post type refers to the various structured data that is maintained in the WordPress posts table. Custom post types allow users to easily create and manage such things as portfolios, projects, video libraries, podcasts, quotes, chats, and whatever a user or developer can imagine.”
Essentially, it allows us developers to make new kinds of posts similar to the post and page types, which all appear in the main navigation in the WordPress admin. There are several advantages to this; most notably, we no longer need plugins to create special types, we can build a theme that relies less on custom fields (as we know them), and they make managing the site easier for clients and non-technical users. Instead of telling them to create a “post” and make sure to fill in all kinds of custom fields for say, music, we can simply tell them to click “Music” to add a new music post.
Let’s Get Started!
In this tutorial we will:
- Create a Custom Post Type for Products with our own inputs
- Create a custom “taxonomy” for the type.
- Create a theme template to go along with the new type.
Register the Custom Post Type
All of this will be done from within our theme’s functions.php file. I’m modifying the default 3.0 theme, TwentyTen.
The first thing we will do is tell WordPress that we want to register a new custom type. Here’s the code:
	add_action('init', 'product_register');

	function product_register() {
    	$args = array(
        	'label' => __('Products'),
        	'singular_label' => __('Product'),
        	'public' => true,
        	'show_ui' => true,
        	'capability_type' => 'post',
        	'hierarchical' => false,
        	'rewrite' => true,
        	'supports' => array('title', 'editor', 'thumbnail')
        );

    	register_post_type( 'product' , $args );
	}
The first line is a hook to tell WordPress that we want to call the function product_register() during initialization. It’s in that function that we register the new post type.
The function register_post_type() accepts two arguments: the name we want to give our post type, and a list of arguments used to create that post type, which we put in an array called $args. You can read exactly what all of the arguments are here, but I want to point out the important ones.
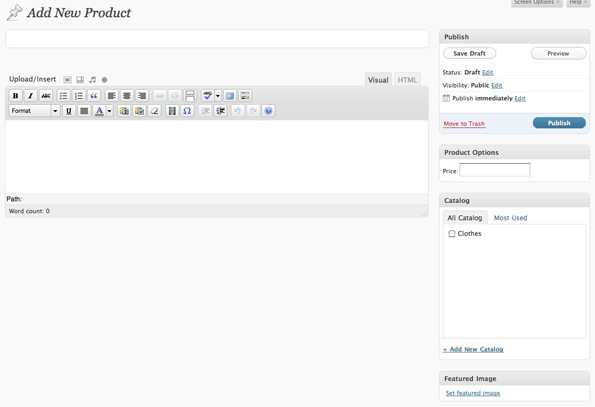
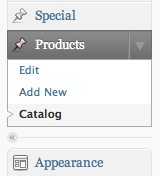
- label & singular_label: These are the labels as we want them to appear in the WordPress admin. ‘label’ will show up in the admin nav and anywhere that references multiple entries of that type (Edit Products, for example). ’singular_label’ will show up when one of that type is referenced (Add Product, for example).
- capability_type: This tells WordPress which native type (post, page, attachment, revision, or nav-menu-item) the custom type will behave as. By making it a ‘post’ type, we can do things like add it to a category.
- rewrite: Tell WordPress if (or how) to apply permalinks formatting. You can send a boolean as we did, or any array of arguments to apply a custom permalink format to the type.
- supports: This is everything on the add/edit page that will show up. We want to have a title, editor(the content), and thumbnail images. Next, we will add our own custom inputs by cleverly masking custom fields as input fields for our custom type.
Adding Our Own Inputs
Let’s add our own custom inputs for our new type. Since we can now create new post types, we can make the custom fields more streamlined for users that might not be as familiar with WordPress as we are. It’s worth noting here that this functionality has been available since 2.5 and up until this point, has been used primarily by plugin developers. Here we are going to add a price field.
<?php
	add_action("admin_init", "admin_init");
	add_action('save_post', 'save_price');

	function admin_init(){
		add_meta_box("prodInfo-meta", "Product Options", "meta_options", "product", "side", "low");
	}

	function meta_options(){
		global $post;
		$custom = get_post_custom($post->ID);
		$price = $custom["price"][0];
?>
	<label>Price:</label><input name="price" value="<?php echo $price; ?>" />
<?php
	}

function save_price(){
	global $post;
	update_post_meta($post->ID, "price", $_POST["price"]);
}
?>
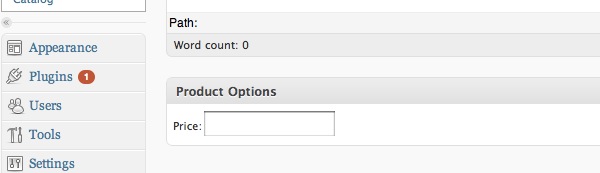
Once again, the first couple of lines are hooks to tell WordPress when we want to use certain functions. The first line says that when the admin panel is initialized, call the function that we wrote, admin_init(). This function tells WordPress to add an area called “Product Options” to any posts of type ‘product’, and to use the function meta_options() to print the form fields. You can read more about add_meta_box here. meta_options() will then get any preexisting custom values and print the form field. The second action line states that when a post is saved, call our function save_price(), which uses update_post_meta() to add or update a custom field called ‘price’.
Custom Categories and Edit Columns
Our last step in creating a completely custom type is giving unique names to its category and edit column labels. First, the custom category name, or ‘taxonomy’.
register_taxonomy("catalog", array("product"), array("hierarchical" => true, "label" => "Catalogs", "singular_label" => "Catalog", "rewrite" => true));
The function we use is register_taxonomy(), which you can find in the codex here; it has been available since 2.8. It’s essentially saying that we want to create a new category type called ‘catalog’ which we will associate with the ‘product’ type. The last argument is an array of information similar to what we saw the register_post_type() function. When all is said and done, we will have the term ‘Catalog’ appear beneath our Products menu in the WordPress admin and it will behave like Post Categories do.
Next, we want to create a custom set of columns for our Product type.
add_filter("manage_edit-product_columns", "prod_edit_columns");
add_action("manage_posts_custom_column",  "prod_custom_columns");

function prod_edit_columns($columns){
		$columns = array(
			"cb" => "<input type=\"checkbox\" />",
			"title" => "Product Title",
			"description" => "Description",
			"price" => "Price",
			"catalog" => "Catalog",
		);

		return $columns;
}

function prod_custom_columns($column){
		global $post;
		switch ($column)
		{
			case "description":
				the_excerpt();
				break;
			case "price":
				$custom = get_post_custom();
				echo $custom["price"][0];
				break;
			case "catalog":
				echo get_the_term_list($post->ID, 'catalog', '', ', ','');
				break;
		}
}
The first two lines are hooks to tell WordPress that we want custom columns for the ‘product’ type. The first line says that when printing columns for the product type, use the ones defined in the function prod_edit_columns().
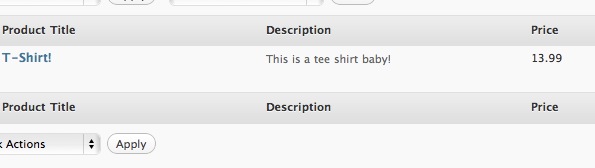
In prod_edit_columns(), we have a key-value array where the keys are used to reference certain post information, which we define in the second function, prod_custom_columns(). The values in that array are the column headings. You might notice that prod_edit_columns() lists five columns, but we only describe display information for three in prod_custom_columns(). ‘cb’ and ‘title’ are part of a set of default keys that WordPress already has associations for. WordPress doesn’t know what the other three are, so it’s up to us to define them.
Making the Theme Template

Not too shabby, right? And now we are finally up to the fun part- the theme template. To make a theme template for a custom post type, we simply name the template single-<post-type-slug>.php and add it to our theme. In our case, this would be single-product.php. Here I will show you a snippet of that page that displays all of the information we’ve added to our custom post type:
<?php the_post(); ?>

<?php
	$custom = get_post_custom($post->ID);
	$price = "$". $custom["price"][0];

?>

<div id="post-<?php the_ID(); ?>" <?php post_class(); ?>>
<h1 class="entry-title"><?php the_title(); ?> - <?=$price?></h1>

<div class="entry-meta">

	<div class="entry-content">
		<?php the_post_thumbnail(); ?>
		<?php the_content(); ?>
	</div>
</div>
I’ve added this code to the Twentyten theme in WordPress 3.0 Beta, as it’s the only theme that supports the new functionality- namely the menu system. I copied the single.php template, renamed it single-product.php and replaced everything in the ‘content’ div with the code above. To test my code, I went to Themes->Menus and added our new type to my site’s navigation. Then, I clicked through to our custom post type.
Wrapping Up
As I said previously, WordPress 3.0 is still in beta (you can get it here); so there are still some bugs to work out and some things may change in the final version. The best thing you can do is get in there and play with some of the new features to familiarize yourself with the updates/changes. From what I’ve seen so far, things are looking pretty good!
My biggest regret is that I hadn’t met those guys earlier. I love their trading style. No matter attached and they ensure that my principal is defended with proper risk management. Those are the qualities of a good trader. Smartfxsol you guys are excellent. I truly recommend forex signals service to serious traders.
check it on smartfxsol.com
ipage hosting http://technologycanada.com/ipage-hosting/
???? ?????? ????? ??? ???? ??????, ?????? ??????, ????? , ?????? ?????? ?????? ???????.
[b]metronidazole neurotoxicity[/b]
Sorry! i’m new user . plz help to create new theme
What is this