In this tutorial we will show you how to design a Mobile Task Manager App with Photoshop. Let’s get started!
Tutorial Assets
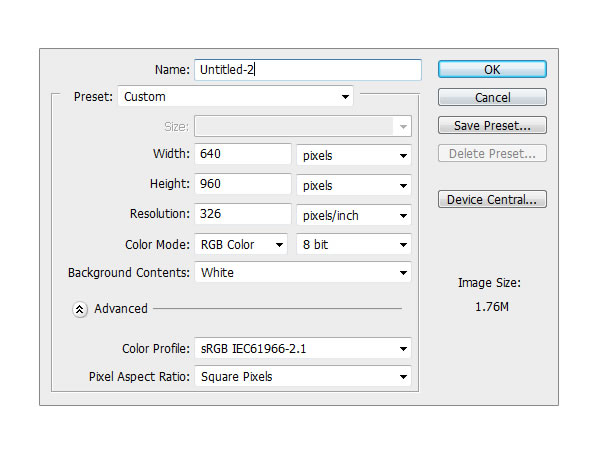
Step 1
Create a new file. Set Width to 640 and Height to 960 and the resolution to 326 PPI.
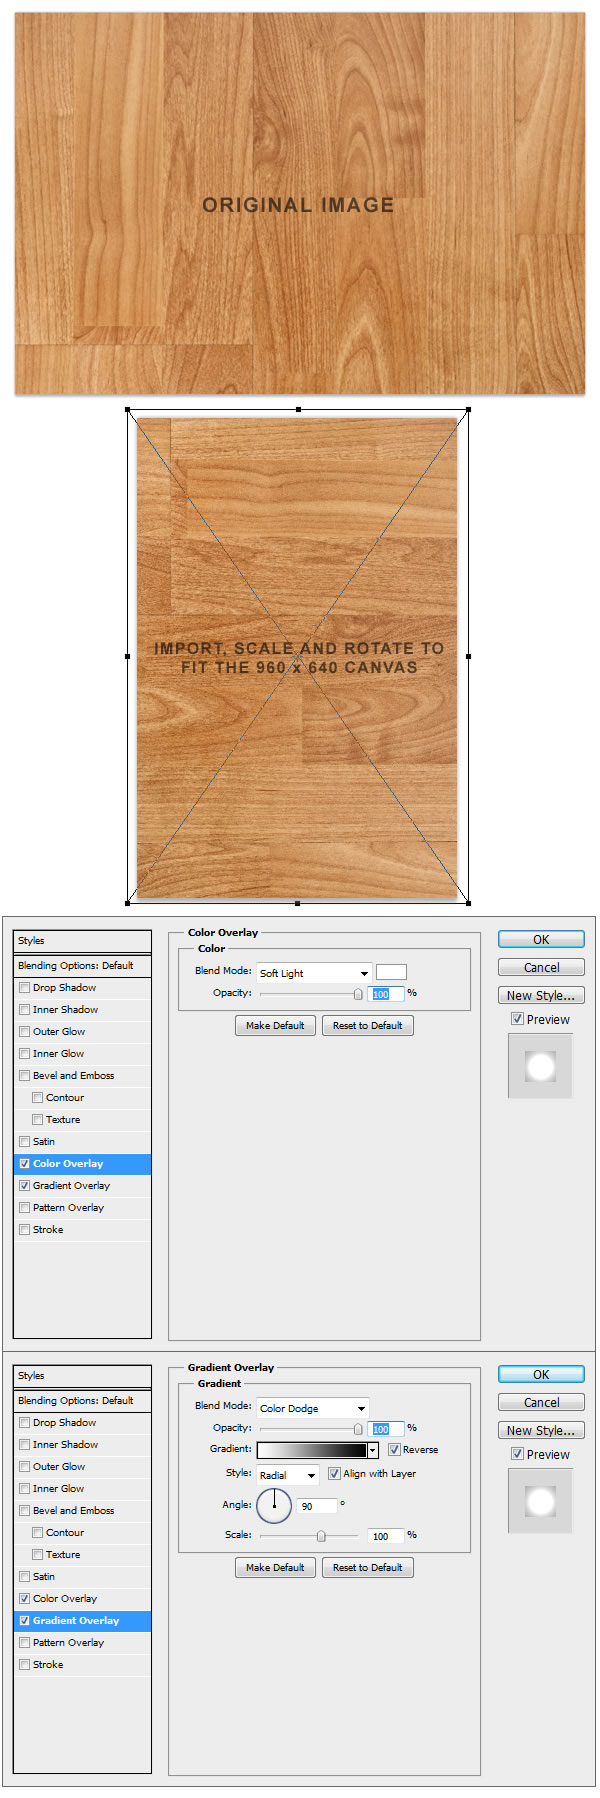
Step 2
Make a new Group and name it Background. Download Timber Floor and open it with Photoshop®
and drag it in our 640×960 canvas. Resize and flip it like in the example. Afterwards apply the Layer Styles.
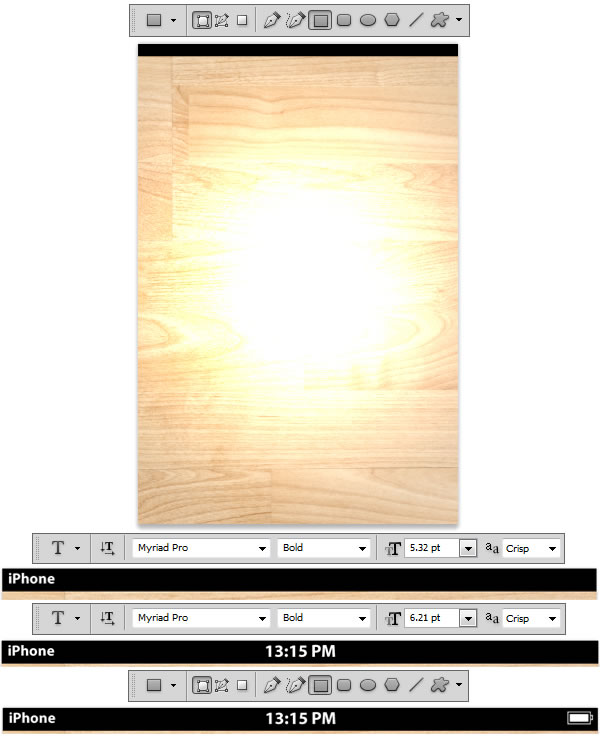
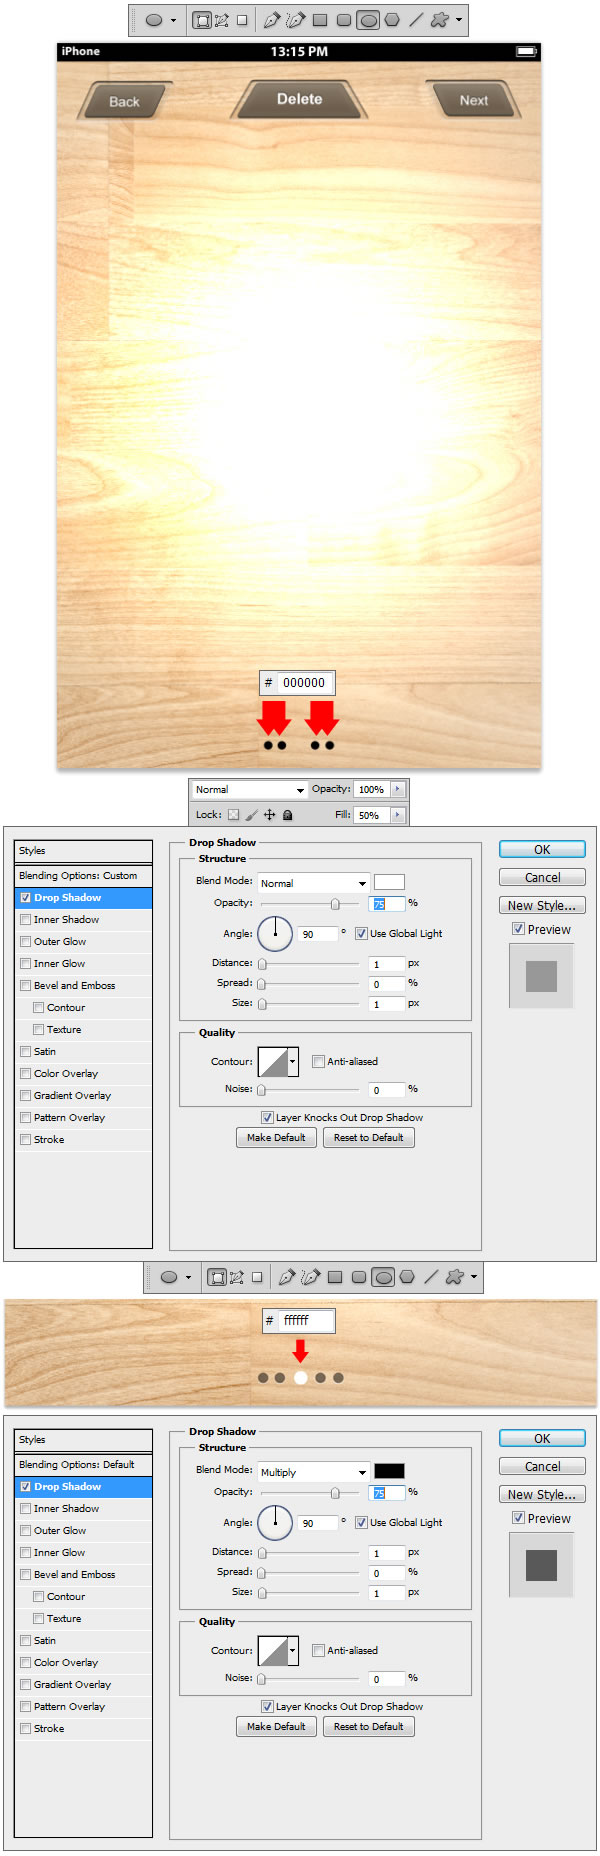
Step 3
Create a new Group and name it Header. Using Rectangle Tool (U) draw a shape exactly like the one in the example. Now using Horizontal Type Tool (T), set the Font to Myriad Pro, Bold and the font size to 5.32 pt and write down the word "iPhone" in the top left corner like in the example. Now set the Font size to 6.21 pt and write down in the middle of the canvas "13:15 PM". Now switch to Rectangle Tool (U) and draw a battery shape just like the on in the top right corner.
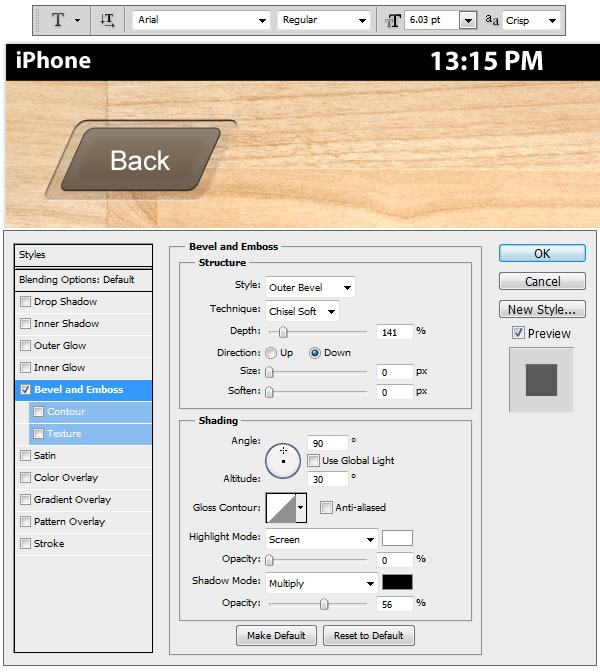
Step 4
Now Make another Group and name it Left Button. Using Pen Tool (P) draw a shape just like the one in the example. Set the fill color to #131313. Set the Fill to
10% and apply the Layer Styles. Draw another shape using Pen Tool (P) like the one on top of the previous that we did. Set the fill color to #776855 and apply the Layer Styles.

Step 5
Using Horizontal Type Tool (T) set the Font Arial, Regular and the Font Size to 6 pt and write down the word “Back”. Afterwards apply the Layer Styles.
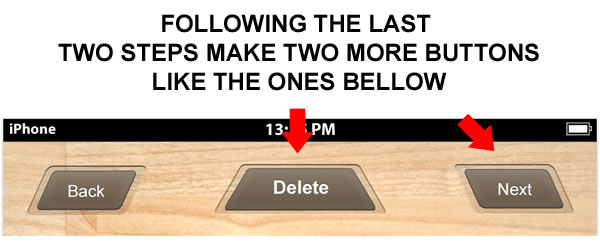
Step 6
Following Step 4 and Step 5 make two more buttons.
Step 7
Create a new Group and name it Dots. Using Ellipse Tool (U) draw 4 black #000000 circles like the one in the example. Set the Fill level to 50% and apply the Layer Style. Draw another circle, this time a little bigger, set the fill color to #ffffff and apply the Layer Style.
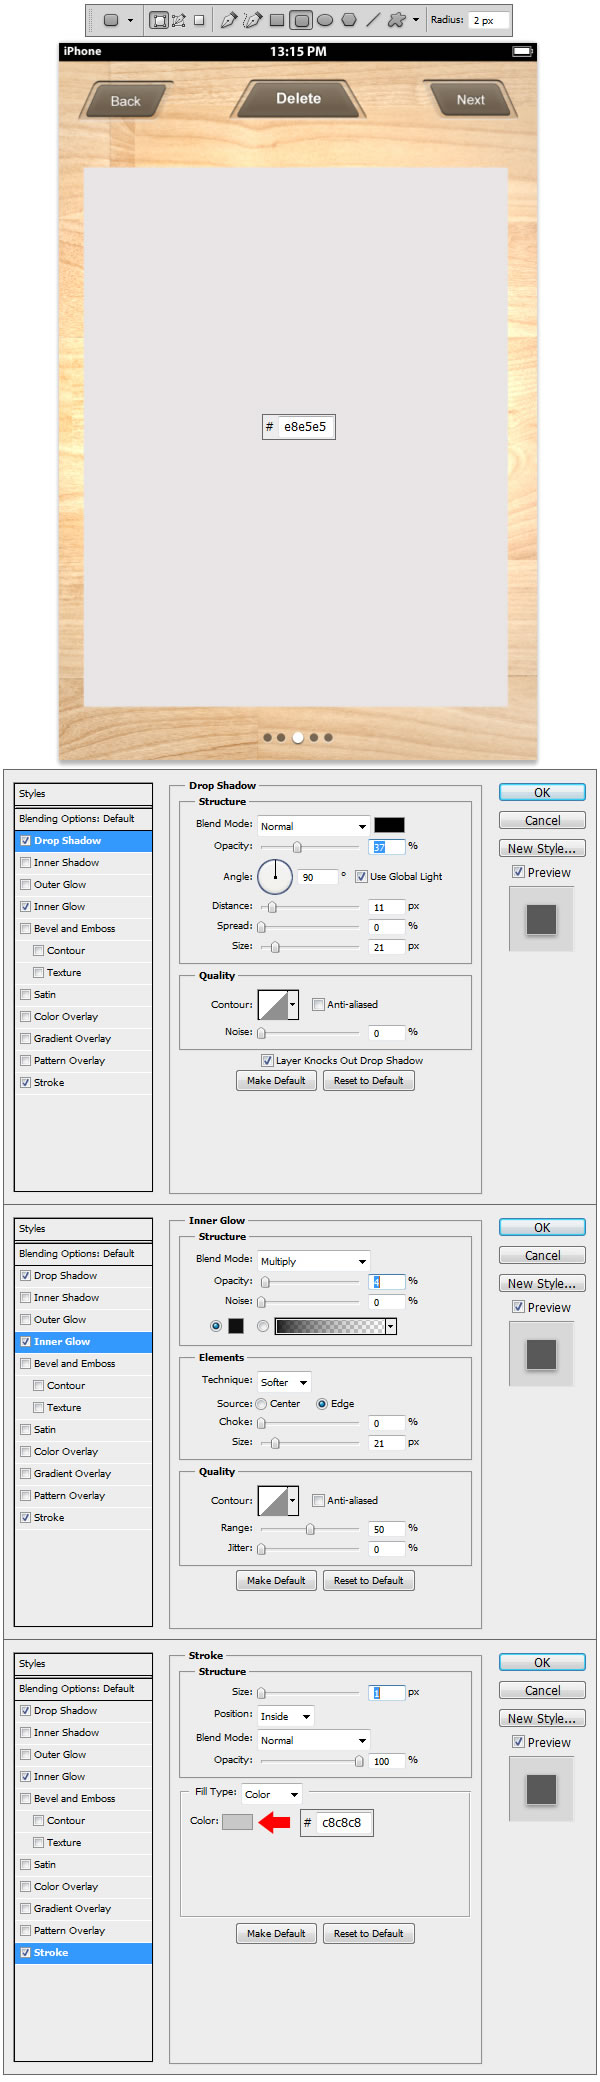
Step 8
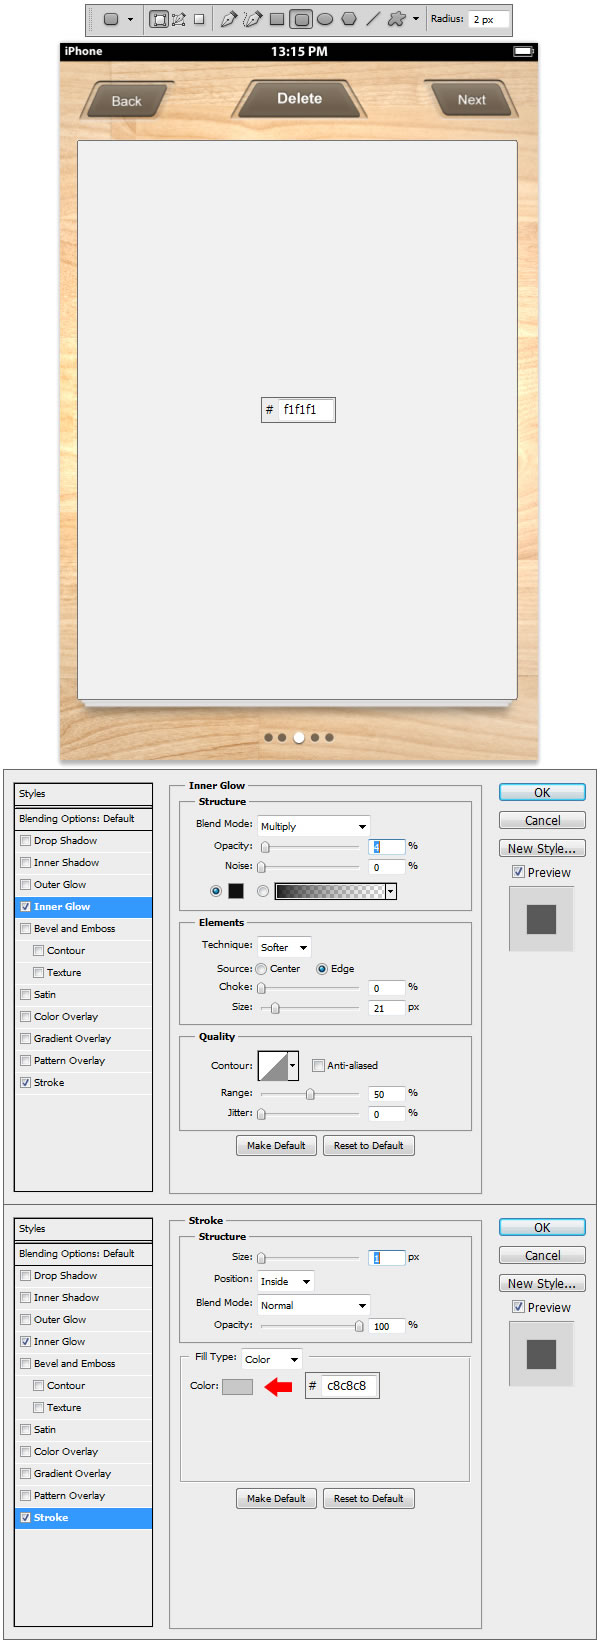
Make a new Group and name this one Body. Using Rounded Rectangle Tool (U), set the Radius to 2 px and draw a shape like the one in the example and set the fill color to #e8e5e5 and apply the Layer Styles.
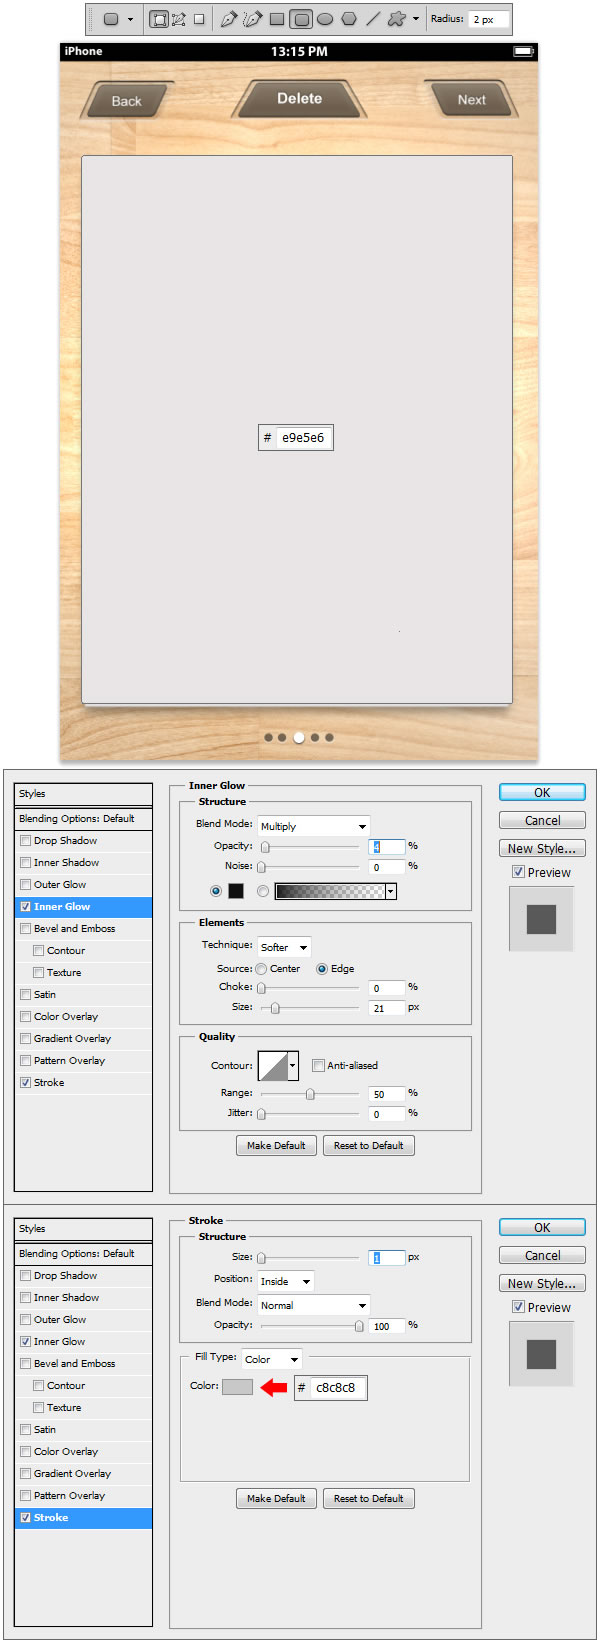
Step 9
Using Rounded Rectangle Tool (U) draw a shape a little bigger than the previous one and set the fill color to #e9e5e6 and apply the Layer Styles.
Step 10
With the help of Rounded Rectangle Tool (U) draw another shape, a little bigger than the previous one, set the fill color to #f1f1f1 and apply the Layer Styles.
Step 11
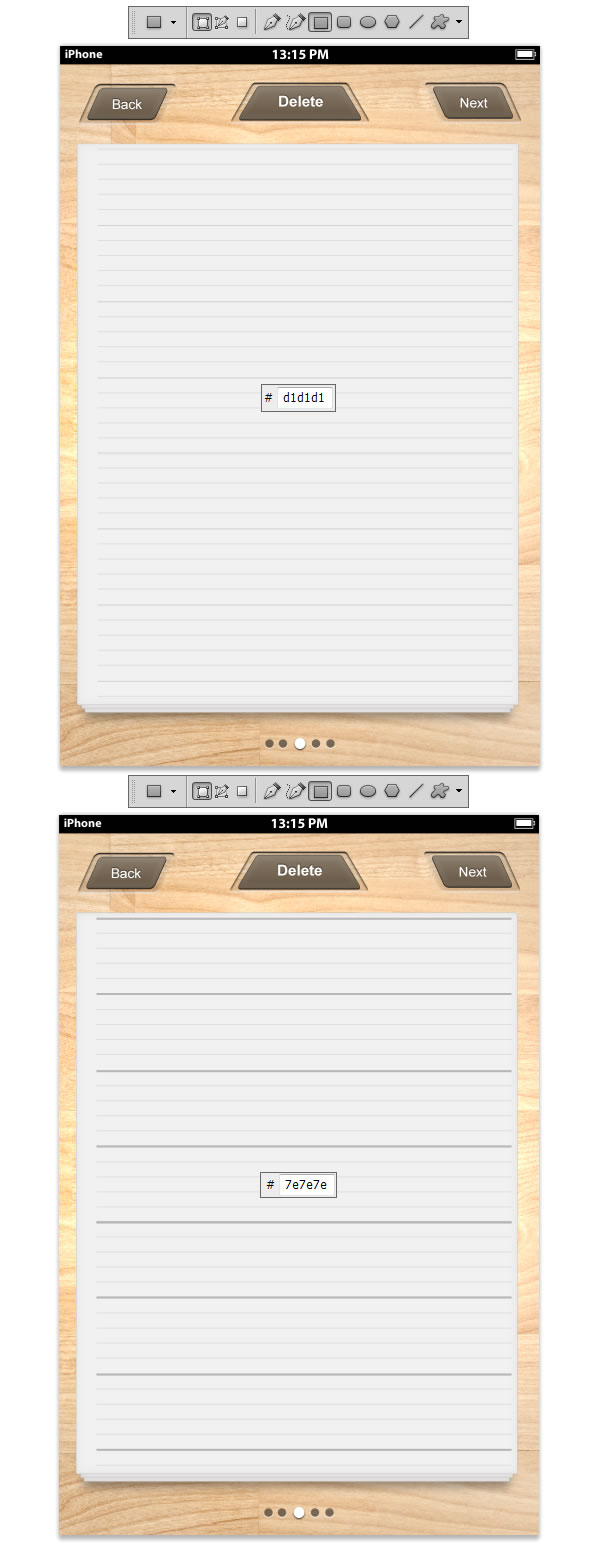
Make a new Group and name it Lines. Using Rectangle Tool (U) set the fill color to #d1d1d1 and draw some small horizontal lines like the ones in the example. Now using Rectangle
Tool (U) some bigger horizontal lines with color fill set to #7e7e7e just like the ones in the example.
Step 12
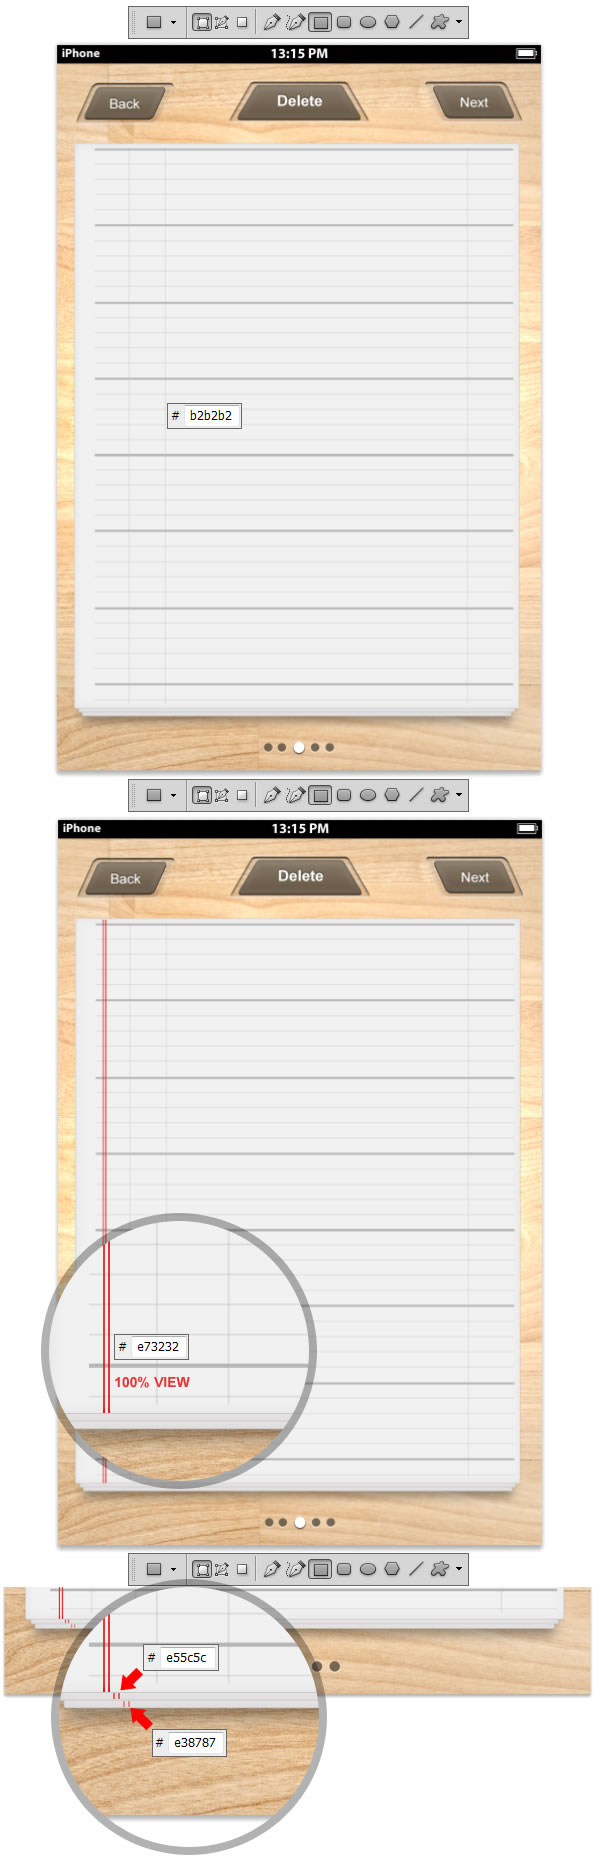
Using Rectangle Tool (U) draw three vertical lines like the ones in the example. Set the fill color to #b2b2b2. Now make two more lines on the left side of the shape
just like the ones in the example. Set the fill color to #e73232 and continue to draw two more sets like the ones in the example using lighter tones as you draw in perspective.
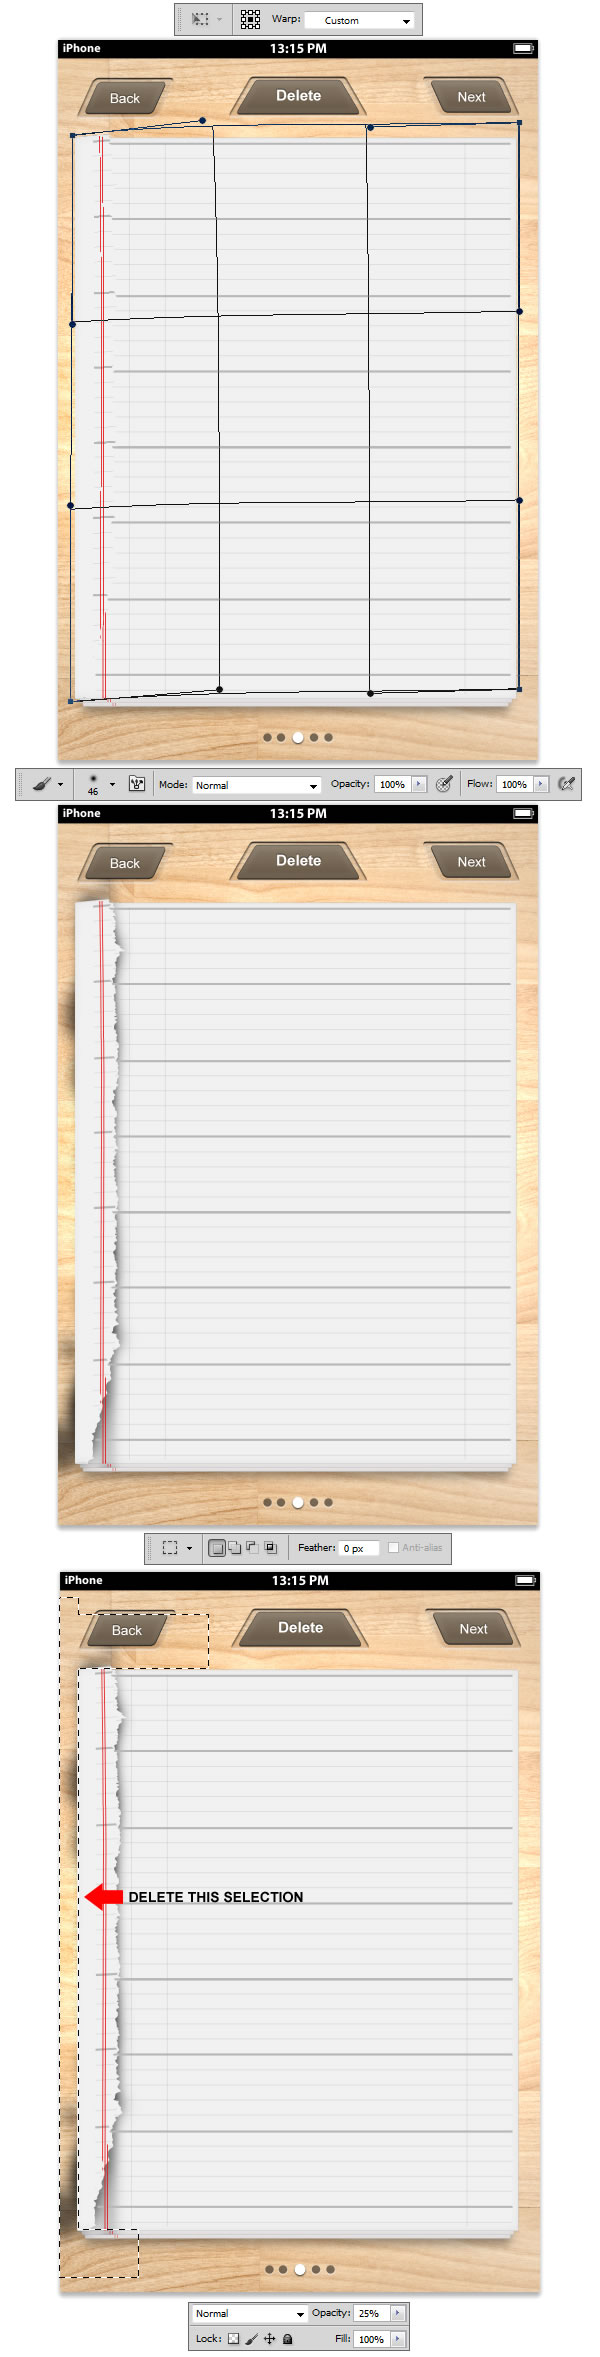
Step 13
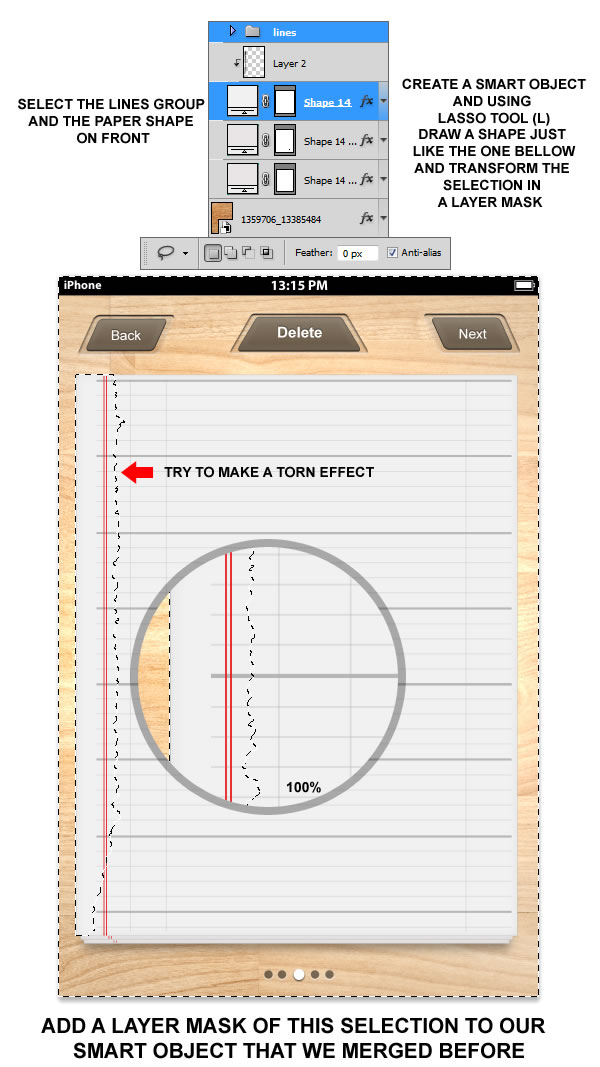
Select the last paper layer and holding Command/Ctrl key select the Lines Group. Duplicate them and Transform the copies in a Smart Object. Using Lasso Tool (L)
start making a selection like the one in the example. Try to not push yourself too much, because this torn paper effect should look natural, and natural comes well natural ![]() .
.
Add a layer mask.
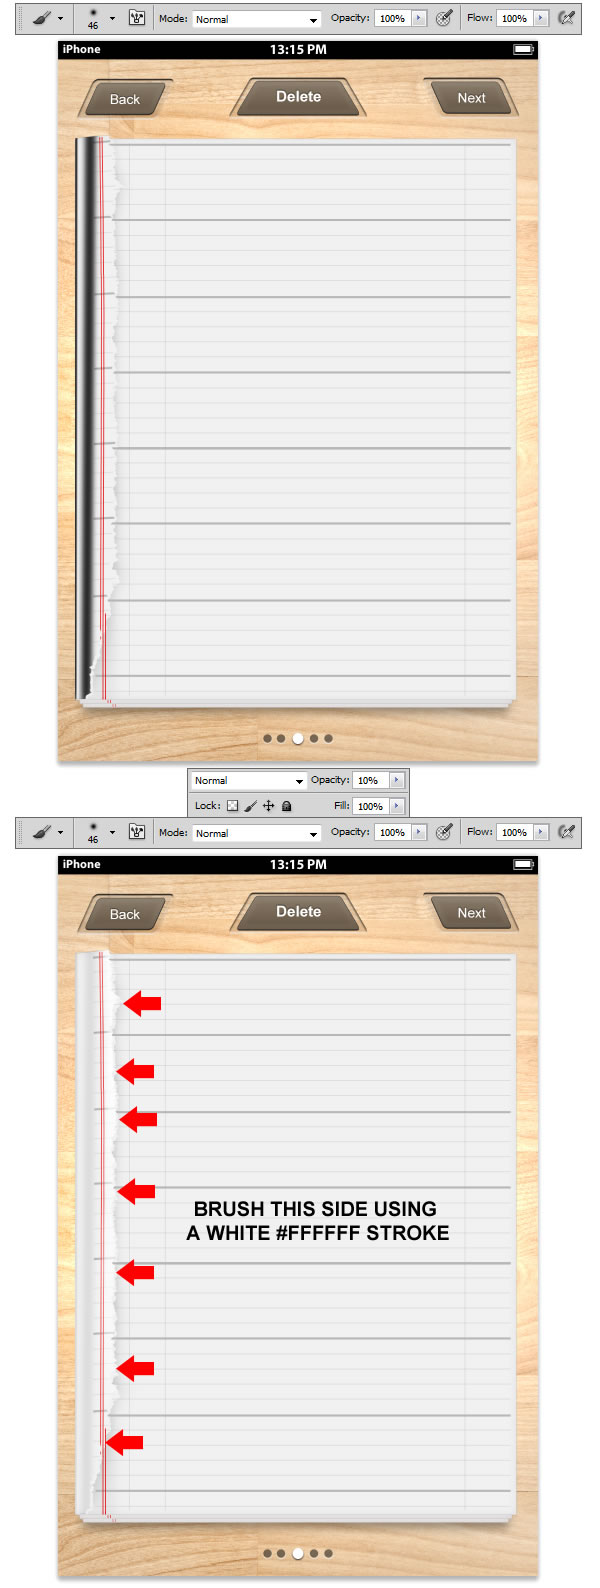
Step 14
Select the Smart Object layer that we made in the previous set and go to Edit > Transform > Warp. Warp the shape like seen in the example. Now using Brush Tool (B)
pick a small size brush with hardness set to 0 and draw underneath the Smart Object. Using Rectangular Marquee Tool (M) and holding SHIFT key pressed down make a selection
like the one in the example and delete the selection. Reduce the Opacity level to 25%.
Step 15
Now we will work on top of the Smart Object Layer. Using Brush Tool (B) pick a small size brush, set the color to #000000, make a new layer and transform it in a Clipping Mask and make two strokes like the ones in the example. Reduce the Opacity to 10%. Make a new layer and transform it in a Clipping Mask. Using Brush Tool (B) set the color to #ffffff and start brushing on the right margin of the Smart Object layer, like shown in the example.
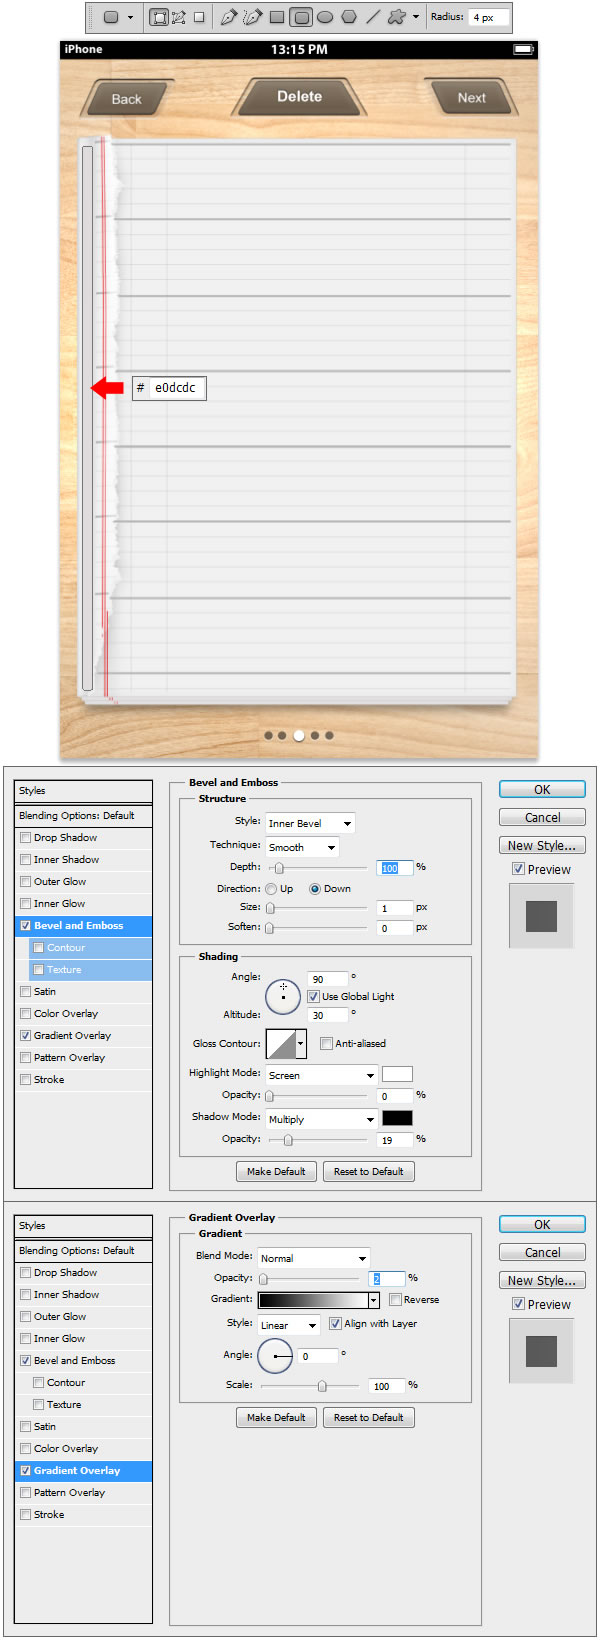
Step 16
Make a new Group and name this one Margin. Using Rounded Rectangle Tool (U), set the Radius to 4px and draw a shape like the one in the example. Set the fill color
to #e0dcdc and apply the Layer Styles.
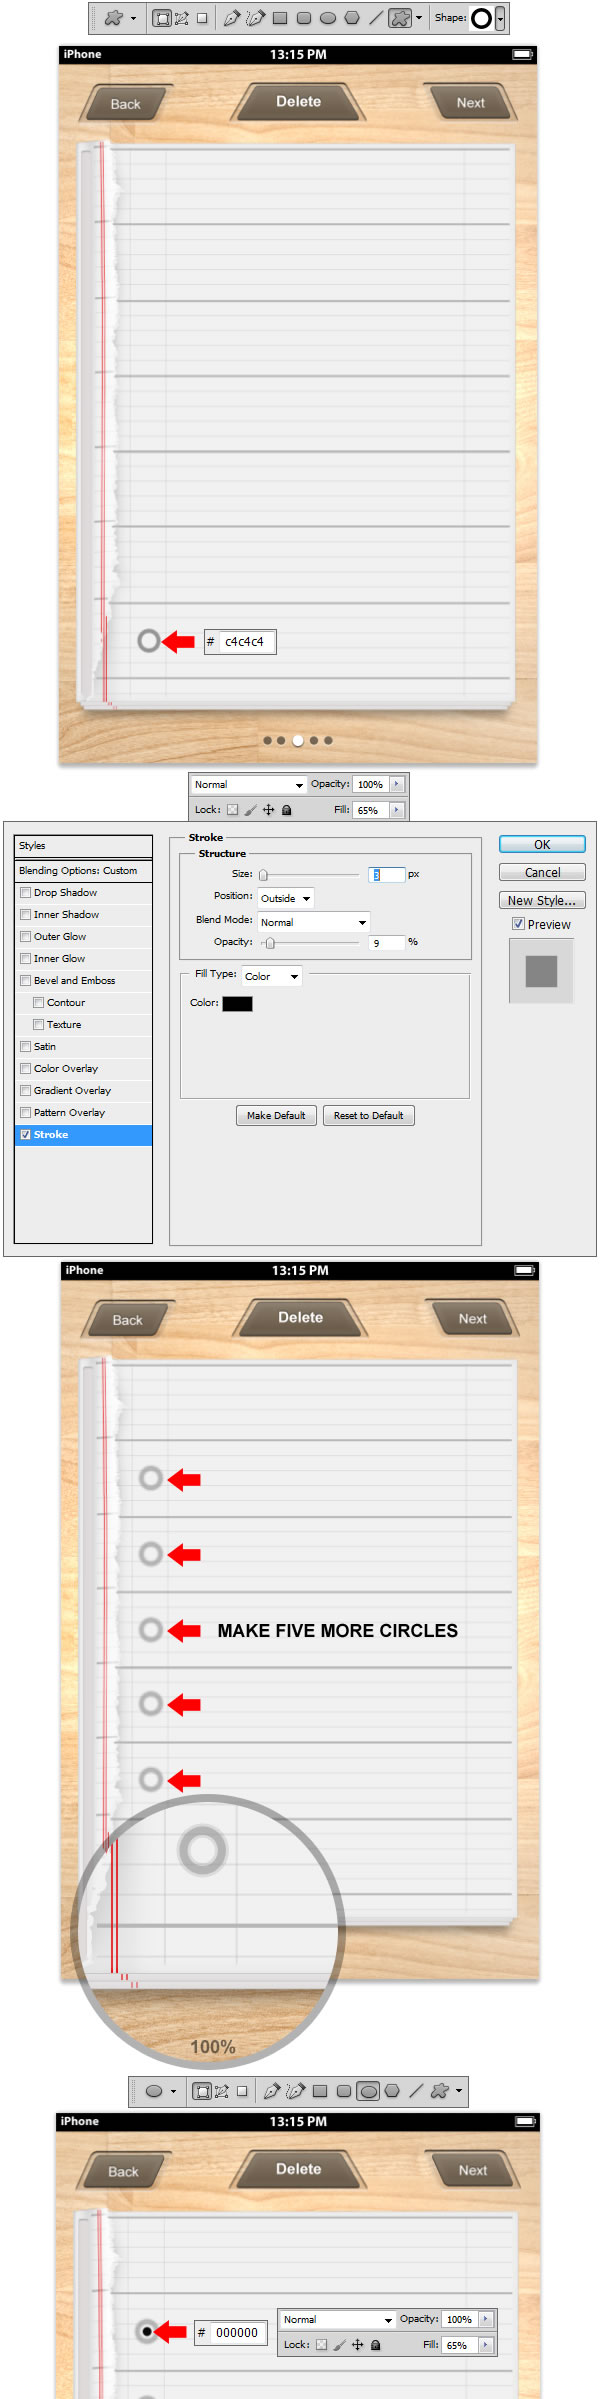
Step 17
Now using Custom Shape Tool (U) select the Circle Frame from Shapes. Draw a shape like the one in the example, set the fill color to #c4c4c4 and Fill 65% and apply the Layer Styles. Using Ellipse Tool (U) draw a small black #ffffff circle in the middle of the first Circle Frame and reduce the Fill level to 65%.
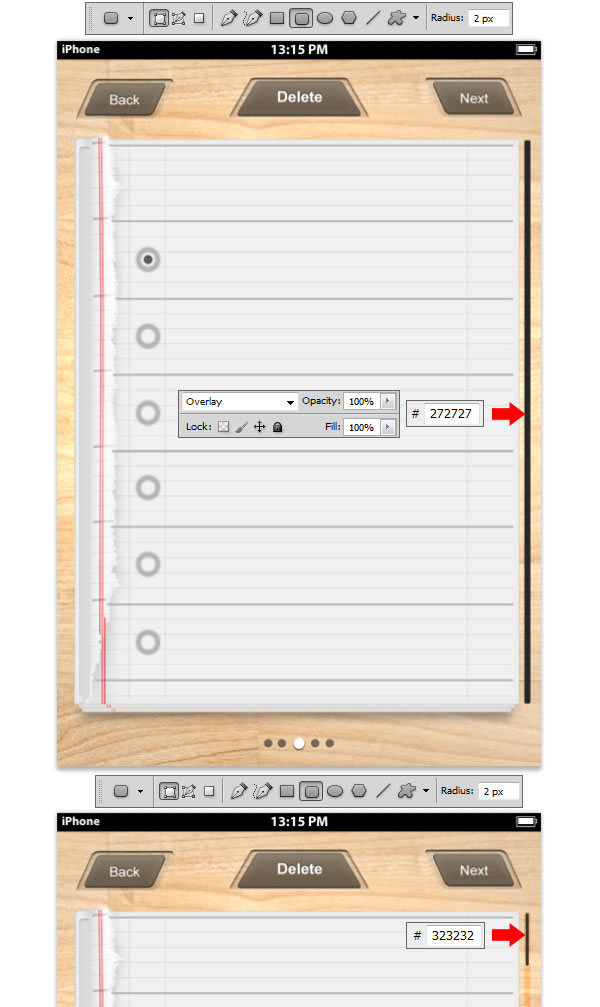
Step 18
Make a new Group and name it Slider. Using Rounded Rectangle Tool (U) set the Radius to 2px and draw a shape like the on in the example. Set the fill color to
#272727 and Set the Blending Mode for the Layer to Overlay. Now make another shape using Rounded Rectangle Tool (U) just like the one in the example and set the fill
color to #323232.
Step 19
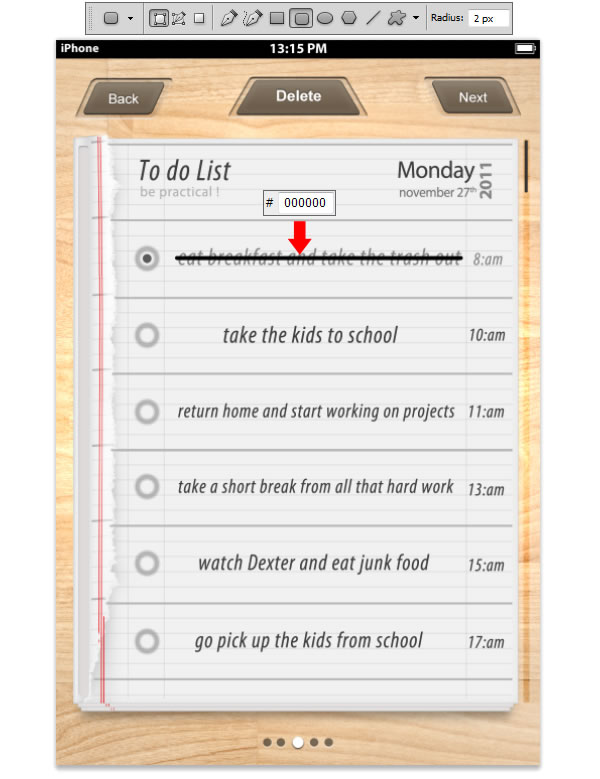
Make a new Group and name it Text. Using Horizontal Type Tool (T) set the Font to Myriad Pro, Condensed and the Font Size to 7. 97 pt and introduce the same text like
seen in the example using the same fill color as indicated. Follow the indications from the example, and using Horizontal Type Tool (U) write down the words indicated.

Step 20
Using Rounded Rectangle Tool (U) set the Radius to 2px and draw a shape like the one in the example just above the "eat breakfast and take the trash out" text.
Step 21
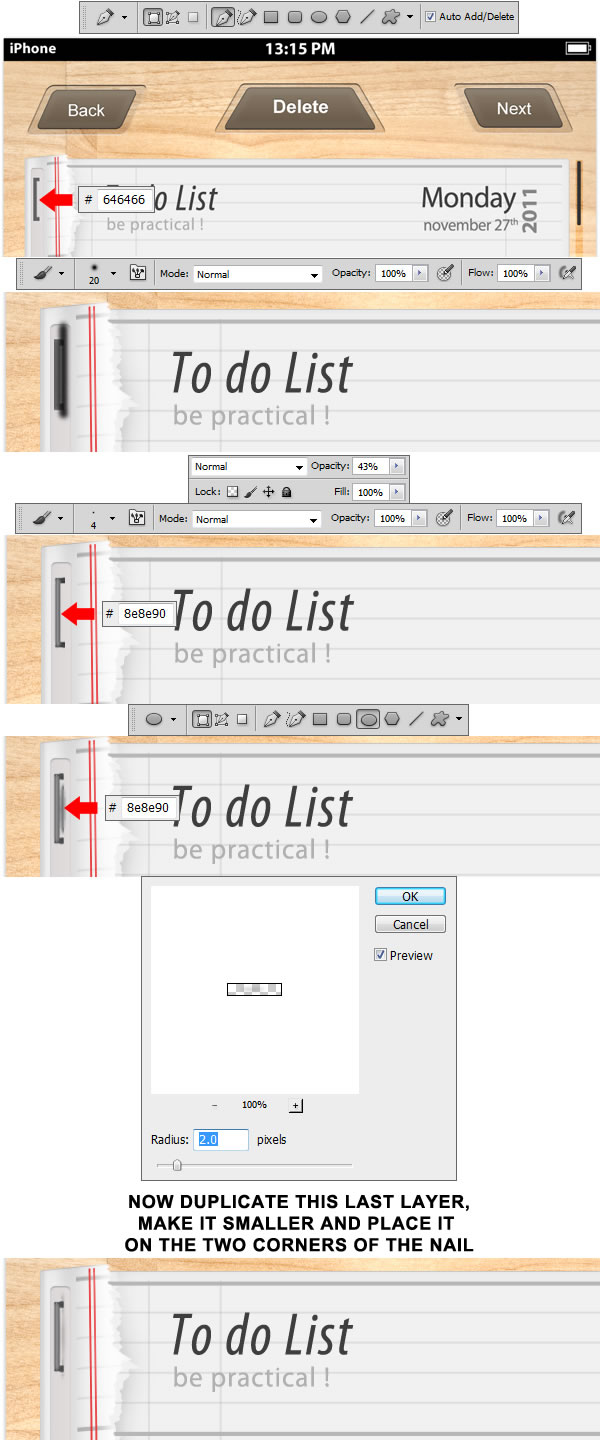
Make a new Group and name it Nail. Using Pen Tool draw a shape like the one in the example and set the fill color to #646466 and using Brush Tool (B) select a small brush size and make a black #000000 stroke on the right side of the nail, like seen in the example. Transform this layer in a Clipping Mask and reduce the Opacity to 43%. Make another stroke using a smaller size brush and using #8e8e90 as fill color. Using Ellipse Tool (U) make a small elliptical shape just like the one in the example, set the fill color to #838390 and got to Filter > Blur > Gaussian Blur and set the Radius to 2px and apply the filter. Now duplicate this layer, make it a little smaller and place them on the corners of the nail.
Step 22
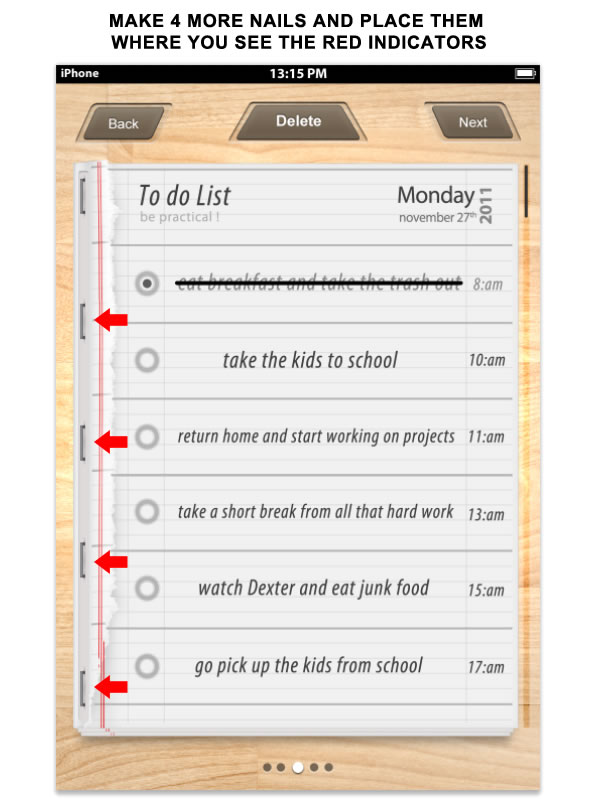
Duplicate the Nails Group 4 more times and place them like seen in the example.
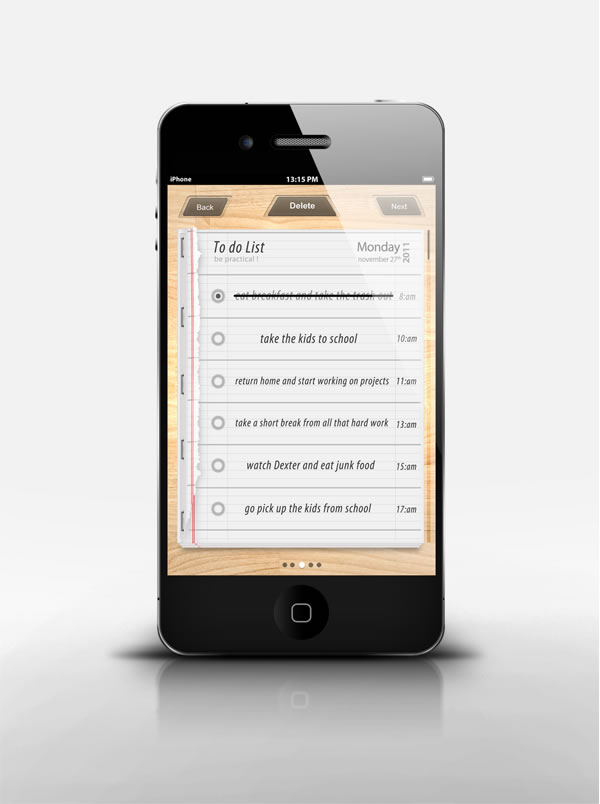
Final Image
{excerpt}
Read More