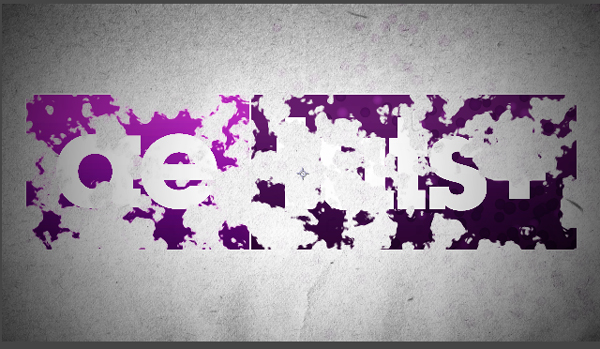
Hey everyone! Today I’m gonna show you how you can create a cool looking basic ink bleed logo reveal. You can use this method for a photo, logo, text or just as a simple transition…. It’s up to you.
Tutorial
Step 1
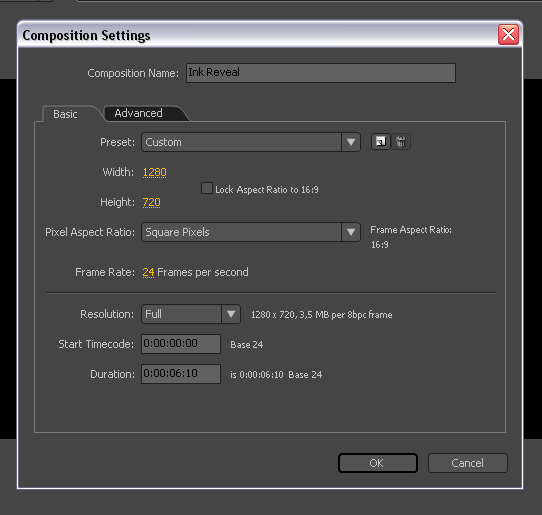
I create a composition by clicking Menu-> Composition->New Composition. Make it 1280*720 square pixels 6 seconds long, name it as ‘Ink Reveal’.If you want to create a longer reveal then you can change this value.
Step 2
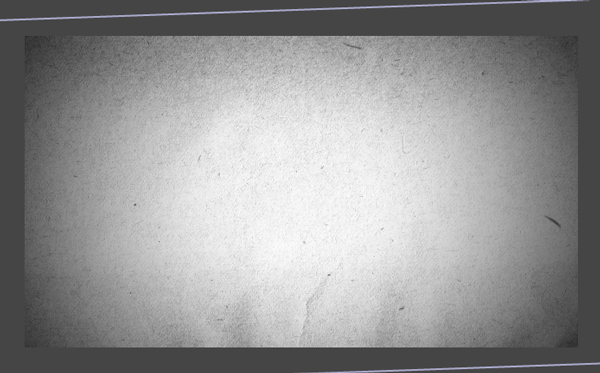
I used Bleeding-Dragon’s awesome paper textures to create the background.In this example I used Paper1 from the pack then add a simple tint effect to desaturate the texture(Effect->Color Correction->Tint)
Step 3
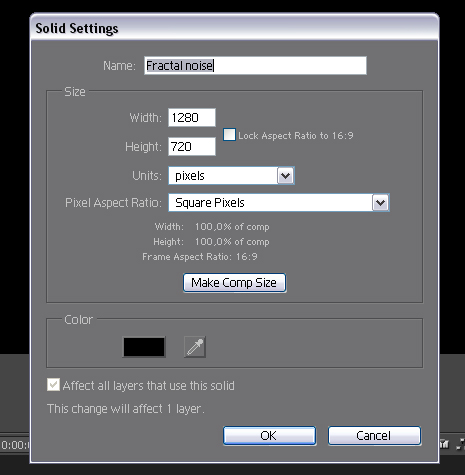
Create a new solid clicking by Menu->Layer->New->Solid. Change the color to black. Make it comp size (1280*720) and name it as ‘Fractal noise’.
Step 4
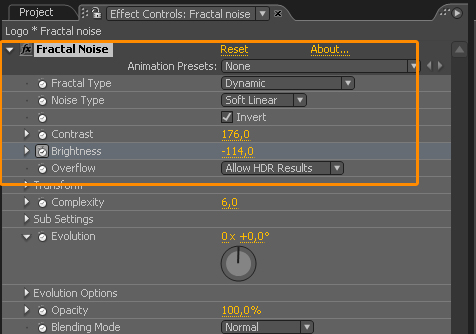
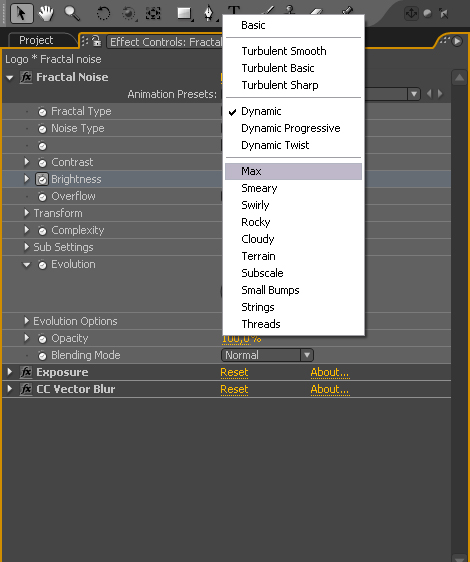
Select Fractal Noise (Effect->Noise and Grain->Fractal Noise) and set the following properties.You have to animate the brightness value so let’s go to the first frame and click on the stopwatch to create a new keyframe.Now let’s go to the end of the last frame and set the brightness value to 24
Step 5
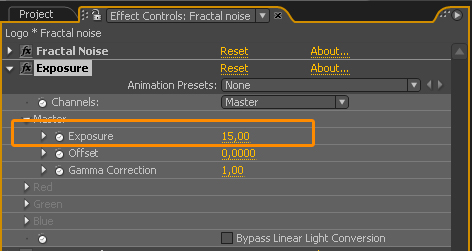
I also add Exposure(Effect->Color Correction->Exposure) to overbright the scene.Without it you will discover semmi-transparent points on your reveal wich is screw up the whole effect.So set the Exposure to 15 and you will be fine.
Step 6
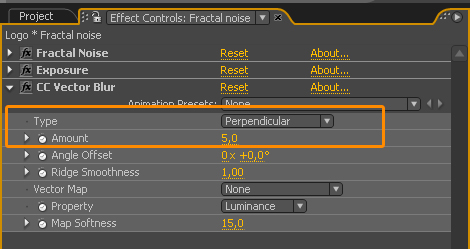
Our ink splatters are too saw-edged now so we have to add CC Vector Blur(Effect->Blur and Sharpen->CC Vector Blur) to make an ink look.
Step 7
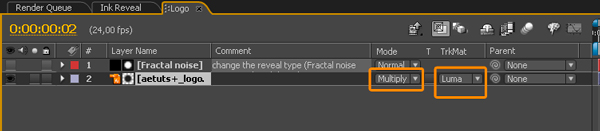
Let’s import the Aetuts+ logo and put it below the fractal noise layer.Set the blending mode to multiply and set the Track Matte to Luma matte.This step is optional so if you want to type in a text or use your own logo maybe your footage then do it.If you don’t see this properties then press the f4 button on the keyboard or just click on the Toggle Switches/Modes button down below.
Step 8
Keep that in mind if you use a vector format as I did then don’t forget to check on the Continuously Rasterize option.

Step 9
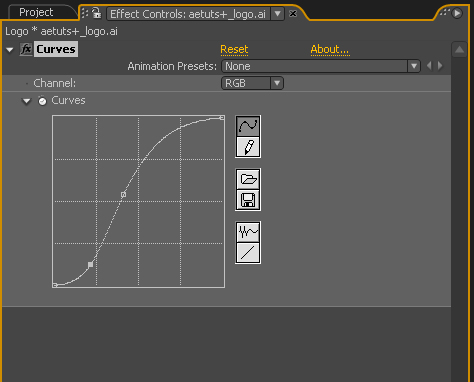
I add a simple curve effect to the logo(Effect->Color Correction->Curves).It’s not necessary but if you use a footage or a picture you will probably want to make a little color correction.
Step 10
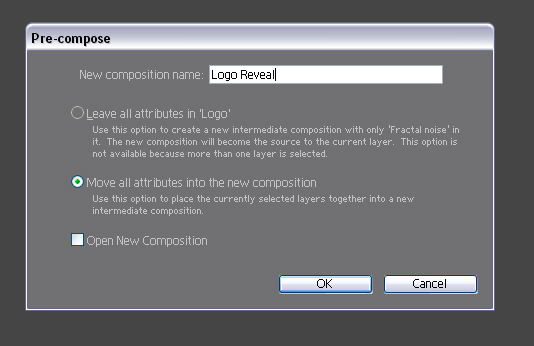
Select both layers and go to Layer->Pre-Compose ,name it as Logo Reveal and select the Move all attributes option.
Step 11
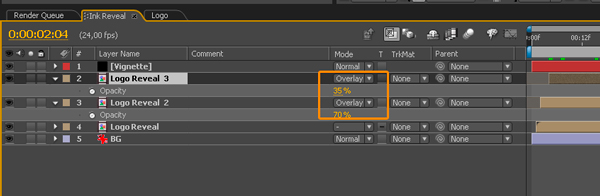
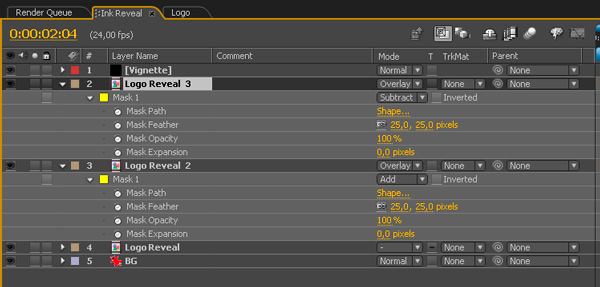
Let’s duplicate the Logo comps and set the blending mode to overlay and offset the layers just a touch.
Step 12
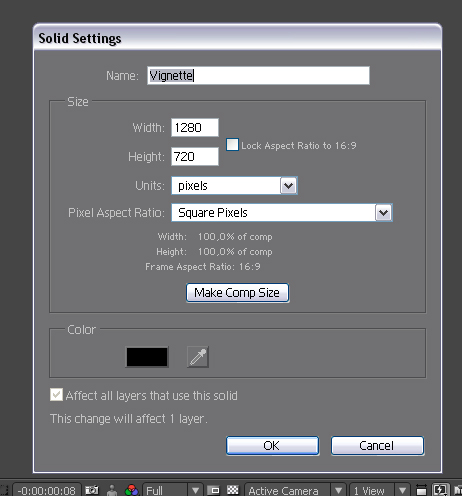
Create a new solid clicking by Menu->Layer->New->Solid. Change the color to black. Make it comp size (1280*720) and name it as ‘Vignette’.
Step 13
Let’s select the Circle effect(Effect->Generate->Circle) and set the following properties to create the vignette effect.

Step 14
I used the Rectangle Tool to create 2 masks. In the logo Reveal 2 comp I selected the half of the logo and copied the mask and paste it in the Logo Reveal 3 comp but this time I set the mask mode to Subtract.This is a subtle change but this will make a little more reallistic ink flow.
Step 15
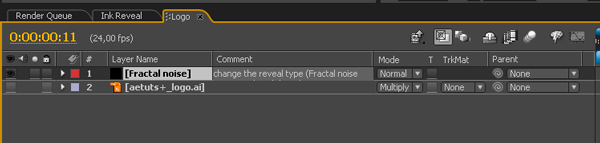
So we done but there is a little extra tip.Let’s go back to the Logo Reveal coposition(Hold down the alt key on the keyboard and double click on it) and turn off the Set matte and the logo layer and turn on the fractal noise layer.
Step 16
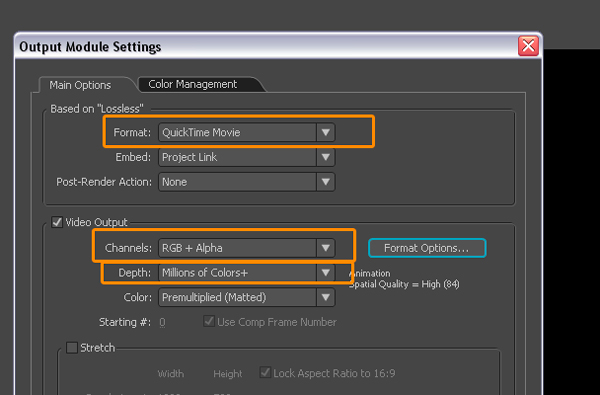
Now go to Composition->Add To Render Queue and set the Output Module.

Step 17
Set the following Output Module Settings and render it.
Step 18
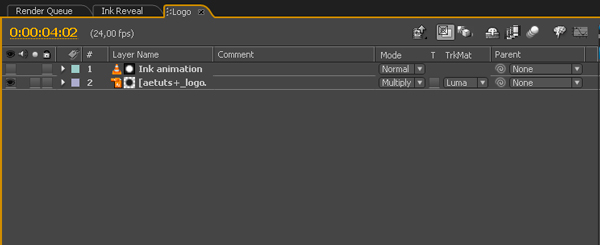
So if you create a whole new composition and import this rendered movie and your logo then you have to set the track matte to the logo file as a Luma matte and you good to go.You have two layers now, it’s more faster and elegant way.
Step 19
Don’t forget to try different Fractal types to get different ink looks.
Step 20
If you add CC Ball Action (Effect->Simulation->CC Ball Action) to the Logo Reveal composition then you will get a similar effect like this .3D Ball Dispersion by Andrew Kramer.If you use this then delete the 2 duplicate composition and add this effect to the fractal noise layer and your logo layer.So I hope you enjoyed this tutorial. My name is Tibor Miklos and thanks a lot for your attention.
Final Result