XNA is a high level game creation framework for Microsoft devices including Windows PCs, Xbox 360, and the brand new Windows Phone 7 operating system. In a previous tutorial, we covered the basics of the XNA framework including handling input and displaying sprites. In this article, you’ll learn how to combine those skills with a game idea of your own to create something fun to play and easy to pick up.
Project Overview
In this tutorial, you’re going to create a simple Tic-Tac-Toe game playable with friends. Tic-Tac-Toe is a simple game in which two players take alternating turns placing characters on a three by three grid. The first player uses an O and the second player uses an X. To win the game, a player must arrange three of their characters into a row, column, or diagonal.
While this game is simple, it requires a couple of different skills to build. First, you’ll be using XNA and its graphics capabilities to build your game. As such, you need to be familiar with displaying sprites. Second, you need to know how to handle touches on the phone’s touchpanel. Luckily, XNA provides a high-level API to access these touches. Finally, you need to apply a bit of programming and logic know-how in order to decide the winner. For this tutorial, much of that will be given to you. When building games in the future you’ll have to come up with your own ideas and logic.
Creating Your Project
To start, make sure you have installed the latest Windows Phone 7 development tools. If you haven’t updated your tools since the last WP7 tutorial on MobileTuts, then you should visit the Microsoft Download Center and get the RTW version. This latest version comes with the final emulator that demonstrates how your apps will work on release day hardware.
After ensuring your tools are up to date, open Visual Studio 2010 and click the “New Project…” link in the left sidebar. In the dialog box that pops up, choose “XNA Game Studio 4” in the left column and make sure that the “Windows Phone Game (4.0)” template is selected on the right. Give your project an appropriate name like “TicTacToe” and confirm that the “Create directory for solution” checkbox is selected. If you’ve done all this correctly, your dialog box should match the following image:
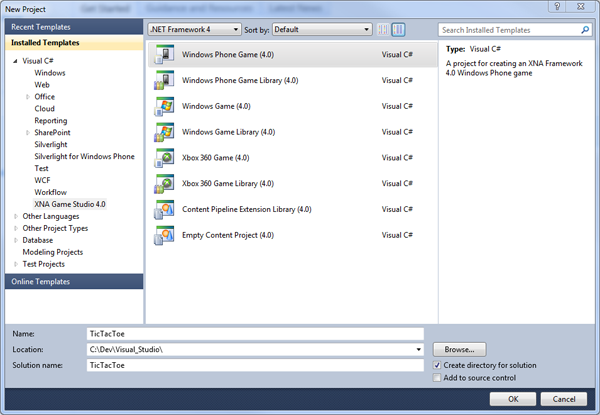
Click “OK” to create your new project. Visual Studio 2010 will generate the necessary files in your specified directory and open Game1.cs for editing.
Import Media Content
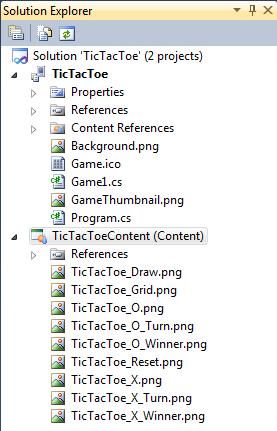
Since you’ll be using sprites for all game graphics in this project, you need to import the required items into your project. In the download accompanying this tutorial you’ll find a Media directory containing a variety of images. In the solution explorer on the right side of the screen, locate the Content project (called TicTacToeContent) and right click on it. From the context menu, select “Add > Existing Item…”. When the dialog opens up, browse to the Media folder that you unzipped from the tutorial download and select all the images contained within it. You should be able to tell from the image names exactly what each item contains.
After importing your media, your solution explorer should resemble the following:
Loading and Assigning Content
Now that your media has been imported into the Content project attached to your solution, you need to load each image as a separate texture. Because you’ll use these textures throughout your game, you’re going to store them in fields inside of your game class. Open the file Game1.cs and add the following fields to the top of your class declaration:
    Texture2D gridTexture;
    Rectangle gridRectangle;

    Texture2D resetButton;
    Rectangle resetButtonPosition;

    Texture2D oPiece;
    Texture2D xPiece;

    Texture2D oWinner;
    Texture2D xWinner;
    Texture2D noWinner;

    Texture2D oTurn;
    Texture2D xTurn;
You see that each of the images you imported has a field to back it up. In addition, the main playing grid and the reset button texture have fields of type Rectangle which will be used to position those items. These are stored as fields because they won’t change over the course of the game.
Now that you have the appropriate fields created, it is time to instantiate the Texture2D and Rectangle objects that are assigned to the fields. Scroll down to your Game1.cs file until you reach the LoadContent method. Inside of this method, insert the following code after the line that reads spriteBatch = new SpriteBatch(GraphicsDevice);:
    gridTexture = Content.Load<Texture2D>("TicTacToe_Grid");
    gridRectangle = new Rectangle(0, 0, spriteBatch.GraphicsDevice.Viewport.Width, spriteBatch.GraphicsDevice.Viewport.Height);

    oPiece = Content.Load<Texture2D>("TicTacToe_O");
    xPiece = Content.Load<Texture2D>("TicTacToe_X");

    resetButton = Content.Load<Texture2D>("TicTacToe_Reset");
    resetButtonPosition = new Rectangle(spriteBatch.GraphicsDevice.Viewport.Width / 2 - (resetButton.Width / 2), spriteBatch.GraphicsDevice.Viewport.Height - 95, resetButton.Width, resetButton.Height);

    oWinner = Content.Load<Texture2D>("TicTacToe_O_Winner");
    xWinner = Content.Load<Texture2D>("TicTacToe_X_Winner");
    noWinner = Content.Load<Texture2D>("TicTacToe_Draw");

    oTurn = Content.Load<Texture2D>("TicTacToe_O_Turn");
    xTurn = Content.Load<Texture2D>("TicTacToe_X_Turn");
Defining the Game Workflow
After loading the sprites that will be used by the game, you need to come up with the workflow that the game will run on. For the purposes of Tic-Tac-Toe, this is quite simple and looks something like the following:
- Draw the playing grid
- Draw the currently played pieces
- Draw the current game status (whose turn it is or if there is a winner)
- If the game has been won or is no longer winnable, draw the Reset button
- If no one has won and the game is still winnable, handle touches on the grid and check for a winner if a touch is made
- If the game has been won or is no longer winnable, handle touches on the reset button
- If the reset button is touched, reset the game
As you can probably tell, these steps fall into one of two basic categories, Draw or Update. Scanning through the Game1.cs file you’ll see that you have two methods, Draw and Update that are the perfect containers for the code required to describe the workflow.
Storing Game State
Looking at the workflow, you can discern that there are four different items to keep track of in order to manage the game state. First, you have to track the state of each grid spot on the playing field. You’ll do this using a custom enumeration and a multi-dimensional array. Next, you have to keep track of whether the game has been won and by who. Third, you must track the whose turn it is. Finally, you must track is whether the game is winnable. This item is initialized as true and is recalculated after each player has a turn. When all the grid spots are filled in, this changes to false.
You’ll start by defining the custom enumeration describing a player for your game. At the top of your class file, above your class declaration, add the following code:
public enum TicTacToePlayer { None, PlayerO, PlayerX }
This enumeration delineates three players (None, PlayerO, and PlayerX) and will be used to track both grid state and the game winner. Now, add the instance variables that will help you track the game’s state. These items should be added at the top of your class declaration:
    bool winnable;
    TicTacToePlayer winner;
    TicTacToePlayer current;
    TicTacToePlayer[,] grid;
You are storing four things here. First, you delineate whether the game is still winnable. Second, you declare the winner. If the winner is None, then play continues. After that, you store the current player. Finally, you store the grid state. At this point, you still need to initialize each of these variables. Thinking ahead, you know that you’ll need to reinitialize them whenever someone clicks the Reset button and, as such, we can create a new method that handles that initialization. Add the new method to your class underneath the Initialize method as follows:
    private void Reset()
    {
        winnable = true;
        winner = TicTacToePlayer.None;
        grid = new TicTacToePlayer[3, 3];
        for (int i = 0; i < 3; i++)
        {
            for (int j = 0; j < 3; j++)
            {
                grid[i, j] = TicTacToePlayer.None;
            }
        }
    }
Now, call this new method from the Initialize method by changing it to read as follows:
    protected override void Initialize()
    {
        Reset();
        base.Initialize();
    }
At this point you are storing all the data you need, so it should be simple to start drawing the interface.
Drawing the Game Interface
Before you start drawing anything, you need to set your preferred width and height for your device. You’ll do this inside of the Game1 constructor. Change it to read as follows:
    public Game1()
    {
        graphics = new GraphicsDeviceManager(this);
        Content.RootDirectory = "Content";

        graphics.PreferredBackBufferWidth = 480;
        graphics.PreferredBackBufferHeight = 800;

        // Frame rate is 30 fps by default for Windows Phone.
        TargetElapsedTime = TimeSpan.FromTicks(333333);
    }
You’ve added statements declaring that you want the back buffer width to be 480 pixels and the height to be 800 pixels. This greatly simplifies drawing the rest of the components for the game.
To keep things simple, you’re going to perform each drawing step inside of a separate method. These methods will then be called from the base Draw method that already exists. Let’s start by thinking of some good names for each of the game workflow steps, creating methods of that name, and adding calls to those methos from Draw. In my opinion, the following method names adequately describes both what they will do and the workflow steps covered:
- DrawGrid — Covers workflow step one and draws the playing grid
- DrawPieces — Covers workflow step two and draws pieces wherever a piece has been played
- DrawStatus — Covers workflow step three and draws the current game status (“O’s Turn”, “X’s Turn”, “O Wins!”, “X Wins!”, or “Draw!”)
- DrawResetButton — Covers workflow step four and draws the reset button
Create these methods now by inserting the following code below your Draw method:
    private void DrawGrid()
    {

    }

    private void DrawPieces()
    {

    }

    private void DrawStatus()
    {

    }

    private void DrawResetButton()
    {

    }
You’ll write the code for these methods in a moment, but for now you need to add them to your Draw method by changing it to read as follows:
    protected override void Draw(GameTime gameTime)
    {
        GraphicsDevice.Clear(Color.Black);

        spriteBatch.Begin();

        DrawGrid();
        DrawPieces();
        DrawStatus();
        DrawResetButton();

        spriteBatch.End();

        base.Draw(gameTime);
    }
You’ll notice that you’ve surrounded the calls to your helper methods with calls to the spriteBatch object’s Begin and End methods. You do this because your helper methods will all be drawing sprites and it is much more efficient to call the Begin and End pair one time inside of Draw rather than inside of each helper method.
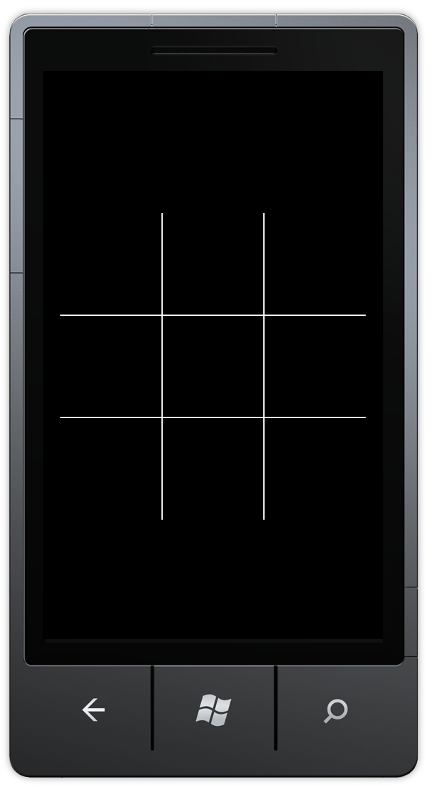
Now, let’s work on getting the playing grid to show up. The playing grid is a 480 pixels wide by 800 pixels tall image with a transparent background and a white grid of squares 150 pixels wide located in the center. You imported it earlier. Drawing it to the phone’s screen couldn’t be easier. You take the texture you loaded and stored into the gridTexture variable and draw it by positioning it using the prevoiusly instantiated gridRectangle variable, passing both items to the spriteBatch object’s Draw method. Change your DrawGrid method to read as follows:
    private void DrawGrid()
    {
        spriteBatch.Draw(gridTexture, gridRectangle, Color.White);
    }
Save the file you’re working in and hit F5 to compile and run your project. The Windows Phone 7 Emulator should show up and display your Tic-Tac-Toe grid on a black background just like the following image:
Now that the grid is in place, let’s draw the playing pieces. At this point we can apply some simple logic to show the pieces but nothing will display until we add the code to actually handle touches and play the game. Modify your DrawPieces method as follows:
    private void DrawPieces()
    {
        for (int i = 0; i < 3; i++)
        {
            for (int j = 0; j < 3; j++)
            {
                if (grid[i, j] != TicTacToePlayer.None)
                {
                    Texture2D texture = grid[i, j] == TicTacToePlayer.PlayerO ? oPiece : xPiece;
                    Rectangle position = GetGridSpace(i, j, texture.Width, texture.Height);
                    spriteBatch.Draw(texture, position, Color.White);
                }
            }
        }
    }
If you’ve got a sharp eye (or more likely, Visual Studio is showing you red squiggly lines) you’ll see that the GetGridSpace method is missing. GetGridSpace is a convenience method that helps keep a bit of code out of the DrawPieces method and will also come in handy when trying to handle touches later on. Add it to the bottom of your class declaration as follows:
    private Rectangle GetGridSpace(int column, int row, int width, int height)
    {
        int centerX = spriteBatch.GraphicsDevice.Viewport.Width / 2;
        int centerY = spriteBatch.GraphicsDevice.Viewport.Height / 2;

        int x = centerX + ((column - 1) * 150) - (width / 2);
        int y = centerY + ((row - 1) * 150) - (height / 2);

        return new Rectangle(x, y, width, height);
    }
Now, let’s look at the rest of DrawPieces. This method is a bit more complicated than the DrawGrid but it should still be pretty easy to understand. You iterate over each row and column of the playing field, stored in the grid variable, and check to see the state of that grid space. If the grid space contains a player other than “None” than draw the appropriate texture. You use the ternary operator to grab the correct texture based on the grid space’s state and then draw it using the rectangle obtained from GetGridSpace.
The next issue to deal with is drawing the current status. The status shows whose turn it is, who won the game, or whether the game is a draw. Fill in the method as follows:
    private void DrawStatus()
    {
        Texture2D texture;
        if (winner != TicTacToePlayer.None)
        {
            texture = winner == TicTacToePlayer.PlayerO ? oWinner : xWinner;
        }
        else if (!winnable)
        {
            texture = noWinner;
        }
        else
        {
            texture = current == TicTacToePlayer.PlayerO ? oTurn : xTurn;
        }

        Rectangle position = new Rectangle(spriteBatch.GraphicsDevice.Viewport.Width / 2 - (texture.Width / 2), 15, texture.Width, texture.Height);
        spriteBatch.Draw(texture, position, Color.White);
    }
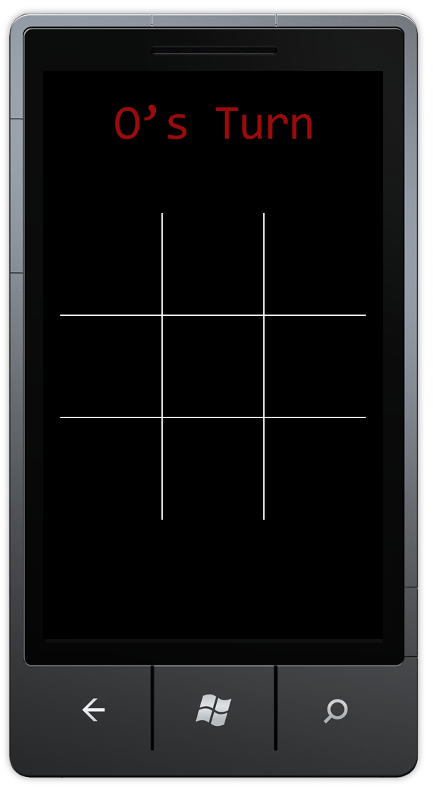
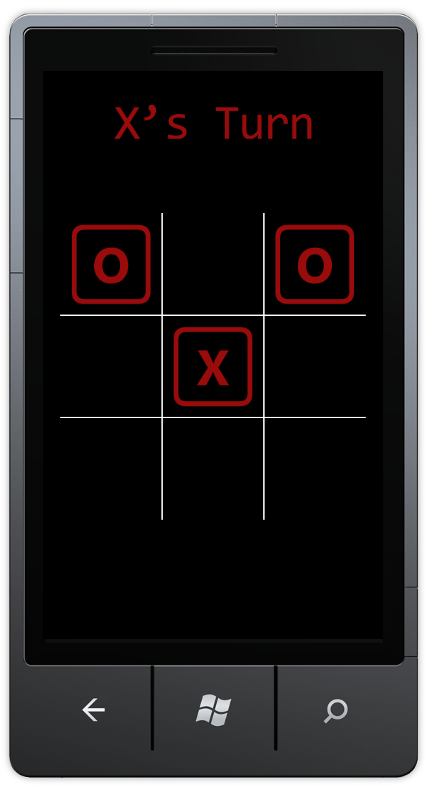
This method doesn’t differ much from the other drawing methods you’ve created thus far. You have a texture and a position and need to draw the texture on the screen. The interesting part of this method is determining what texture to draw. You first check to see if there is a winner. If there is, you choose the correct winner texture and draw that. Then, you check to see if all grid spaces have been occupied and the game is no longer winnable. If that is the case, then you choose the no winner texture and draw that one. If neither of those conditions are true, then you check which player’s turn it is, choose the correct turn texture, and draw that one. If you compile and run your project at this point (by pressing F5), you’ll see that the interface shows it is O’s turn:
Finally, you’re going to create the code that draws the reset button. This is fairly straightforward. If there is a winner or the game is no longer winnable, you draw the reset button texture. Modify the DrawResetButton method so it reads as follows:
    private void DrawResetButton()
    {
        if (winner != TicTacToePlayer.None || !winnable)
        {
            spriteBatch.Draw(resetButton, resetButtonPosition, Color.White);
        }
    }
At this point, you’ve created all the code that is needed for drawing your interface and all its component pieces. Now, you just need to handle updating your game based on touches from the players.
Handling Touches and Updating State
If you followed the last tutorial on XNA, a lot of the following code will look familiar. Handling touches on the screen is something that is pretty standard and it is only inside of the touch handling code that you’ll have your game logic. To start, let’s put the basic touch handling code into the Update method. Find Update in your Game1 class and modify it to read as follows:
    protected override void Update(GameTime gameTime)
    {
        if (GamePad.GetState(PlayerIndex.One).Buttons.Back == ButtonState.Pressed)
        {
            this.Exit();
        }

        TouchCollection touches = TouchPanel.GetState();

        if (!touching && touches.Count > 0)
        {
            touching = true;
            TouchLocation touch = touches.First();

            HandleBoardTouch(touch);
            HandleResetTouch(touch);
        }
        else if (touches.Count == 0)
        {
            touching = false;
        }

        base.Update(gameTime);
    }
There are a few things in this method to pay attention to. First, you’ll notice a new touching variable that doesn’t exist. This variable stores whether or not the player was touching the board on the previous Update call and prevents a lingering finger from playing multiple times without releasing from the screen. Add touching as an instance variable at the top of your class declaration.
bool touching;
You’ll also notice that you’re making two method calls within the Update method to methods that don’t exist yet. Add those methods to your class declaration directly below the Update method:
    private void HandleBoardTouch(TouchLocation touch)
    {

    }

    private void HandleResetTouch(TouchLocation touch)
    {

    }
Now, walking through the Update method you see that you check for current touches on the screen. If there are touches and the player wasn’t previously touching the screen, then you grab the first touch and pass it to the methods that handle board touches and reset touches. If the player is not touching the screen and they were previously, then you update the touching variable to false.
At this point, let’s fill in the HandleBoardTouch and HandleResetTouch methods. These correspond to workflow steps 5 and 6, respectively.
Handling Board Touches
When a user touches the screen the game has to do a few things:
- Check if the touch is within the playing area
- If it is in the playing area, check if the spot being touched is already occupied
- If the spot is not occupied, then place a piece there and check if the current player has won
- If the played piece was the winner, update the game’s status as such. If the played piece occupied the last available spot, mark the game as unwinnable
- Finally, swap the current player
Update the HandleBoardTouch to read as follows, handling all of the above steps:
    private void HandleBoardTouch(TouchLocation touch)
    {
        if (winner == TicTacToePlayer.None)
        {
            for (int i = 0; i < 3; i++)
            {
                for (int j = 0; j < 3; j++)
                {
                    Rectangle box = GetGridSpace(i, j, 150, 150);
                    if (grid[i, j] == TicTacToePlayer.None && box.Contains((int)touch.Position.X, (int)touch.Position.Y))
                    {

                        grid[i, j] = current;

                        CheckForWin(current);
                        CheckForWinnable();

                        current = current == TicTacToePlayer.PlayerO ? TicTacToePlayer.PlayerX : TicTacToePlayer.PlayerO;
                    }
                }
            }
        }
    }
As you can see, this method follows the basic outline above. If there isn’t a winner, it iterates over each grid space, checks if the touch is in that space, checks if the space is open, and then places a piece there. Checking for a winner and making sure the game is still winnable are handled by other methods. Let’s stub out those methods now. Underneath the HandleBoardTouch method, add the following code:
    private void CheckForWin(TicTacToePlayer player)
    {

    }

    private void CheckForWinnable()
    {

    }
For now, leave these methods blank and compile and run your game. Try touching the board by clicking on the emulator and watch the status message change and the playing pieces display. You’re well on your way to a complete game now!
Win Conditions
At this point you get to the real meat of the game, the winning logic. As discussed previously, a winning state occurs when one player’s pieces occupy one of the rows, one of the columns, or one of the two diagonals. The game becomes unwinnable when there is no winner declared and there are no unoccupied spots left. For this game, we’re using a multidimensional array to store the grid’s state and out of the box C# doesn’t provide methods to check rows, columns, or diagonals. Luckily, the language supports an awesome feature called extension methods that you’ll use here to make your code a bit cleaner.
Creating the Helpers
To create the extension methods, you must first create a new class. Click your project’s name in the Solution Explorer and click “Add > Class…”. Name your class MultiDimensionalArrayExtensions and click “Add”. When your new file opens for editing, modify it so your class declaration looks like the following:
    public static class MultiDimensionalArrayExtensions
    {
    }
You’ll see that you’ve added the modifiers public and static to the class declaration. This is needed for creating extension methods. Now, we’re going to create a couple of methods that we’ll need, each of which returns an IEnumerable for easy querying:
- Row – Returns all the items in a particular row
- Column – Returns all the items in a particular column
- Diagonal – Returns all the items in a diagonal
- All – Returns all the items in the multidimensional array
Modify your class again, adding the methods as follows:
    public static class MultiDimensionalArrayExtensions
    {
        public static IEnumerable<T> Row<T>(this T[,] array, int row)
        {
            var columnLower = array.GetLowerBound(1);
            var columnUpper = array.GetUpperBound(1);

            for (int i = columnLower; i <= columnUpper; i++)
            {
                yield return array[row, i];
            }
        }

        public static IEnumerable<T> Column<T>(this T[,] array, int column)
        {
            var rowLower = array.GetLowerBound(0);
            var rowUpper = array.GetUpperBound(0);

            for (int i = rowLower; i <= rowUpper; i++)
            {
                yield return array[i, column];
            }
        }

        public static IEnumerable<T> Diagonal<T>(this T[,] array,
                                                 DiagonalDirection direction)
        {
            var rowLower = array.GetLowerBound(0);
            var rowUpper = array.GetUpperBound(0);
            var columnLower = array.GetLowerBound(1);
            var columnUpper = array.GetUpperBound(1);

            for (int row = rowLower, column = columnLower;
                 row <= rowUpper && column <= columnUpper;
                 row++, column++)
            {
                int realColumn = column;
                if (direction == DiagonalDirection.DownLeft)
                    realColumn = columnUpper - columnLower - column;

                yield return array[row, realColumn];
            }
        }

        public enum DiagonalDirection
        {
            DownRight,
            DownLeft
        }

        public static IEnumerable<T> All<T>(this T[,] array)
        {
            var rowLower = array.GetLowerBound(0);
            var rowUpper = array.GetUpperBound(0);
            var columnLower = array.GetLowerBound(1);
            var columnUpper = array.GetUpperBound(1);
            for (int row = rowLower; row <= rowUpper; row++)
            {
                for (int column = columnLower; column <= columnUpper; column++)
                {
                    yield return array[row, column];
                }
            }
        }
    }
You can see that there isn’t much to these methods. For each one of them, a particular part of the multidimensional array is iterated over and that portion of the array is returned as part of an IEnumerable. The only really tricky part may be the use of the yield keyword. An explanation of the behavior of that keyword is outside the scope of this article, but the C# reference on MSDN for the yield keyword may be of help if you would like to learn more. As a side note, much of the work on these extension methods is taken from a user contribution on StackOverflow which you can find here
Implementing the Win Logic
Now that the necessary extension methods are implemented, it should be quite easy to implement the win logic. Let’s go back to the CheckForWin method and implement it. Update the method to read as follows:
    private void CheckForWin(TicTacToePlayer player)
    {
        Func<TicTacToePlayer, bool> checkWinner = b => b == player;
        if (
            grid.Row(0).All(checkWinner) || grid.Row(1).All(checkWinner) || grid.Row(2).All(checkWinner) ||
            grid.Column(0).All(checkWinner) || grid.Column(1).All(checkWinner) || grid.Column(2).All(checkWinner) ||
            grid.Diagonal(MultiDimensionalArrayExtensions.DiagonalDirection.DownRight).All(checkWinner) || grid.Diagonal(MultiDimensionalArrayExtensions.DiagonalDirection.DownLeft).All(checkWinner)
            )
        {
            winner = player;
        }
    }
Given what you know already from creating the extension methods, this should be fairly simple to decipher. You first create a "Func":http://msdn.microsoft.com/en-us/library/bb549151.aspx object that acts a delegate and allows you to use a lambda statement (that b => b == player part) to query an IEnumerable (like those returned from the extension method) and return a bool. You then apply this Func object across each row, column, and diagonal using the IEnumerable.All method. If any of those cases are true, then you assign the winner instance variable to the player parameter. If none of those cases are true then nothing happens.
Now, modify your CheckForWinnable method:
    private void CheckForWinnable()
    {
        if (winner == TicTacToePlayer.None)
        {
            Func<TicTacToePlayer, bool> checkNone = b => b == TicTacToePlayer.None;
            if (!grid.All().Any(checkNone))
            {
                winnable = false;
            }
        }
    }
This method is very similar to CheckForWin. First, you check to see if the game has a winner. If it does not, you create a Func object that will check whether an item is equal to the TicTacToePlayer None. You then apply this Func against all the spaces in the grid, checking to see if any of the spaces are unoccupied. If none are, then the game is no longer winnable, and you toggle the instance variable winnable.
Finishing Up
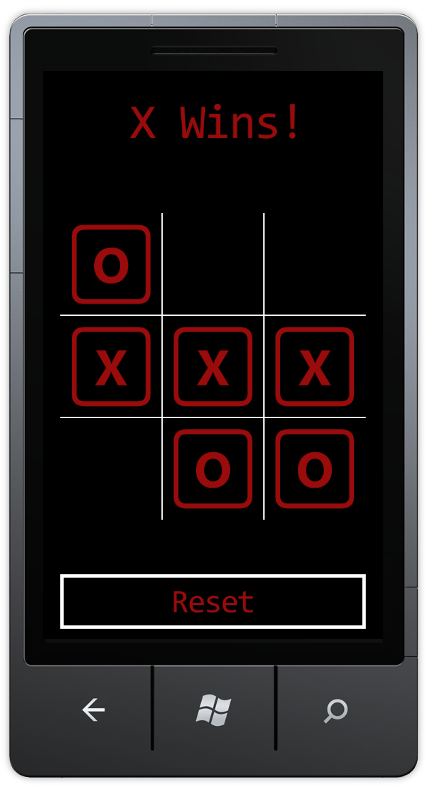
At this point your game is ready to go. You can compile and run your project by hitting F5 and start playing (either by yourself, or with a partner). Take turns placing pieces on the board, watch the status message change and see what happens when you win. Once you win or draw, click the reset button and watch the game revert to its original status.
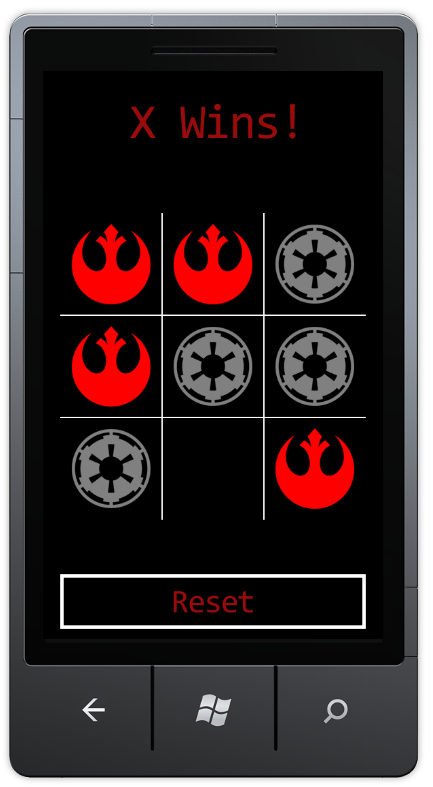
At this point there are a variety of different things you could do. You could implement a winning count that shows how many different times each player has won. You could change the way pieces display, or add a cool animation when a winner is declared. You could theme the game to make it a bit more interesting, perhaps by pitting the Rebel Alliance against the Galactic Empire?
At this point, it is all up to you to expand and develop whatever you want. I hope you enjoyed following this tutorial as much as I enjoyed writing it and look forward to hearing your comments.
where is the accompanying download? Unable to find it. It would have been real helpful to have those media files instead of spending an hour creating sprites myself again.
Where the fuck is the “media” folder download link???? >:(
This is just a tutorial