With Photoshop, just about anything is possible. In today’s tutorial we will demonstrate how to give your yellow Lamborghini a quick paint job. Then, we will add some cool effects. Let’s get started!
Tutorial Assets
Step 1
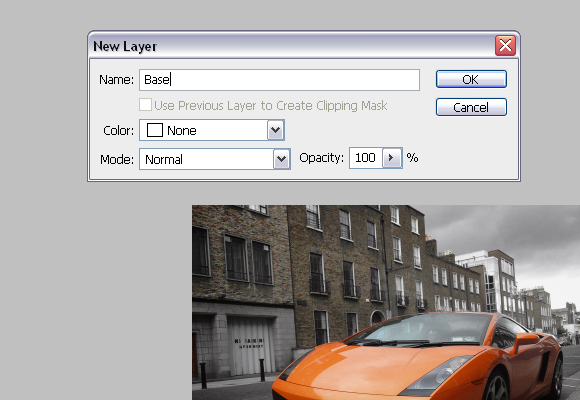
Open the Lamborghini image in Photoshop. Since the image is pretty large, you’ll need to resize it to 1680px by 1050px. To do this, go to Image > Image size or press Cmd/Ctrl + Alt + I on your keyboard.

Step 2
Now, in the Layers palette, you need to unlock the "Background" layer. To do this double click on the "Background" layer, and call it "Base".
Step 3
To finish with adjusting the image size, go to Image > Canvas Size or press Cmd/Ctrl + Alt + C on keyboard. In the Canvas Size windows, in the dropdown menu choose pixels for unit. For Height insert 1050 pixels. Click OK, and click Proceed on the new window, which alerts you that your image is larger than the canvas size.

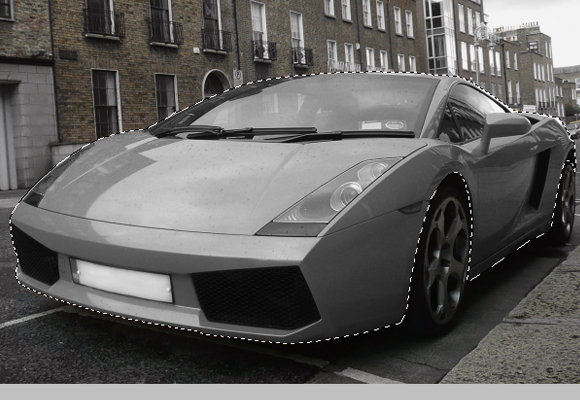
Step 4
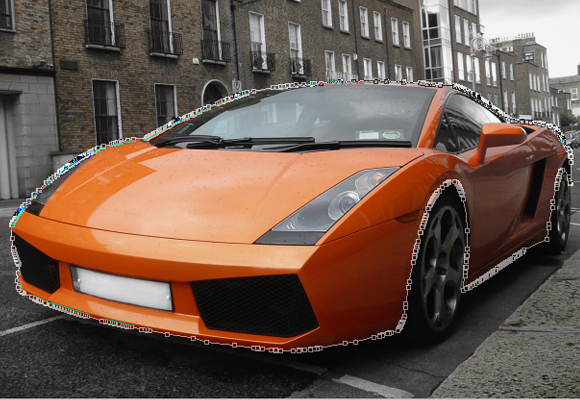
Using the Pen Tool (P), create a path around the car as shown below. Try to be as precise as possible.
Step 5
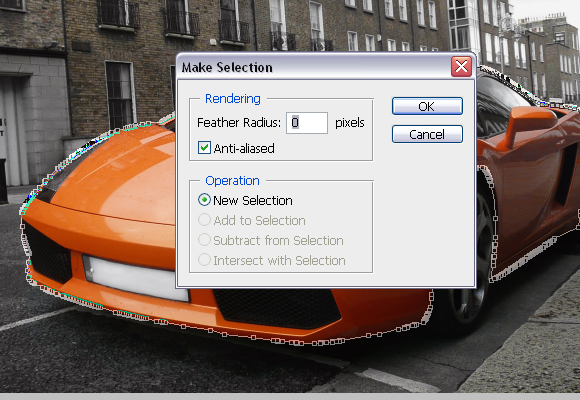
With Pen Tool (P) active right click and choose Make selection. For the Feather radius, set 0px.
Step 6
Usually, when you’re changing car’s colour, this step is not needed but since we are changing car’s colour to black it is. While, the car’s body is selected go to Image > Adjustments > Desaturate or press Cmd/Ctrl + Shift + U. DO NOT deselect yet.
Step 7
Using the Rectangular Marquee Tool (M), right click on the canvas and choose Layer via Copy, and rename the "Layer 1" to "Body".

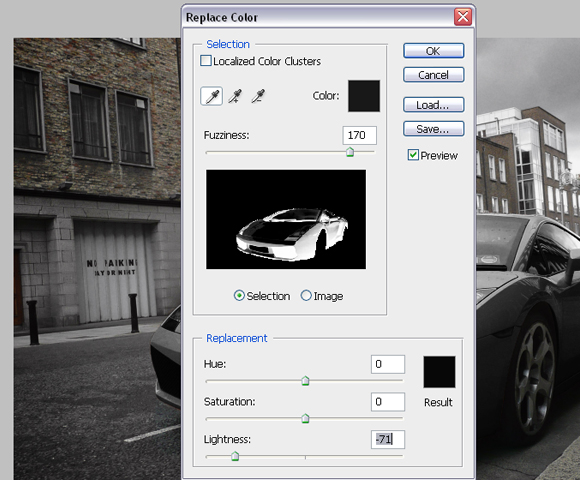
Step 8
Make sure that you’re on the "Body" layer, and go to Image > Adjustments > Replace Color. In the new window set the parameters as shown below, but DO NOT click OK.
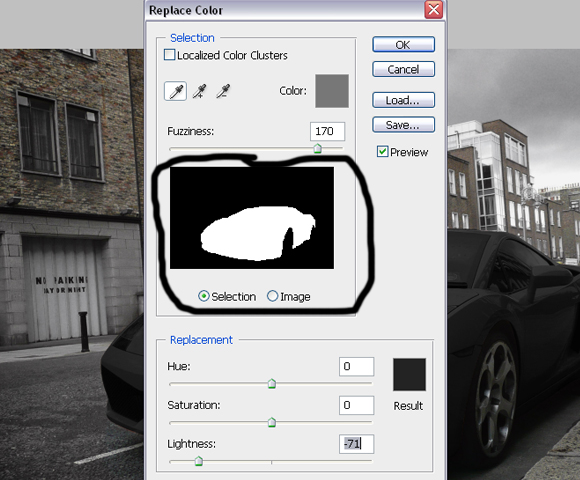
Step 9
Now, click somewhere on the hood to choose the colour to replace, and start adding colours which will be replaced by tones of black. You’ll do this by Shift-clicking on the car’s body (but DON’T click on the glass, lights etc). The selection in the Replace color window should look like below.
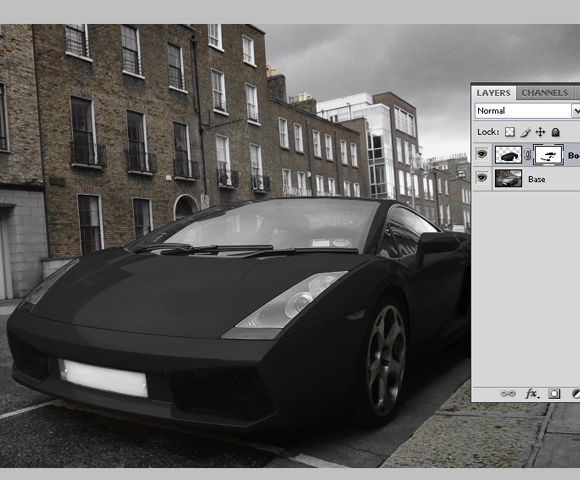
Step 10
Now create a Vector mask for the "Body" layer. Using Pen Tool (P) make paths, which will be used to select registration plates, lights, mirrors and grill.

Step 11
Right click with the Pen Tool on the canvas and choose Make Selection. For the feather radius insert 0px.

Step 12
Using the Brush Tool (B), colour set to #000000, paint over selected areas on the mask of the "Body" layer. Image should look similar as shown below.
Step 13
Now click on the “Base” layer’s thumbnail, and using Pen Tool (P), same as before, create path around rims of the car, right click, go to Make Selection, Feather radius to 0px, and click OK.

Step 14
With Rectangular Marquee Tool (M) right click on the canvas and choose Layer via Copy. Rename created layer to “Rims”.

Step 15
Now, while you’re on the "Rims" layer, go to Image > Adjustments > Replace color and this time set the Lightness somewhere around -60. Shift-click on the different parts of the rims to add more sample colours which are going to be replaced. The result should look as shown below.

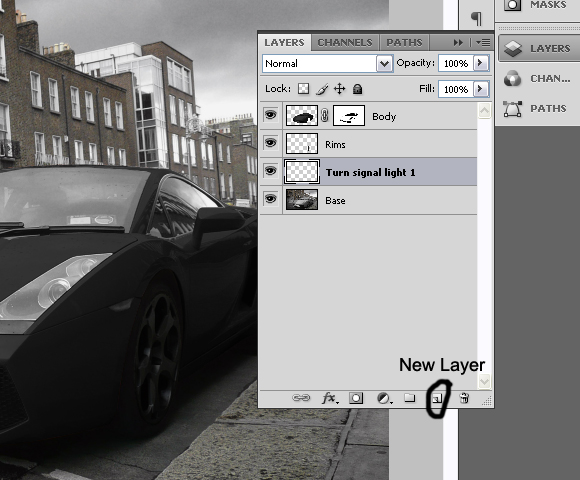
Step 16
Create new layer, just above “Base” layer and call it “Turn signal light 1″.
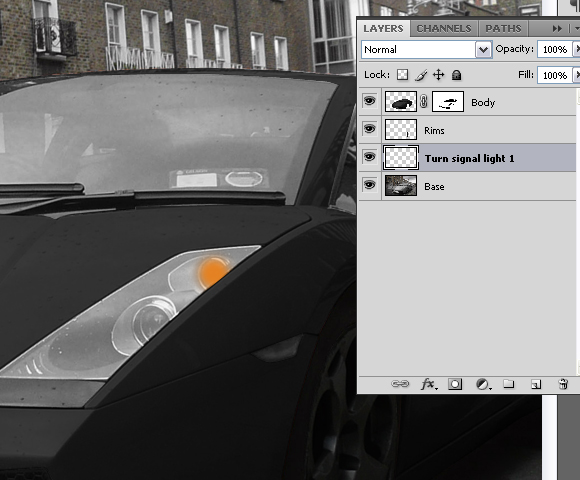
Step 17
Using Brush Tool (B), with colour set to #e48223, Brush size 34px, Hardness 0%, paint on the turn signal light on front of the car as shown below.
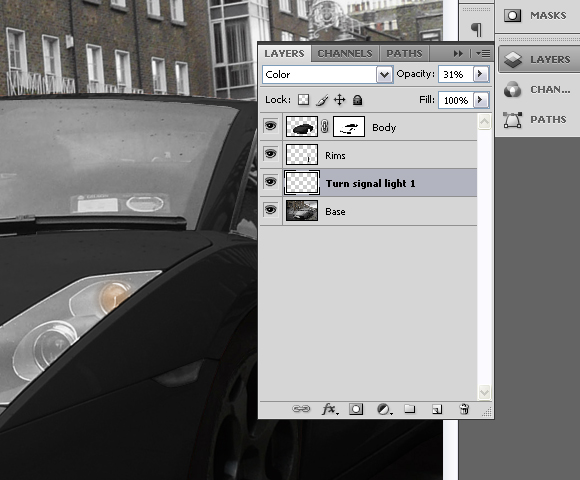
Step 18
Now change the Blending mode for the layer “Turn signal light 1″ to Color and set the layer’s opacity to 31%.
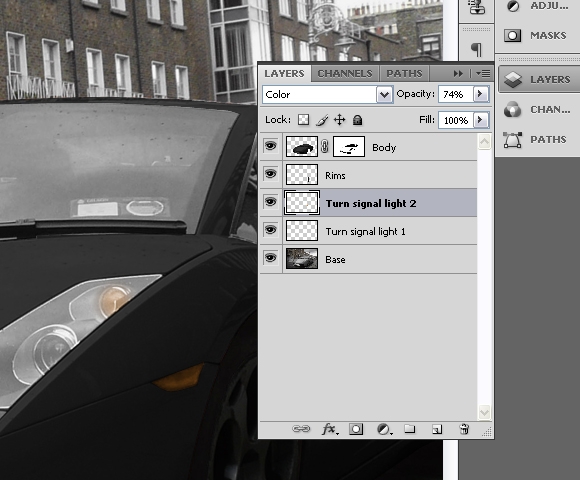
Step 19
Create another layer above the “Turn signal light 1″, and call it “Turn signal light 2″.

Step 20
Again, using the Brush Tool (B), with colour set to #e48223, Brush size 34px, this time Hardness set to 100%, paint over the turn signal on the side of the car as shown below.

Step 21
Set the Blending mode for the “Turn signal light 2″ to Color and layer’s opacity to 74%.
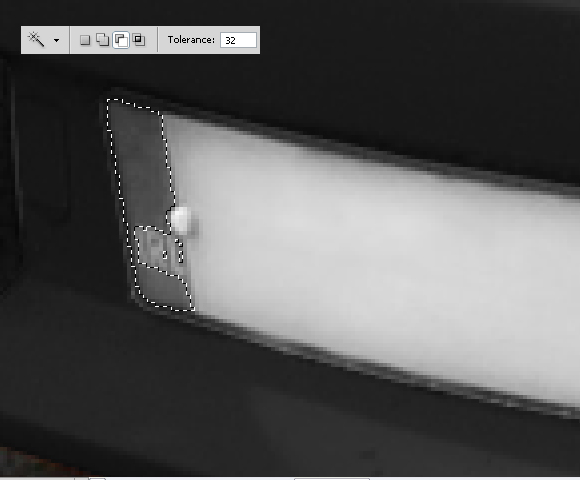
Step 22
Set “Base” layer active (click on the layer’s thumbnail) and using Pen Tool (P) create path around the coloured part of the license plate. Right click, choose Make Selection and set Feather radius to 0px.

Step 23
With Magic Wand Tool (W), and Substract from selection set, click on the letters until you deselect them from the selection.
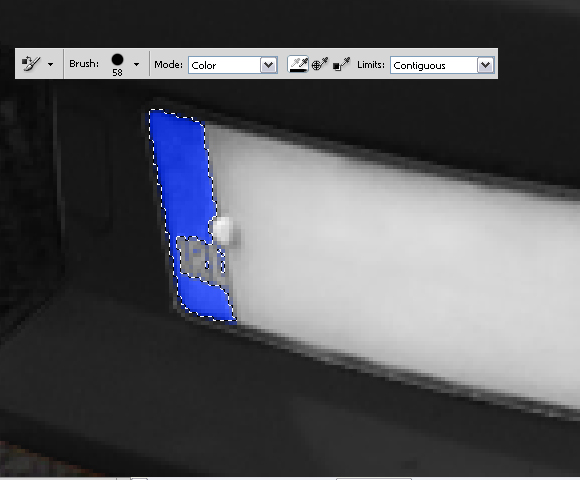
Step 24
With Color Replacement Tool (B), with large brush, 100% Hardness, and colour set to #2343e4 paint over the selection until you finish with the following results.
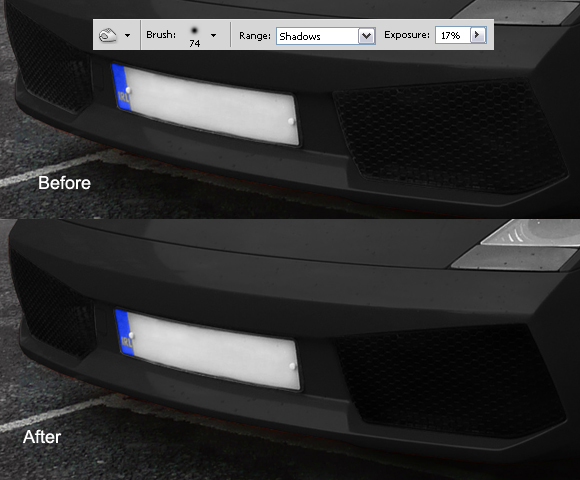
Step 25
Now deselect by going to Select > Deselect or by pressing Cmd/Ctrl + D on keyboard. Using the Burn Tool (O), Range set to Shadows and Exposure to 17%; burn the grill on the front side of the car as shown below.
Step 26
While still on the "Base" layer Cmd/Ctrl-click on the "Body" layer’s mask thumbnail to select mask. Go to Select>Inverse or press Cmd/Ctrl + Shift + I. You can use the Polygonal Lasso Tool (L), with Subtract from selection set, subtract everything except the windows from selection.

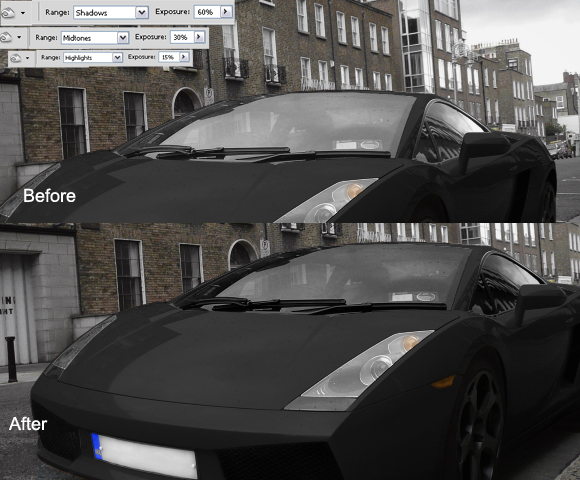
Step 27
Using Burn Tool (O), Range set to Shadows and Exposure to 60% paint over the selection with big hard brush. Don’t deselect yet. Now, change the Range to Midtones and Exposure to 30%, and paint over the selection again. And finally, change Range to Highlights and Exposure to 15%, burn over the selection and deselect it by pressing Cmd/Ctrl + D or going to Select > Deselect.
Step 28
Again, using the Burn Tool (O), Range set to Shadows and Exposure to 60%, Brush size 60px and Hardness 15% burn the wheels, space between car and the wheels and shadows under the car.
Step 29
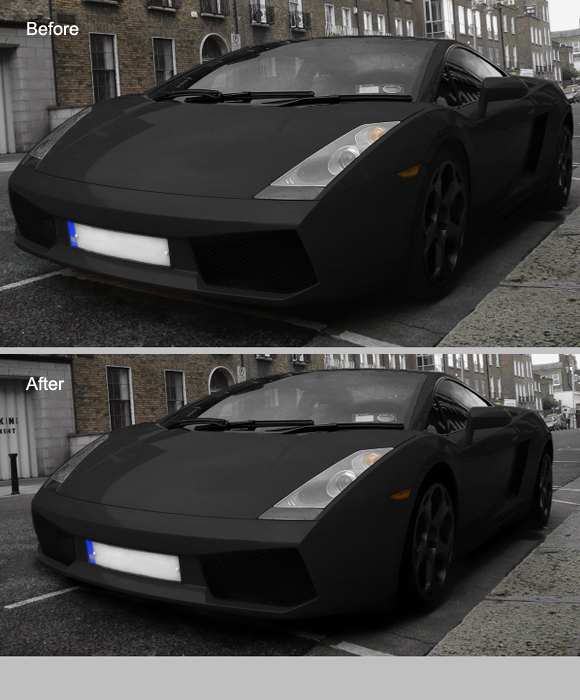
Select all layers, click the right click in the Layers pallet and go to Merge Layers. Rename the layer to the “Final Image”.
Step 30
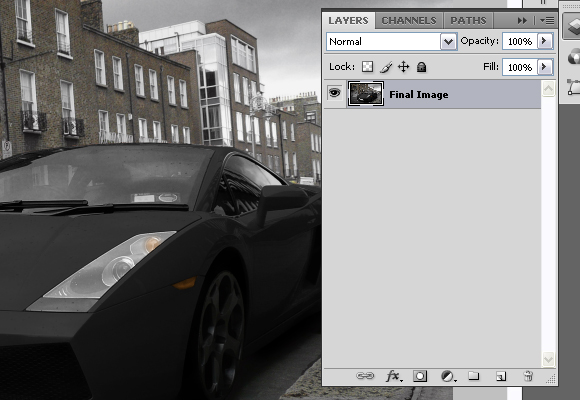
Duplicate the layer by pressing the Cmd/Ctrl + J on the keyboard. Now, while on the copied layer go to Filter > Blur > Motion Blur and set the settings as shown below.

Step 31
Add a Vector mask for the copied layer, and using the Brush Tool (B), with pure black colour, diameter set to pretty high (around 130px) and Hardness to 0%, paint on the mask. The goal is to have blurred only the right part of the image, but not the Lamborghini as shown below.
Step 32
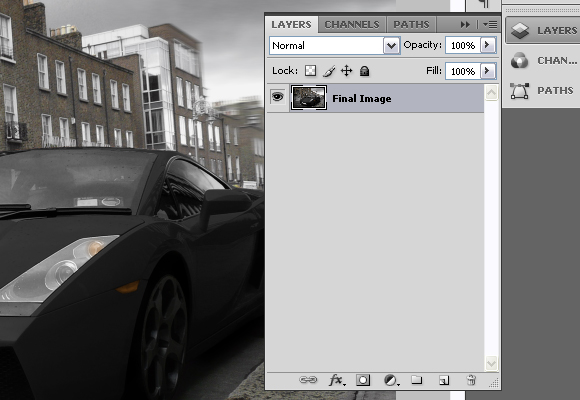
Again, select all the layers, right click in the Layers palette and choose merge visible. Rename the layer to "Final image" again.
Step 33
Now, using the Burn tool (O), Range set to Shadows, Exposure to 16%, Diameter 453px and 0% Hardness, burn entire image slightly.
Step 34
Now, let’s create the final effect and finish the tutorial. Go to Filter > Distort > Lens Correction. In the Vignette section, for the Amount set -100 and for the Midpoint + 28 and press OK.

Step 35
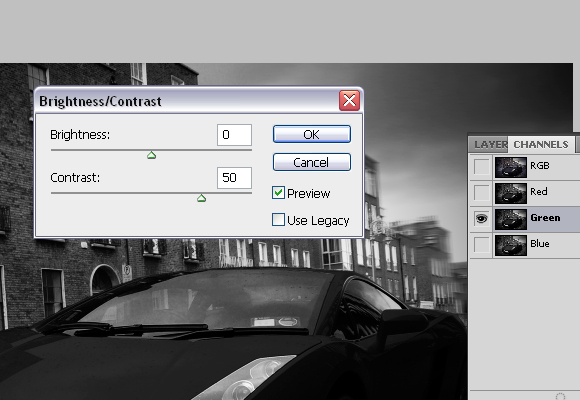
Go to Channels palette and choose "Red" channel or press Cmd/Ctrl + 3 on keyboard.

Step 36
Go to Image > Adjustments > Brightness/Contrast and for the Contrast set 50, and press OK.
Step 37
Select "Green" channel or press Cmd/Ctrl + 4, and go to Image > Adjustments > Brightness/Contrast and for the Contrast set 50 again and press OK.
Step 38
Now, go back to RGB mode or press Cmd/Ctrl + 2.

Step 39
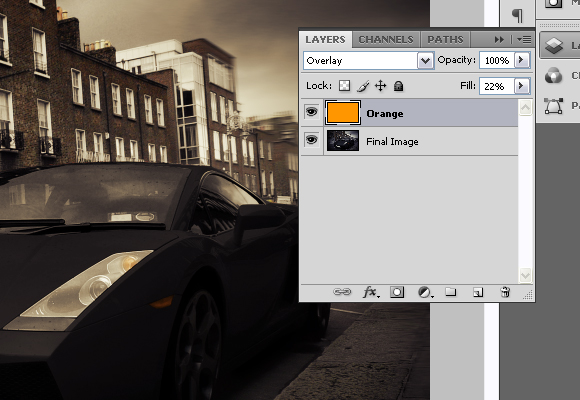
Create new layer, and rename it to “Orange”. Using Paint Bucket Tool (G), with colour set to #ff9600 fill the new layer. Set the Blending mode for the “Orange” layer to Overlay and Fill to 22%.
Step 40
Now using Type Tool (T), in the upper left corner type “Lamborghini”. Go to Character window and for font set “Champagne”, for size 100pt.

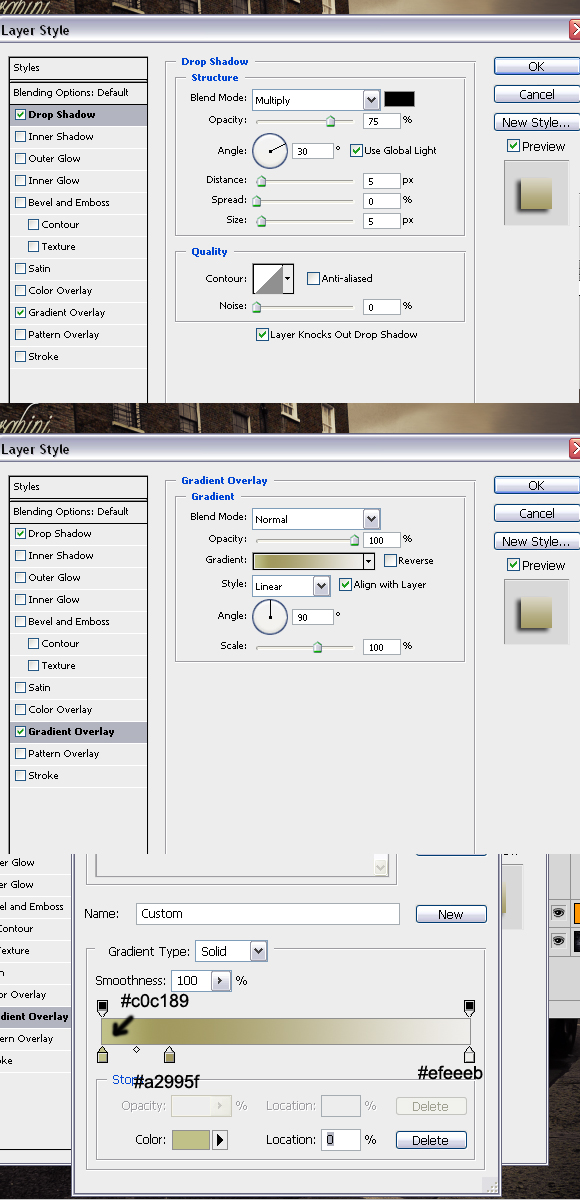
Step 41
And finally, right click on the text layer and go to Blending options and set the following values.
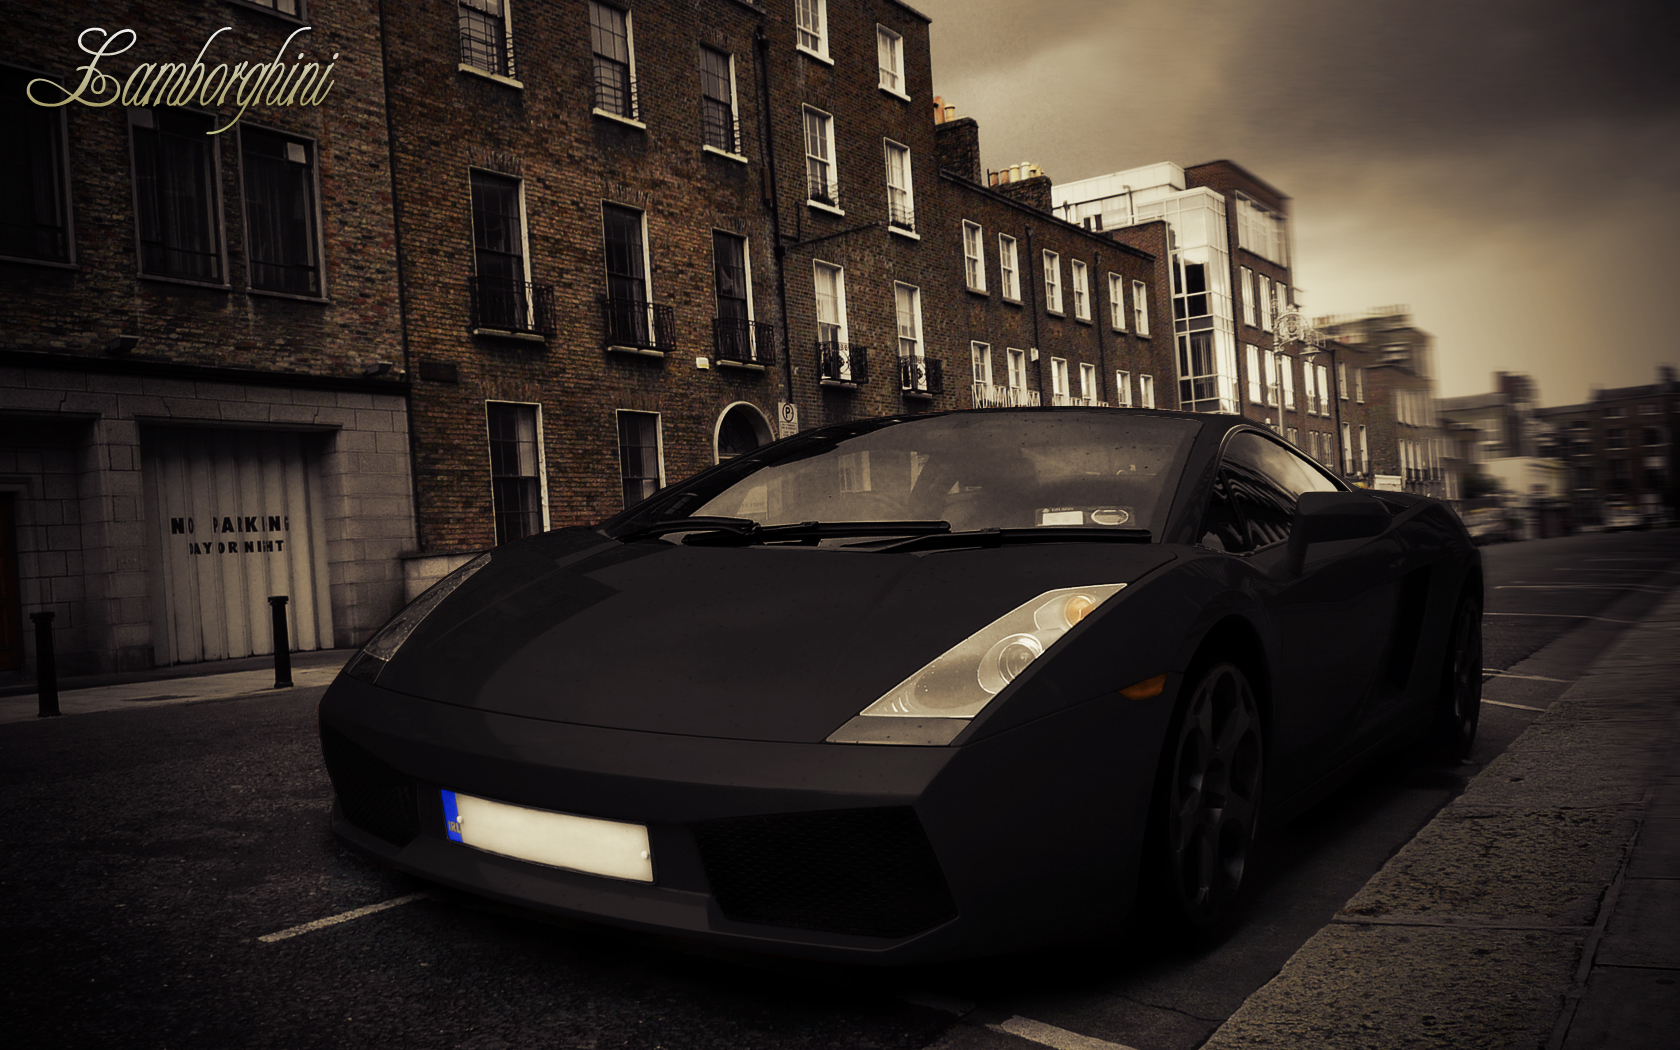
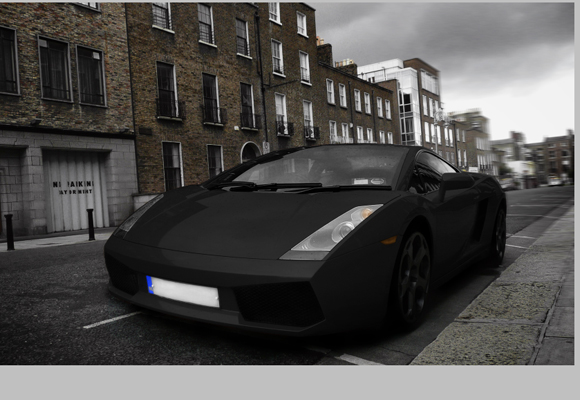
Final Image
The final effect can be seen below. Thanks for reading the tutorial and I hope you liked it.