
Of all the mammals, grizzly bears are one of the easiest to draw—they are big and plump, with thick fur concealing the silhouette, and they’re plantigrade, so their legs are similar to ours. Moreover, their characteristic face with tiny eyes and a huge muzzle makes it easy to keep the proportions right. So, even if you’re a complete beginner at drawing, you can safely try drawing a realistic bear with me!
This is going to be a very simple tutorial about drawing a bear in a single pose. If you want to learn more about drawing bears, their anatomy and species, try this tutorial instead:

1. How to Start a Drawing of a Bear
Proportions are the key to a realistic drawing of an animal. If the legs are too short or the head too small, even the most elaborate details will not make it look good.
That’s why we should start every drawing with a rough sketch of the proportions before we invest any time in the details. Such a rough sketch can show us the whole silhouette in a simple way, so we can see the mistakes when they still can be fixed.
This rough sketch should be drawn lightly, with subtle lines that can be easily erased. Draw this way until I tell you to change the technique.
Step 1
Sketch an oval. It doesn’t need to be perfect or drawn with a continuous line. This will be the huge body of our bear.

Step 2
Divide the height of the oval into halves.

Step 3
Under the oval, mark a distance slightly shorter than half of the oval’s height. This will show us how high the body is over the ground and will create a proper proportion between the torso and legs.

Step 4
Draw a “perspective cross” under this line. This will show us the perspective of the scene and help place all the elements of the body accordingly. Without it, our bear would look flat and boring.

Step 5
Sketch the rhythm of the legs, placing the “paws” on the perspective cross. Draw the whole hind legs and the lower half of the forelegs.

Step 6
Sketch the huge arms and shoulders using a “6” shape.

Remember about the perspective!

Step 7
The length of the neck is one of the trickiest spots when it comes to drawing animal proportions. To keep the bear’s body correct, borrow the length of the neck from the length of the leg.

Step 8
Speaking of tricky spots, the size of the head is another one. Bears don’t really have round heads, but they seem to, so let’s draw this basic silhouette of it first.

Step 9
Let’s set the proportions of the face as well. First, mark the forehead and the eyebrow line. Remember that the head is not flat—you’re drawing in perspective!

Step 10
Draw the line of the nose and the nose itself on the end.

Step 11
Draw the eye sockets. Sketching them instead of the eyes at this point gives us a better picture of the whole face—we can imagine the eyes, the cheekbones, and the eyebrows without actually drawing them.

Step 12
Sketch the width of the nose bridge.

Step 13
Draw the muzzle using a teardrop shape.

Step 14
To better see the 3D form of the muzzle, sketch its flat front.

2. How to Draw a Bear’s Body
Your sketch should already look bear-like, even though it lacks so many details. Look at it closely and try to notice if anything looks amiss. It’s the last moment to fix the proportions! But if you’re happy with them, let’s add the big muscle and fur masses that give volume to the body.
Step 1
Draw wide, upside-down “cups” right above the paws. This will add a proper width to the area.

Step 2
Sketch the width of the paws using the right perspective.

Step 3
Sketch a rough outline of the paws.

Step 4
To add volume to the feet, draw two of their sides. Just sketch them roughly; their shape is not actually that important.

Step 5
Now, the easy part: sketch the outline of the plump legs…

… the thigh…

… and the shoulder hump.

Step 6
Imagine the ears stuck to a headband. Put it on top of the forehead, following the perspective.

Step 7
Draw the cheek-mane that makes the head look so round.

Step 8
Finish the shape of the neck.

3. How to Draw a Bear’s Paws
The paws of a bear are quite unusual in the animal world—they actually resemble human feet! This makes them very easy to draw.
Step 1
Draw a circle in front of each paw.

Step 2
Draw two other circles on both sides of it. Follow the perspective!

Step 3
Draw two more circles slightly behind the former ones.

Step 4
Add the curves of the claws over each circle.

Step 5
Outline the claws. Don’t make them too sharp!

Step 6
Finally, add the paw pad under the claws. They’re not always that visible, but they’ll add some detail to the paws and make the whole drawing more interesting.

4. How to Draw a Bear’s Head
Next step: drawing all the details of a bear’s face. With all the basic proportions already in place, it shouldn’t be too hard, so just bear with me (sorry!).
Step 1
Draw a circle on the end of the muzzle—this will give us a nice outline for the nose.
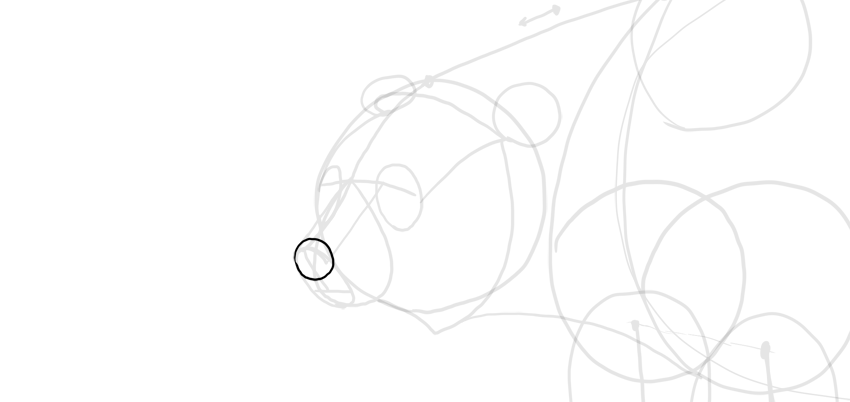
Step 2
“Cut” it in the front.

Step 3
Add the nose holes.

Step 4
Add a detailing shape under them.

Step 5
Outline the whole nose.

Step 6
Divide the rest of the nose bridge into halves.

Step 7
Use this guide line to draw a “heart” on the forehead.

Step 8
Draw the space for the eyes right below the eyebrow—the eyes will be tiny!

Step 9
Time for the actual eyes:

Step 10
Draw the eyelids around the eyes.

Step 11
Give some thickness to the edges of the eyelids.

Step 12
Draw the round pupils.

Step 13
Finish the eyelids.

Step 14
Draw the “eyebrows”.


Step 15
Draw a circle on the front of the muzzle: this is where the whiskers are.

Step 16
Draw the mouth.

Step 17
Add some details to the mouth.

Step 18
Stick a “butterfly” to the whole face to create some guide lines for its final shape.

5. How to Finish a Drawing of a Bear
Even though very complex, these were just the guide lines. Now it’s time to create the actual drawing with all its details! Sharpen your pencil or take a darker tool—we’ll be drawing the serious, visible lines now, so don’t be afraid to press harder.
Step 1
Outline the details using short lines simulating fur. Keep them “open”—don’t outline a whole closed shape by accident when drawing the fur. Don’t try to draw all the single hairs as well—it will look better if you draw “fur masses” instead, “cutting” them from time to time.


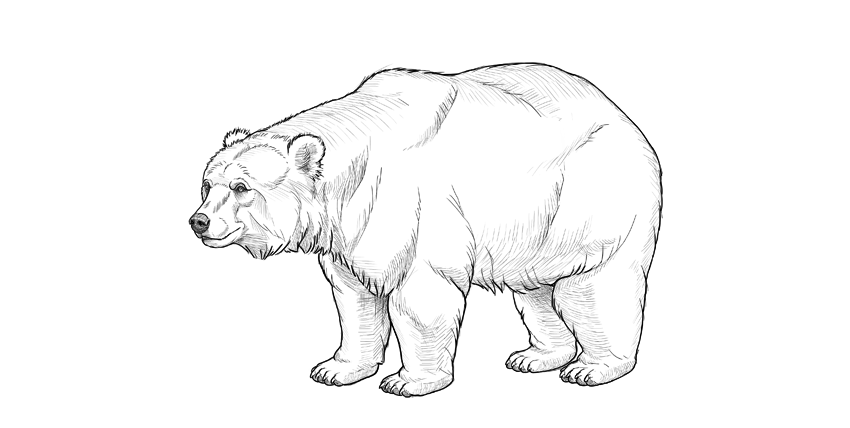
Step 2
After you draw all the details, make the outer outline darker/thicker. This will make the picture more interesting even without colors.

Step 3
Subtly “color” some parts by darkening them. The dark patches around the eyes, for example, are very important for the look of a grizzly bear.

Step 4
If you want to shade your bear, before you start, sketch the areas of shade lightly. This will help you plan it all and avoid mistakes.

Step 5
Shade the bear with simple straight lines accentuating the 3D form of the animal.

Step 6
To make the whole body even more 3D in its look, shade the “top” as well.
Great Job!
Now you know how to draw a bear step by step! If you enjoyed this tutorial and would like to try something similar, we have more simple tutorials on how to draw various animals:
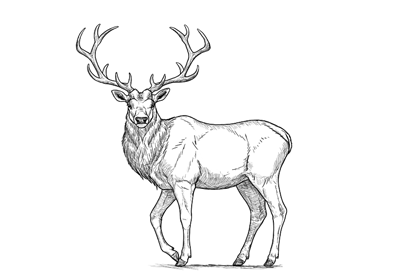 DrawingHow to Draw a Deer Step by StepMonika Zagrobelna
 DrawingHow to Draw a Fox Step by StepMonika Zagrobelna
 DrawingHow to Draw an Elephant Step by StepMonika Zagrobelna
 DrawingHow to Draw a Horse Step by StepMonika Zagrobelna
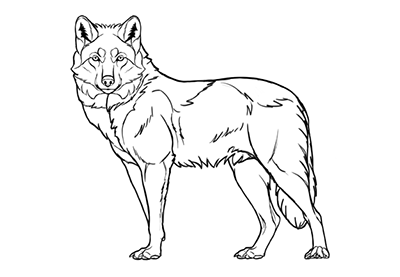 DrawingHow to Draw a Wolf Step by StepMonika Zagrobelna
Or maybe you’re interested in drawing in general? If you want to learn more about using different tools and drawing techniques, you’ll love these tutorials:
 AnimalsHow to Draw Antlers Step by StepEugenia Hauss
 AnimalsHow to Draw Animal EyesMonika Zagrobelna
 NatureHow to Draw a Leaf Step by StepEugenia Hauss
 DrawingHow to Draw a Bird Step by StepEugenia Hauss
 AnimalsHow to Draw an OwlEugenia Hauss
{excerpt}
Read More