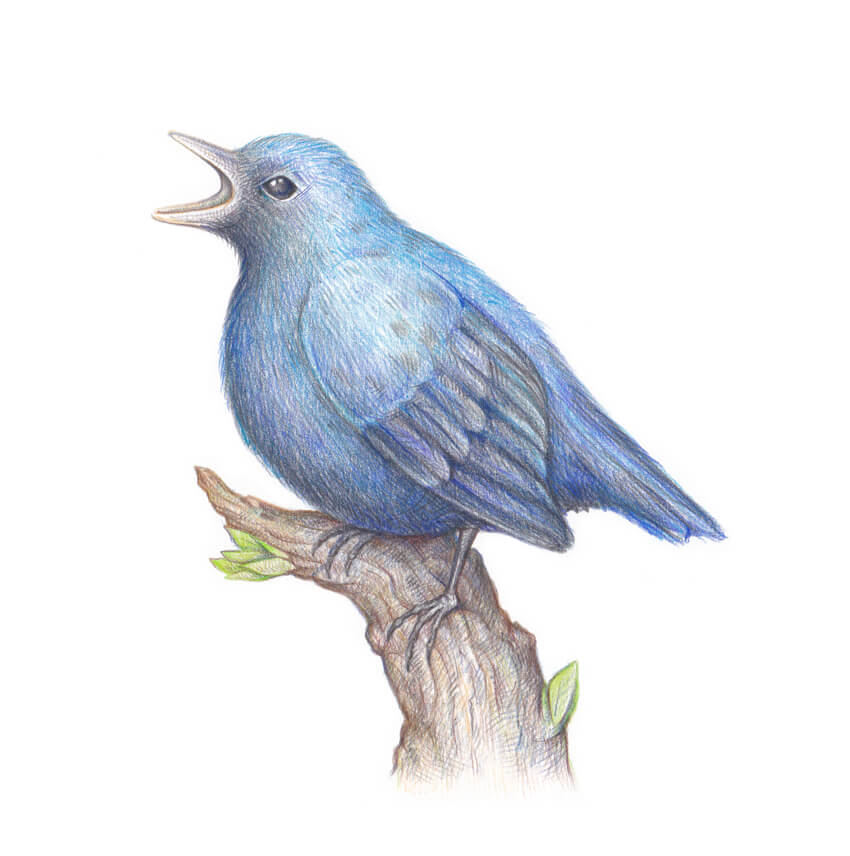
In this tutorial, we’ll draw a singing bird with beautiful blue feathering.
I’ll show you an easy way to create a pencil sketch from scratch, and then we’ll explore the step-by-step process of drawing with colored pencils.
You may also be interested in this great tutorial on bird anatomy.
What You Will Need
You’ll need the following resources in order to complete this tutorial project:
- Two sheets of paper
- A graphite pencil (I recommend an HB or B type)
- An eraser
And pencils of different colors:
- Light grey
- Medium brown
- Light green
- Bright blue
- Medium blue
- Dark blue
- Dark brown
- Black

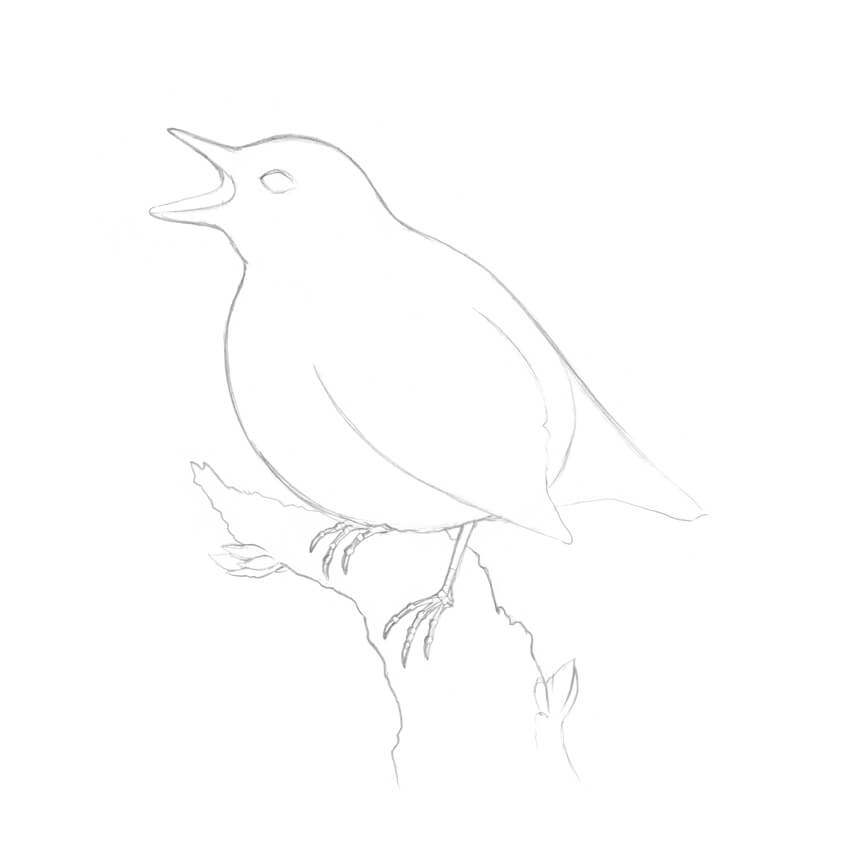
1. How to Draw a Bird With a Graphite Pencil
Step 1
I start with a graphite pencil sketch. I draw two rounded shapes for the bird’s head and body.

Step 2
I draw the rough shape of the beak.

Step 3
I draw the stylized framework of the feet, marking the joints with small circles and adding the claws.

Step 4
I draw the rough shape of the tail; it resembles a triangle.

Step 5
I add the stylized figure of the tree, imagining that the bird is sitting on it. Then I mark the eye of the bird.

Step 6
I refine the bird, joining the head and the body with a smooth, curved line. I also mark the wing and add the back side of the open beak.

Step 7
I refine the shapes of the bird’s feet, based on the framework.

Step 8
I create an outline of the tree, using irregular, organic lines.
I also add two groups of small leaves; they will vary the composition and make the drawing more interesting.
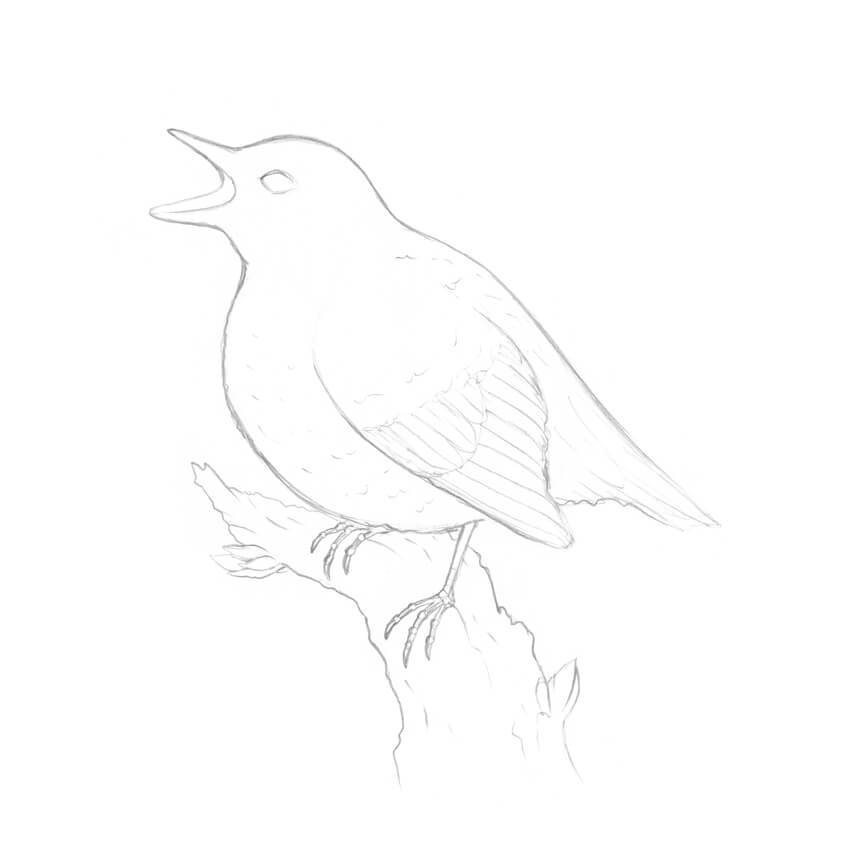
Step 9
I add some details to my sketch, like the feathers in the wing and the nuances of the bark.
This is not an obligatory step; it’s just useful to think over the drawing before delving into the colored pencil part.
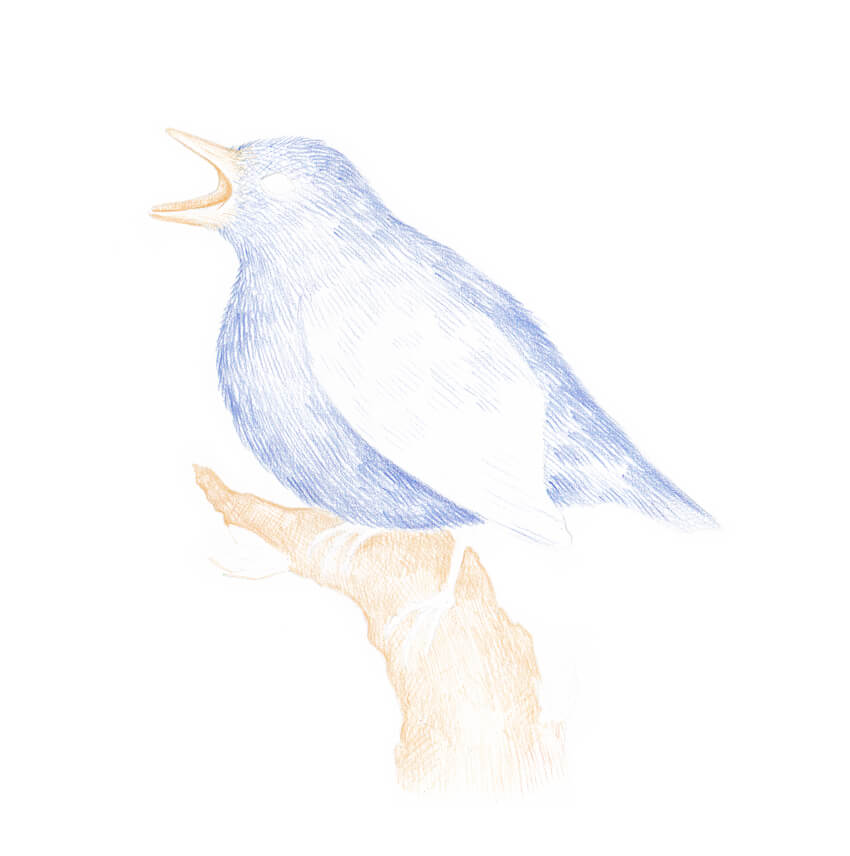
2. How to Draw a Bird With Colored Pencils
Step 1
I transfer the main contours of the drawing onto a blank sheet of paper, using a window.
For this step, I recommend using a light grey pencil from your colored pencils set; this will help to keep the hues in your artwork clean, without the impurity of the graphite strokes.
The lines of the underdrawing are barely visible.

Step 2
With the medium blue pencil, I create the base color layer of the bird’s feathering. I draw long hatches resembling hair or fur.

Step 3
I mark the figure of the tree, using the medium brown pencil. I also add some strokes to the bird’s beak, accenting the inner part of the mouth.
Step 4
I draw the leaves, using the light green pencil. To create a unified look for the artwork, I also add several green hatches to the tree.

Step 5
I use the black pencil to refine the head of the bird, darkening the eye and the area of the mouth.
I also accent the wing’s feathers and the feet, and add some black hatches to the tail. The drawing instantly looks as if we’ve already worked on it for a long time!

Step 6
With the dark brown pencil, I add hatches to the tree, accenting the sides and creating the drop shadow under the bird.
Step 7
I use the bright blue pencil to create beautiful nuances of the feathering. I add the strokes to the bird’s head, back, wing, and tail.

Step 8
I add strokes to the feathering and the drop shadow on the tree, using the dark blue pencil.

Step 9
Using the black pencil again, I add the hatches to the sides of the bird, accenting its three-dimensional look.
I also accentuate the details of the bark and the shadow under the bird’s wing.

Step 10
I add more dark blue strokes to the bird’s feathering to make the color layer thicker.

Step 11
With the dark brown pencil, I add the finishing touches to the artwork, accenting the sides of the tree.

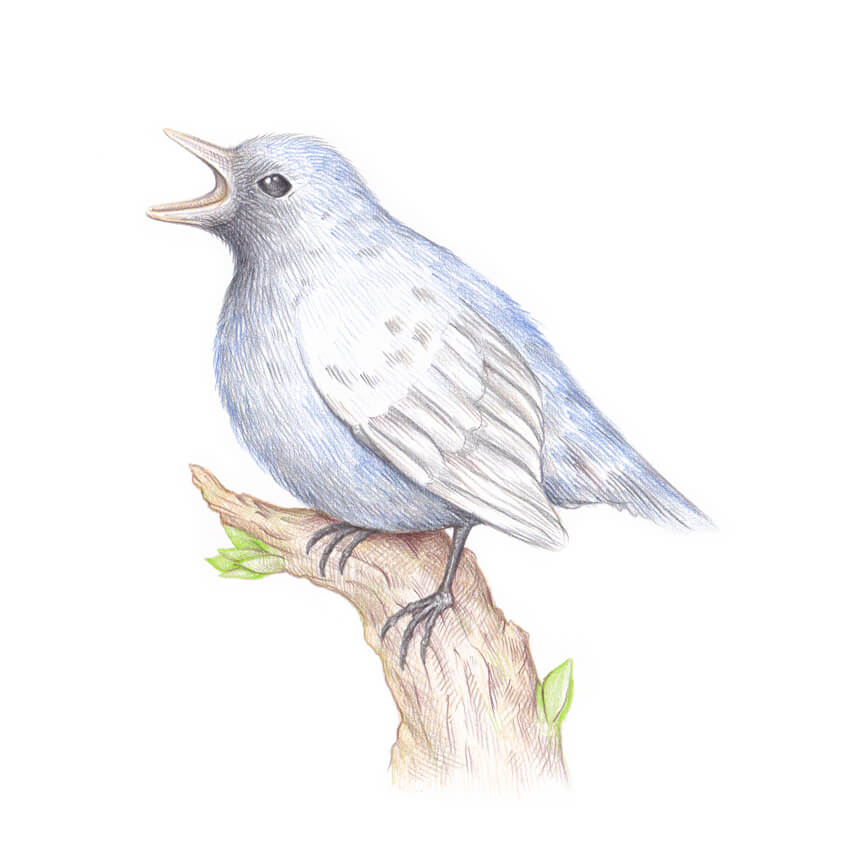
Your Drawing Is Complete
Congratulations! You’ve created an amazing artwork, and I hope you enjoyed the process. May good luck and inspiration always be with you!
{excerpt}
Read More