In this tutorial, you’ll find everything you need to make a Stereoscopic 3D Video, I’ll explain how to make a 3D video with real camera footage or with 3D software (3Ds Max, Blender, Cinema 4D…)
Tutorial
Step 1
Open 3Ds max or any 3D software.
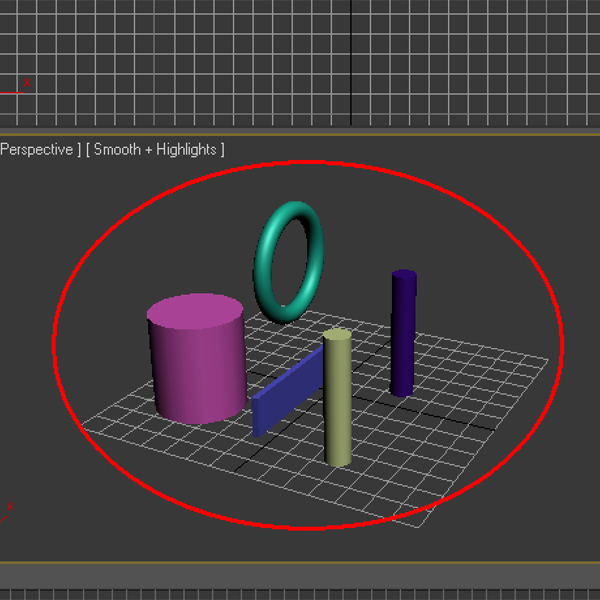
Step 2
Make a scenario (of your choice)
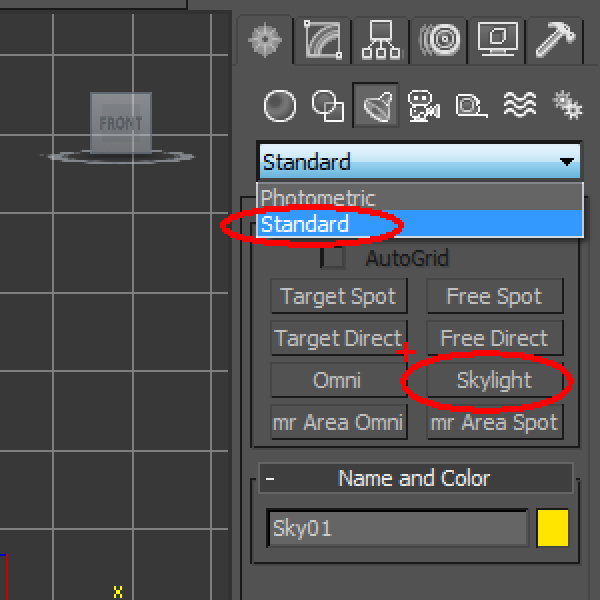
Step 3
Add a nice lighting:
go to "Lights" select Skylight.
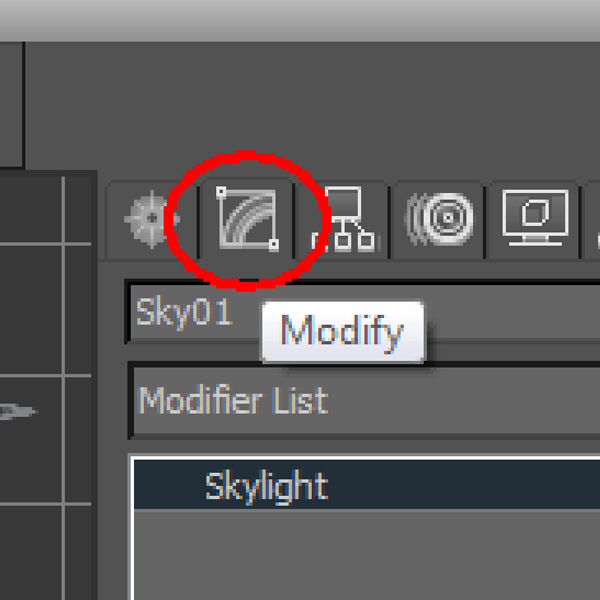
Step 4
Select "Skylight" and go to "Modify"
Step 5
Select "Cast Shadows" in the skylight parameters (That’s all for the lighting).

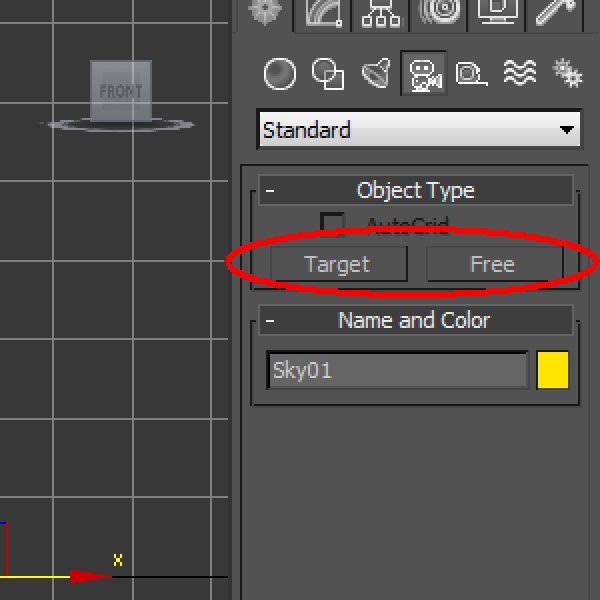
Step 6
Add a "Free Camera" or a "Target Camera".
Step 7
Put the camera in the desired position.

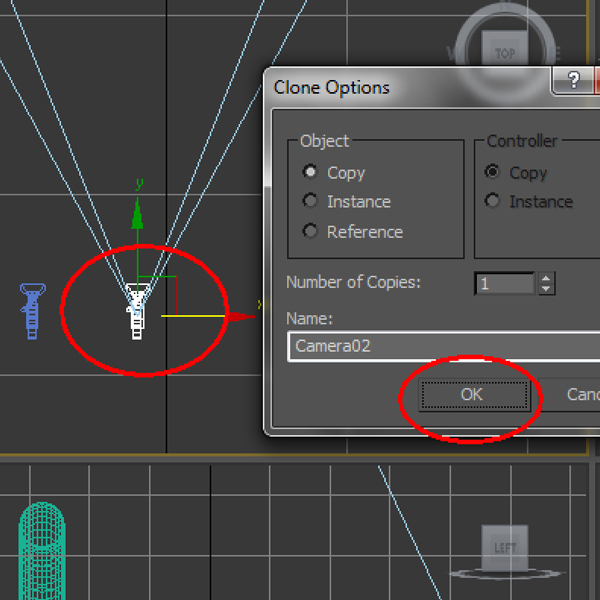
Step 8
Duplicate the camera (the two cameras make you sence the profundity)
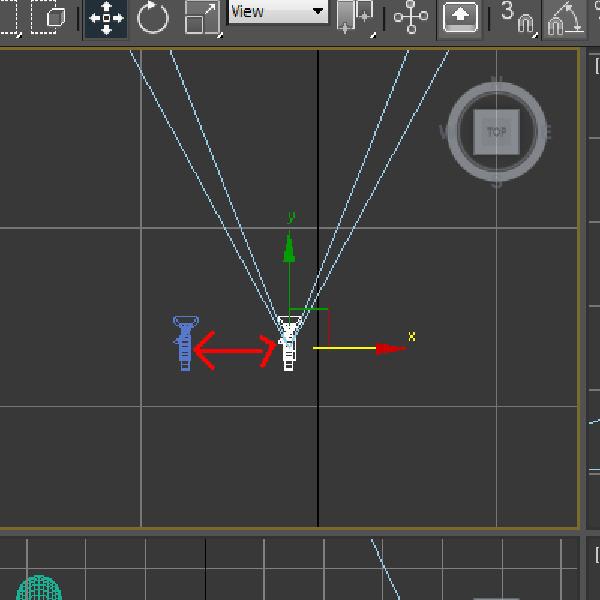
Step 9
Adjust the cameras.
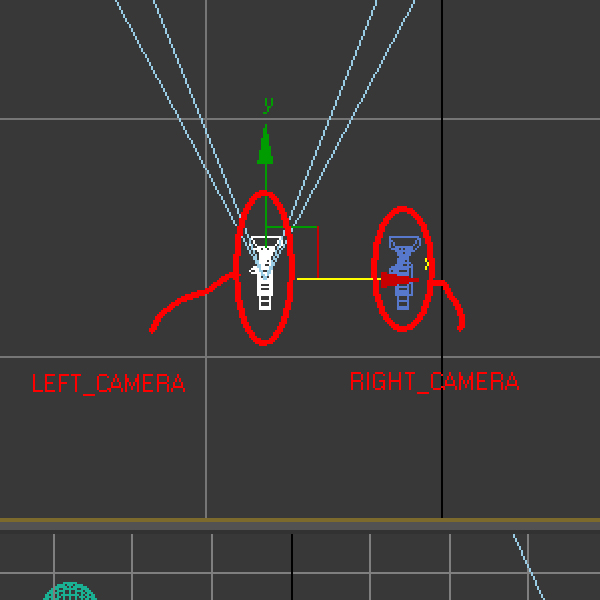
Step 10
Name the cameras "Left_Camera" and "Right_Camera" (So, you can’t get confused).
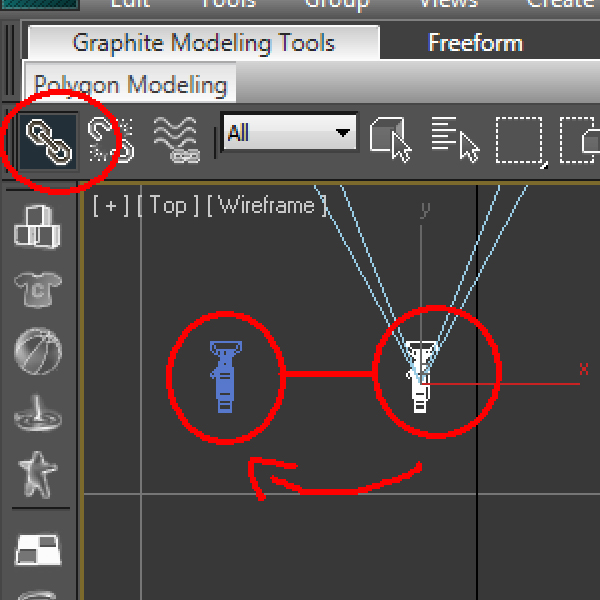
Step 11
Link the "Right_Camera" to the "Left_Camera"
Step 12
Animate your "Left_Camera" or your scenario, depends on what you want to animate.

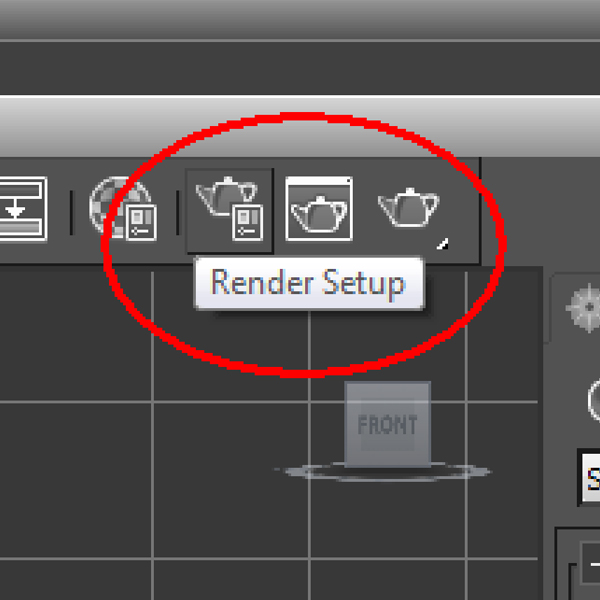
Step 13
Go to "Render Setup"
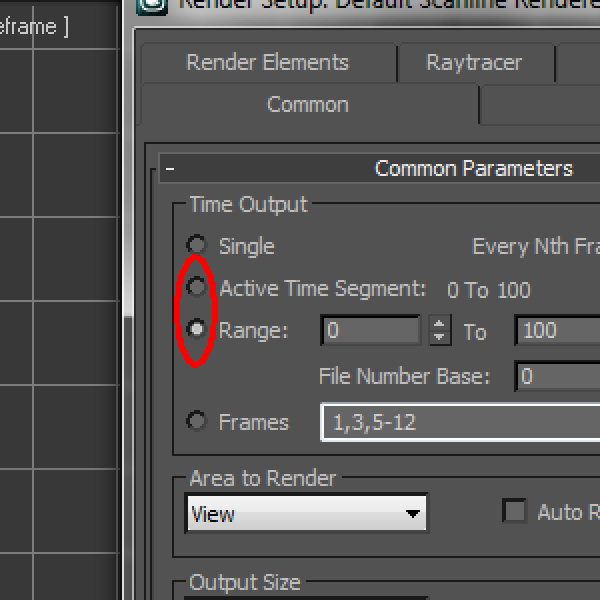
Step 14
Select "Active Time Segment" or "Range"
(Active Time segment: Render all frames
Range: render to a particular frame)
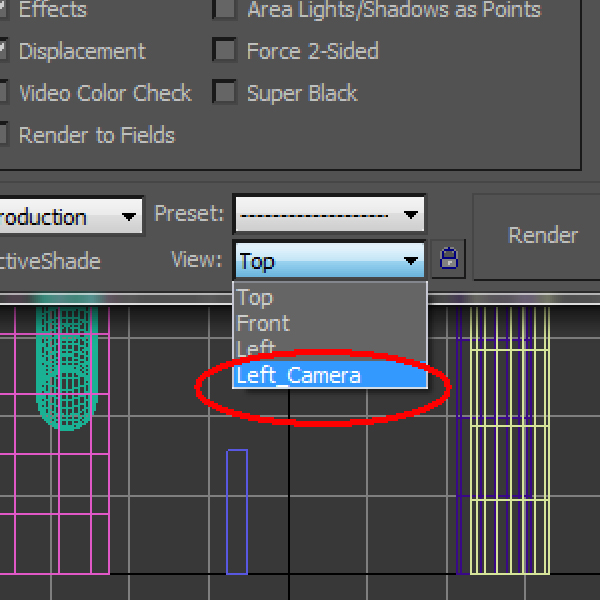
Step 15
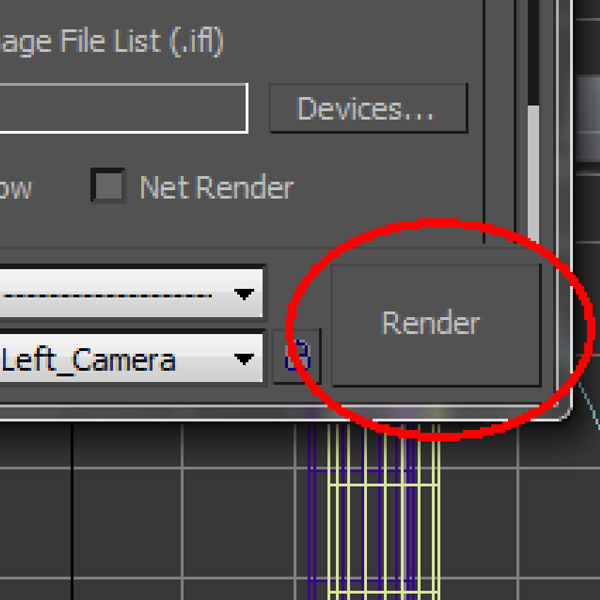
make sure to render with the "Left_Camera"
Step 16
Save the video where you want it.

Step 17
Name the video "Left_Camera"
AVI file

Step 18
Hit "Render"
Step 19
Now, render with the "Right_Camera" and change the name of the video to "Right_Camera"
And RENDER.

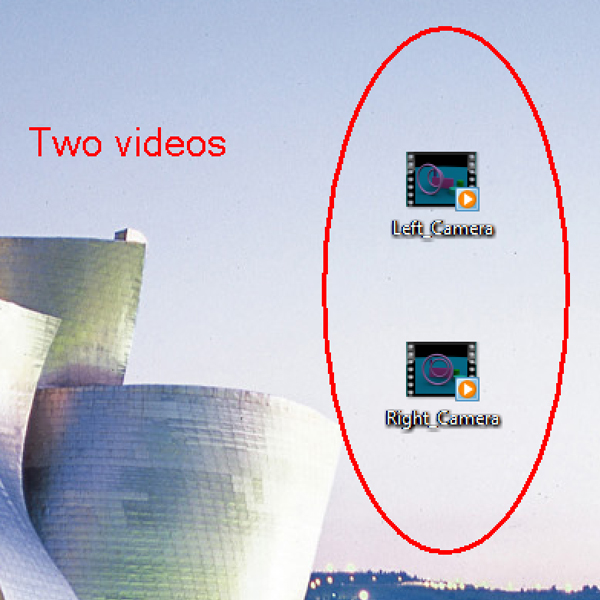
Step 20
Check your videos ("Left_Camera" and "Right_Camera")
Step 21
After Effects:
Make a new composition and Import the Videos ("Left_Camera" and "Right_Camera")

Step 22
Make a new solid (Doesn’t matter the color of the solid)
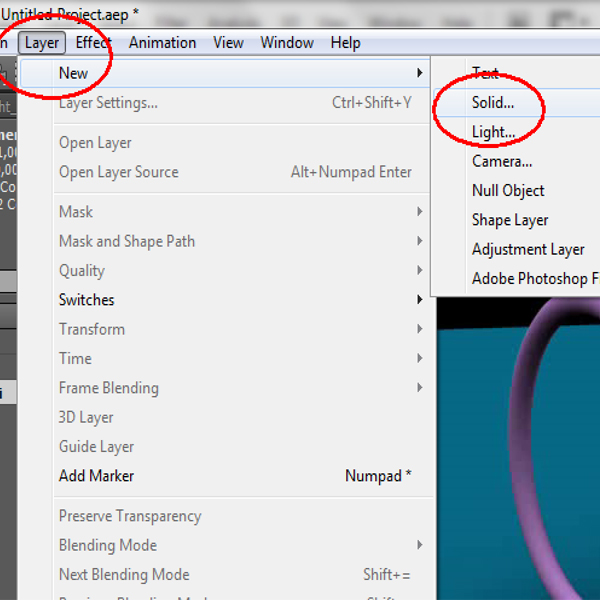
Step 23
Select the solid and go to Effect > Perspective > 3D Glasses.
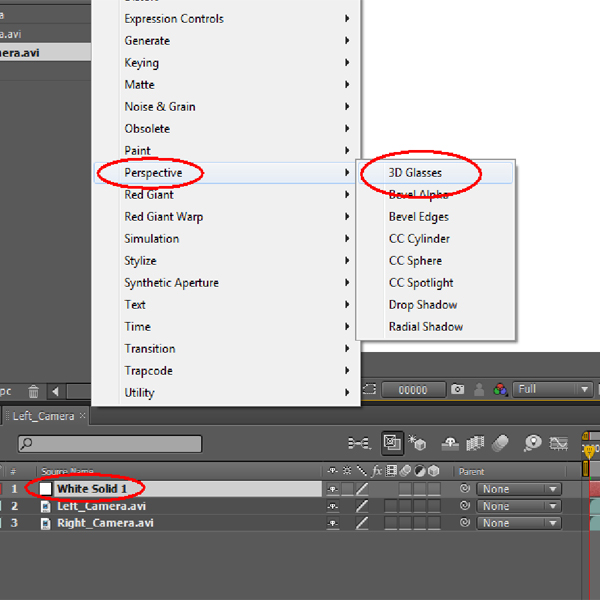
Step 24
In the "Left view" select the "Left_Camera" video
and in the "Right view" select "Right_Camera" .
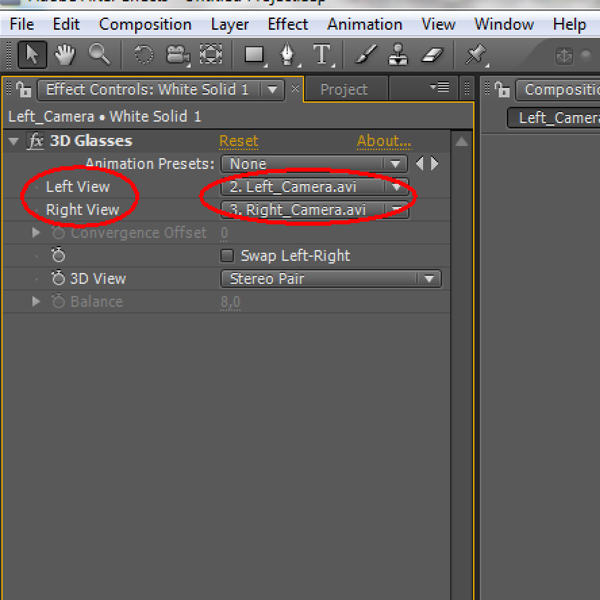
Step 25
Now select "Red Blue LR" and don’t forget to play with the settings.

Enjoy your 3D video!
You can apply this "Two Cameras" technique, in the real life with two cameras.