Photoshop is great for creating resizable, realistic, characters. Thanks to its basic support of vector shapes, its amazing layer styles and the endless possibilities offered by textures we can create compelling vector characters with complex shading while keeping file size to a minimum and performance to a snappy level. In this tutorial we will create a female robot made of simple vector shapes, we will use layer styles to lay down convincing metal shades and a few textures to add a final layer of realism.
Resources
The following resources were used during the production of this tutorial:
Step 1
Create a new blank document, using the size you want. Activate Snap from the View menu with Shift + Command + ; and hit Command + ‘ to turn on the grid.
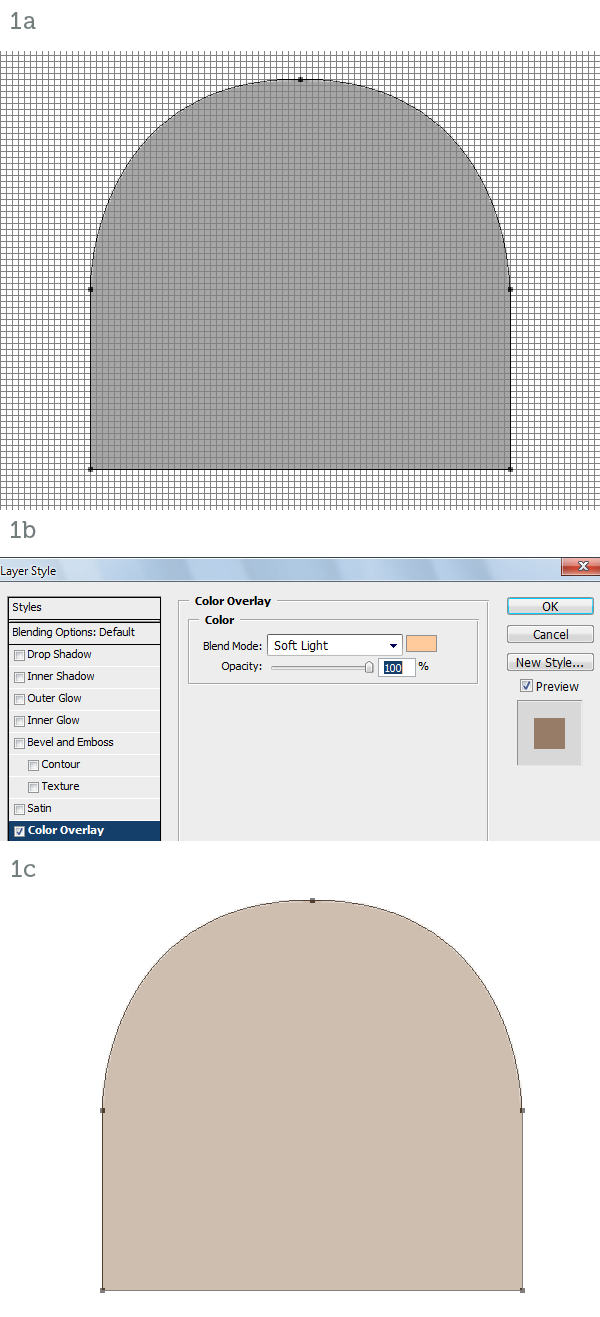
Using the Pen Tool (P) in Shape Layer mode draw the head (1a). Make sure all points snap to the grid and all lines lie on the pixels, not across them. This way we’ll avoid anti-aliasing. Using Color Overlay (1b) make the head light pink (1c).
Step 2
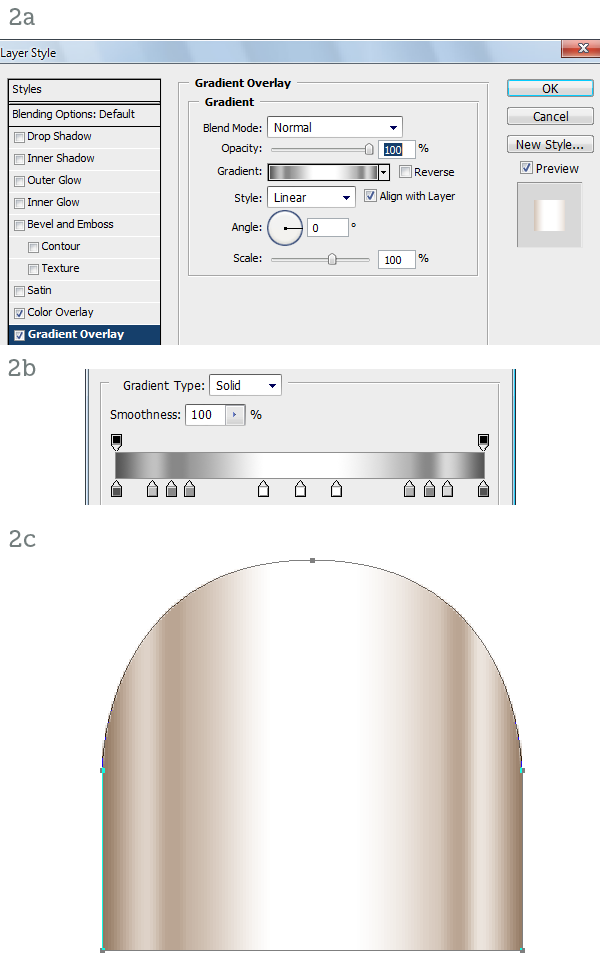
Add a Gradient Overlay style (2a, 2b) to simulate metallic reflections (2c).
Step 3
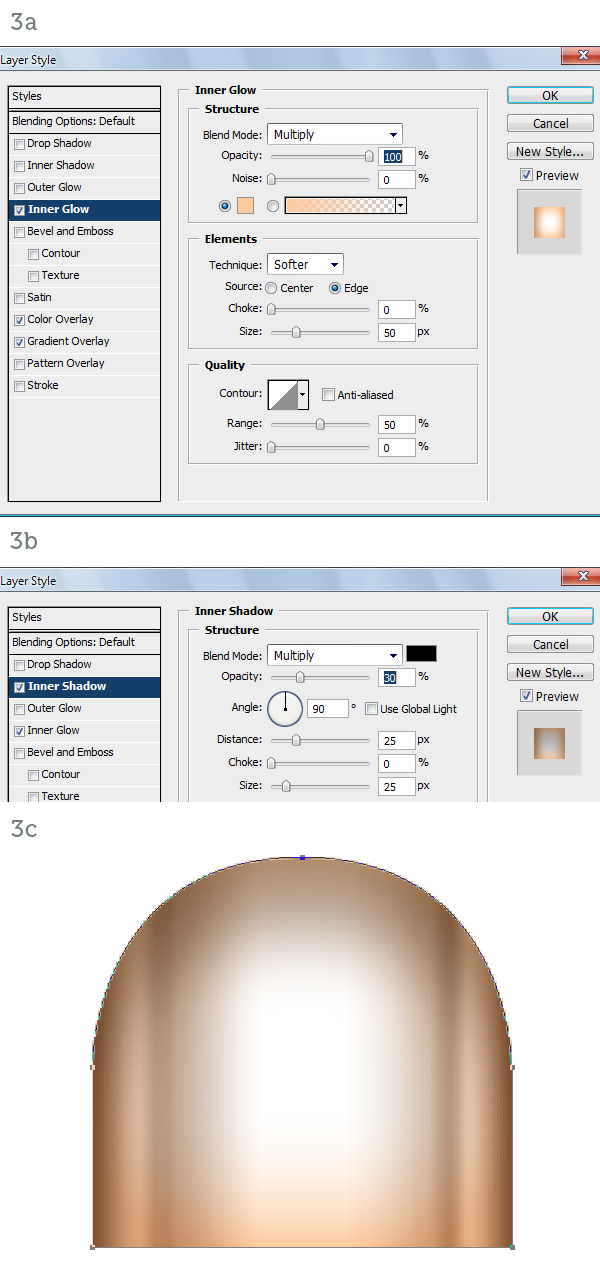
Add some Inner Glow (3a) to simulate ambient reflections and Inner Shadow (3b) to enhance the roundness of the surface. The character is mainly lit from above and ahead so the inner shadow around the top of the head effectively pushes back the outline (3c).
Step 4
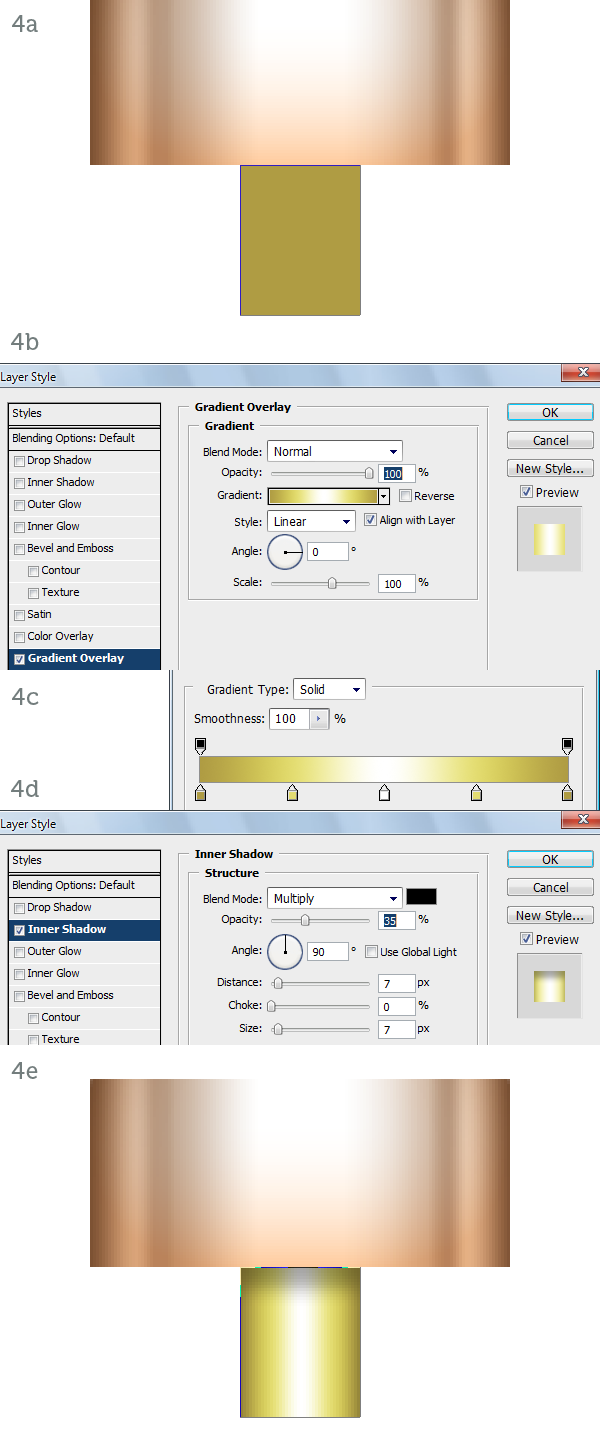
Create the neck with a simple, gold rectangle. Again make sure you snap to the grid for perfectly crisp edges (4a). With a Gradient Overlay (4b, 4c) we add reflective highlights. An Inner Shadow (4d) simulates the shadow cast by the head (4e).
Step 5
On to the eyes. Draw a gold circle (5a). Add an Angle Gradient Overlay (5b, 5c) to create a different type of metallic reflection (5d).
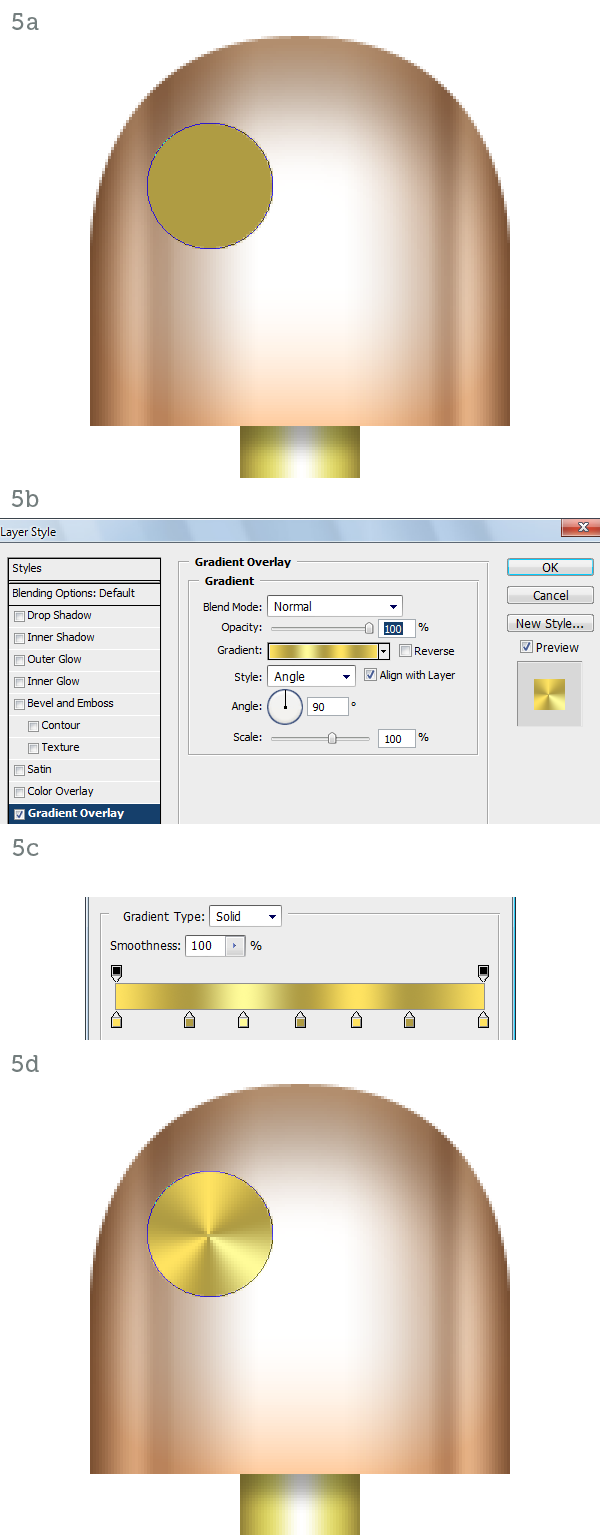
Step 6
Using a Stroke set to Inside create the raised border (6a). With an Inner Shadow (6b) and a Drop Shadow (6c) we make the eye protrude from the head (6d).
Step 7
The pupil is a simple orange circle (7a). A Bevel and Emboss set to Down (7b) will make the pupil inset (7c). The Inner Glow set to Center (7d) will turn the eye on (7e).

Step 8
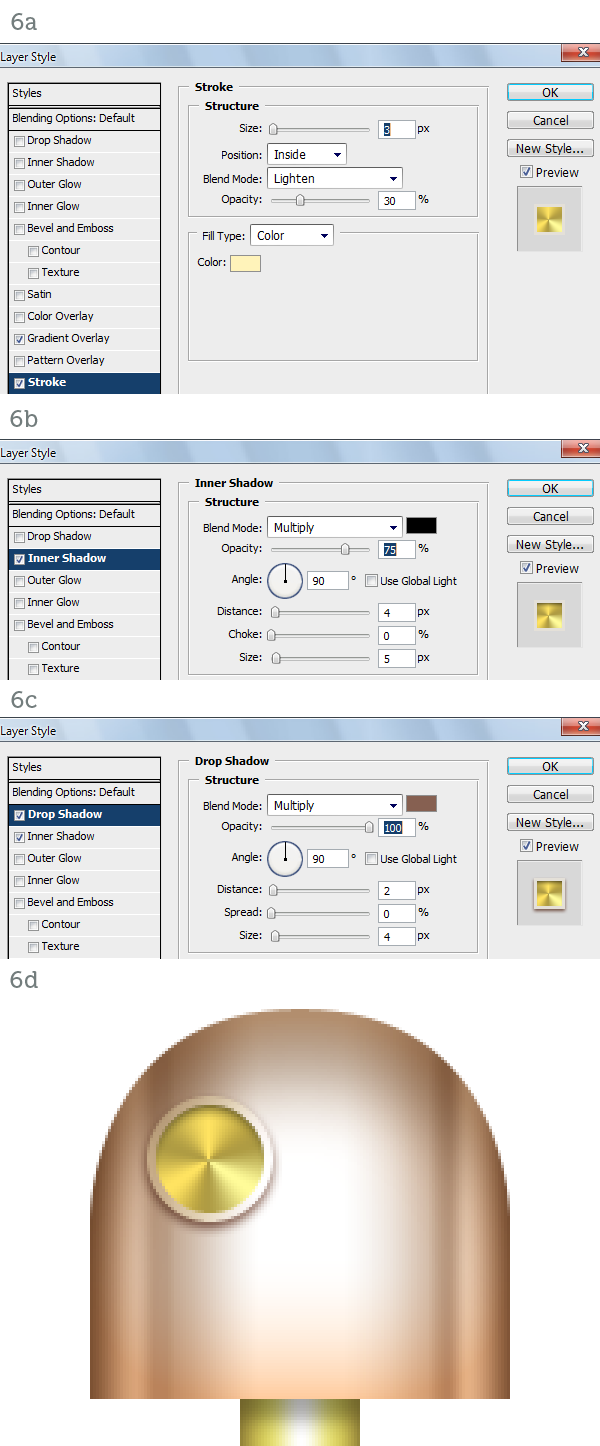
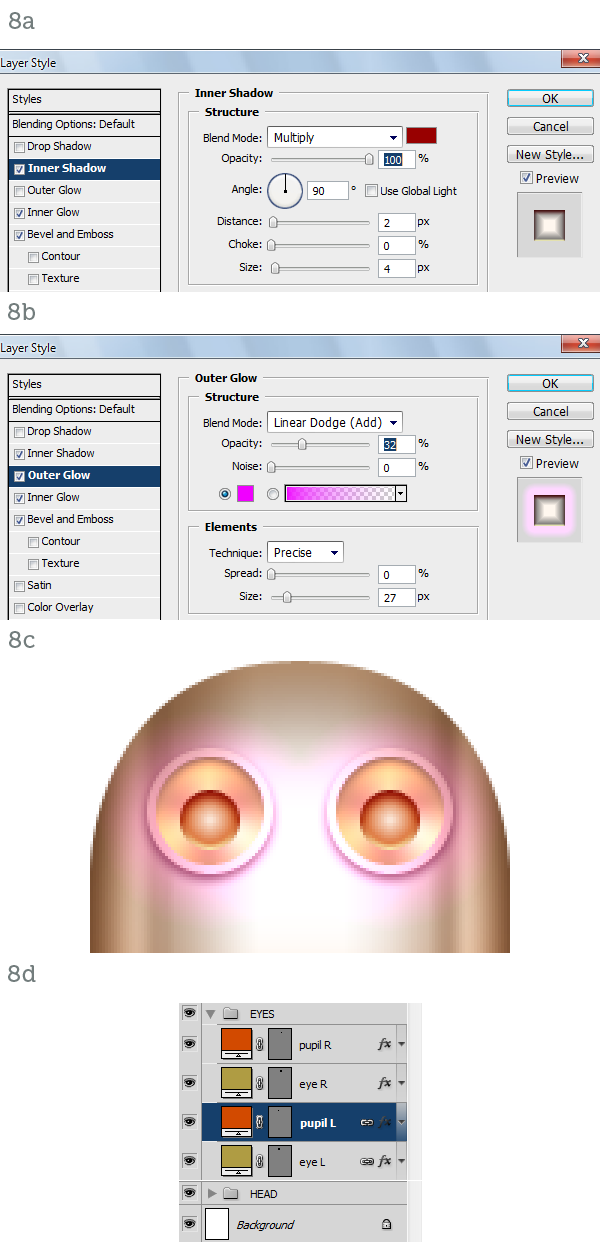
To finish off the pupil we have to add an Inner Shadow (8a) and a purple Outer Glow (8b). The eye is complete so we can duplicate it (8c). Here are the layers so far. It’s important to keep an organized layer structure. Use folders and colors, if you like (8d).
Step 9
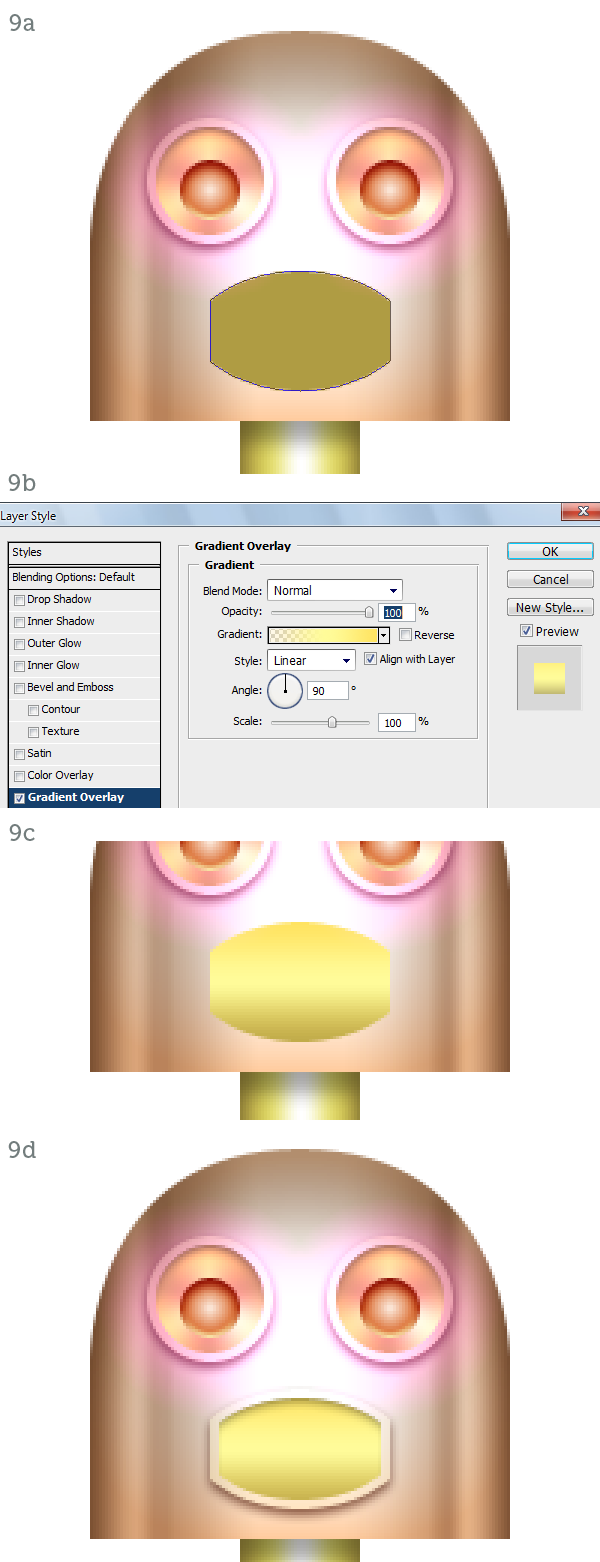
Draw the shape for the lips (9a). Using a yellow-to-transparent Gradient Overlay (9b) we highlight the upper lip (9c). Add a Stroke, an Inner Shadow and a Drop Shadow or better yet copy them from the eye to complete the lips (9d).
Step 10
Create the center tooth as a dark brown rectangle (10a). Use Bevel and Emboss (10b) and Inner Shadow (10c) to inset the tooth. It is in fact a slit in the lips (10d). The rest of the teeth are created with copies of the center tooth, shortened vertically with the help of the grid (10e).

Step 11
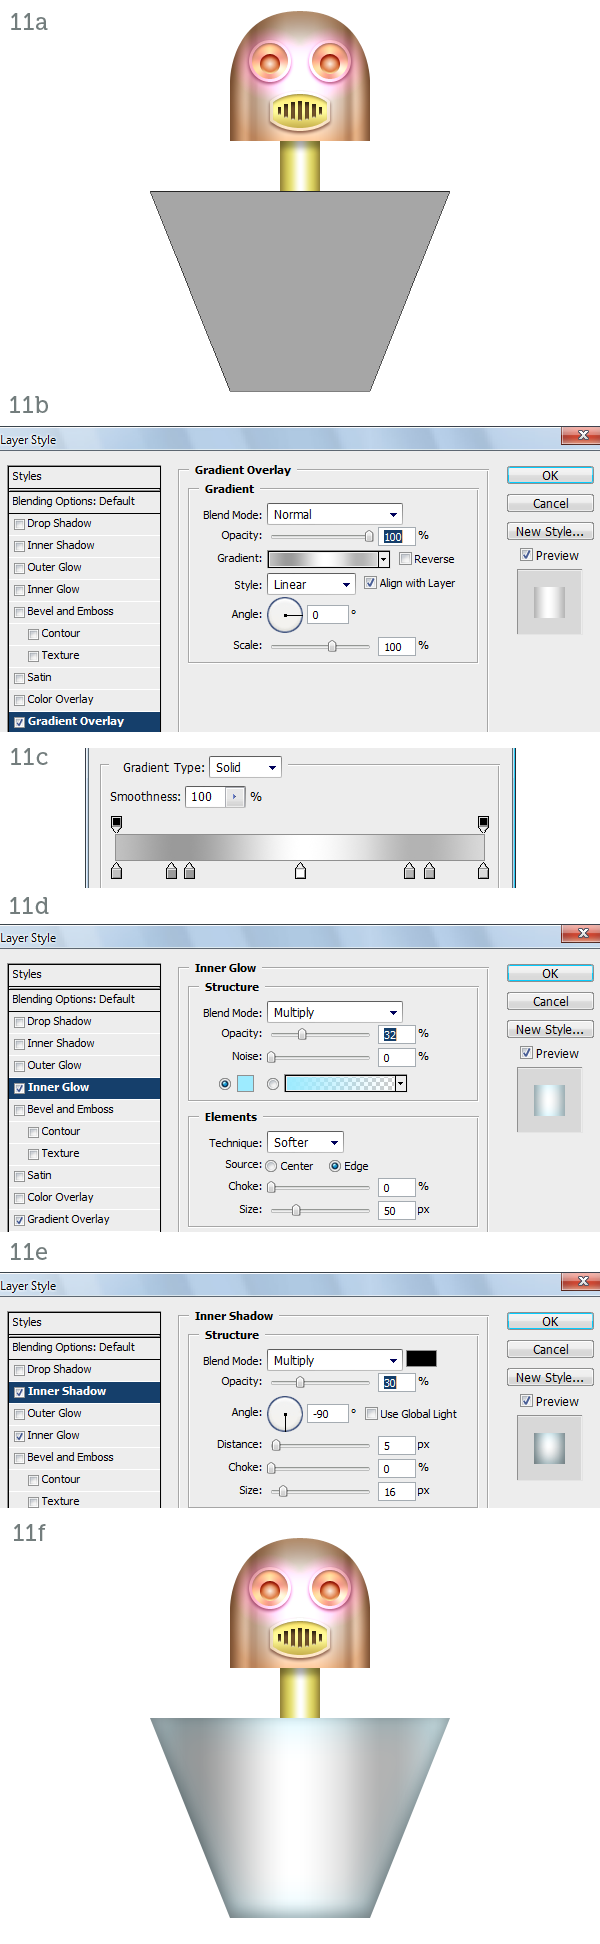
The torso is a trapezoid (11a). The shading technique is the same as before. Gradient Overlay (11b, 11c), Inner Glow (11d), Inner Shadow (11e). The result is a metallic cone (11f).
Step 12
The skirt has a bell-like profile (12a). Yet another time use Gradient Overlay (12b, 12c), Inner Glow (12d) and Inner Shadow (12e) to shade it (12f).

Step 13
Draw the left arm as a thin metal rod that initially curves out and down from the shoulder and then ends in a straight line (13a). Using a dark Inner Glow (13b) we simulate a rounded surface (13c). With the same method create the hand (13d).
As you can see similar materials are created with the same layer styles. Of course you have to use your judgment and make minor adjustments to the settings to adapt the styles to different shapes and/or dimensions.

Step 14
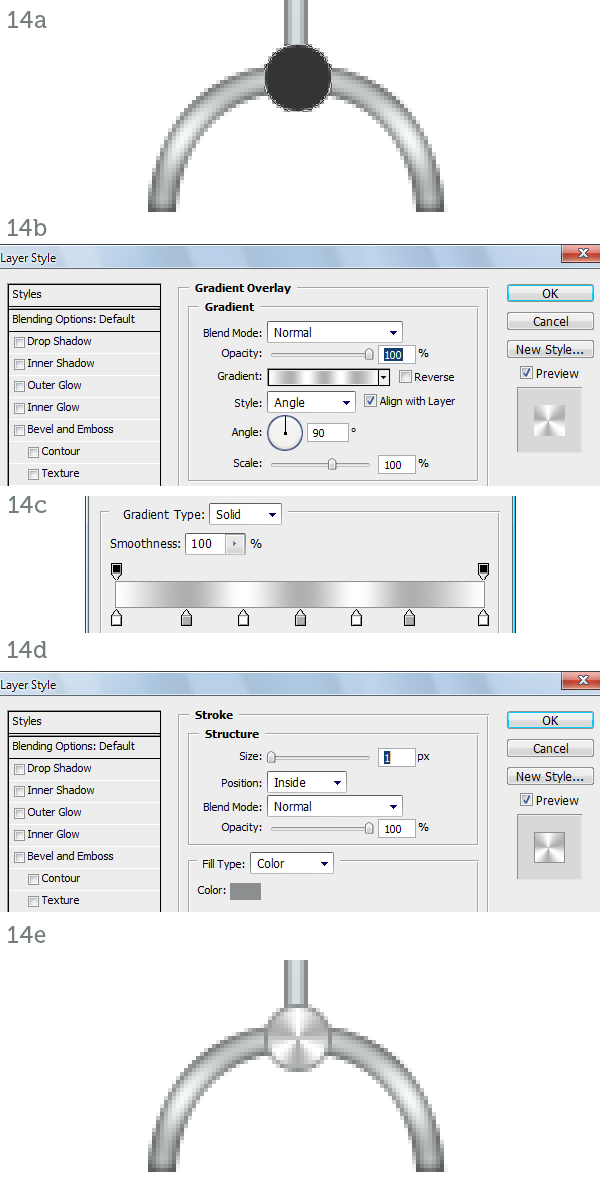
The hand is attached to the arm via a round joint similar to the eye (14a). Apply a similar Angle Gradient Overlay (14b, 14c) and a slight dark stroke to enhance the edge (14d). The hand is finished (14e).
Step 15
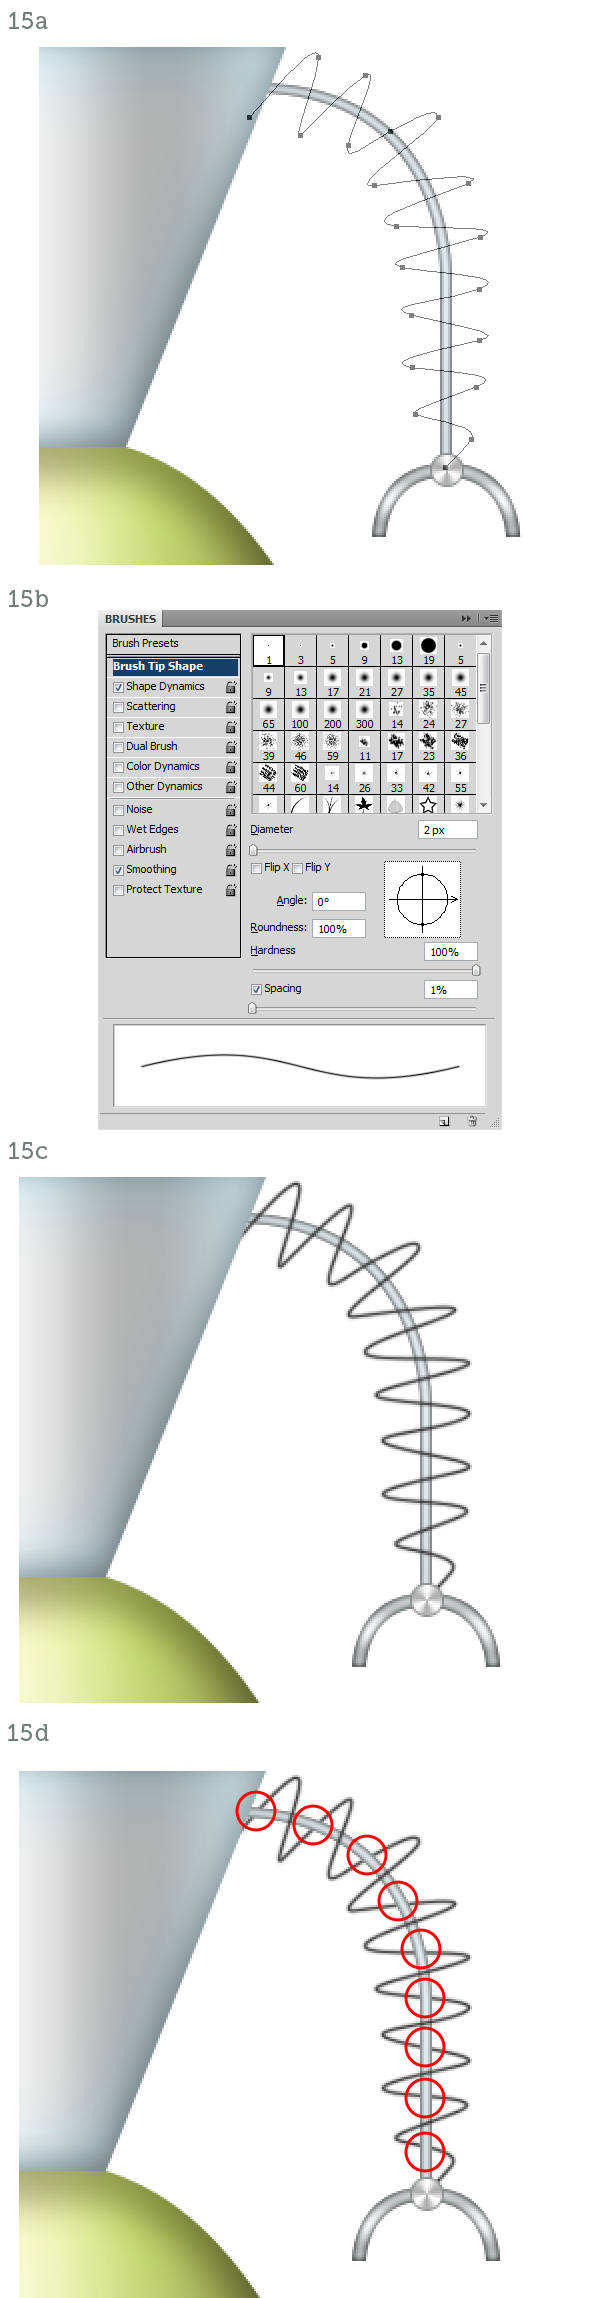
To complete the arm we need to draw a wire that winds around the metal rod. Create a new layer. Draw the spiral with the Pen Tool (P) in Paths mode (15a). Hit B to activate the Brush Tool and then F5 to open the Brushes palette. Pick a hard-edged, round preset and set the Diameter to 2px (15b). Now in the Paths palette right-click on the spiral path and choose Stroke Path. The path will be stroked on the new layer (15c). Mask the spiral where it curves behind the arm (15d).
Step 16
Activate the Dodge Tool (O) and set it to Shadow mode. Paint on the spiral where it faces the view directly. These parts catch highlights and should be almost white (16a). The arm is finished so you can group all its layers. Duplicate the group and flip it horizontally to the other side of the body to create the second arm (16b).

Step 17
It’s time to add some detail to the body parts. The head, the neck, the torso and the skirt are made of metal plates soldered and riveted together.
Create a thin vertical rectangle down the middle of the torso, make it medium gray (17a). Now open the Brushes window (F5) and increase the spacing to about 600%. In the preview you will see the brush stroke change to a trail of dots (17b). Holding down Shift paint a vertical line of rivets along the rectangle (17c). Add a white Drop Shadow (17d) to make the rivets look inset. Duplicate the layer to create a second row of rivets (17e).

Step 18
Add a few more rows of rivets to the torso (18a), place one on the head and on the neck too (18b).
The skirt has no rivets, just horizontal lines carved in it. They have the same white drop shadow as the rivets (18c). Crop the lines with the vector mask from the skirt itself (18d, 18e).

Step 19
The torso is not complete without a big reflective highlight. Draw a white ellipse on top of it (19a) set it to Screen, 35% Opacity and crop it with the torso’s vector mask (19b).

Step 20
In lieu of ears the fembot has small antennas. First create the base of the left ear with a gold rectangle (20a) filled with a Gradient Overlay (20b, 20c). That’s shiny enough (20d).

Step 21
Use an Inner Shadow coming from the left (21a) to simulate the shadow cast by the head (21b). Add a thin rectangle filled with a single two-tone vertical gradient for the antenna to wrap around (21c).

Step 22
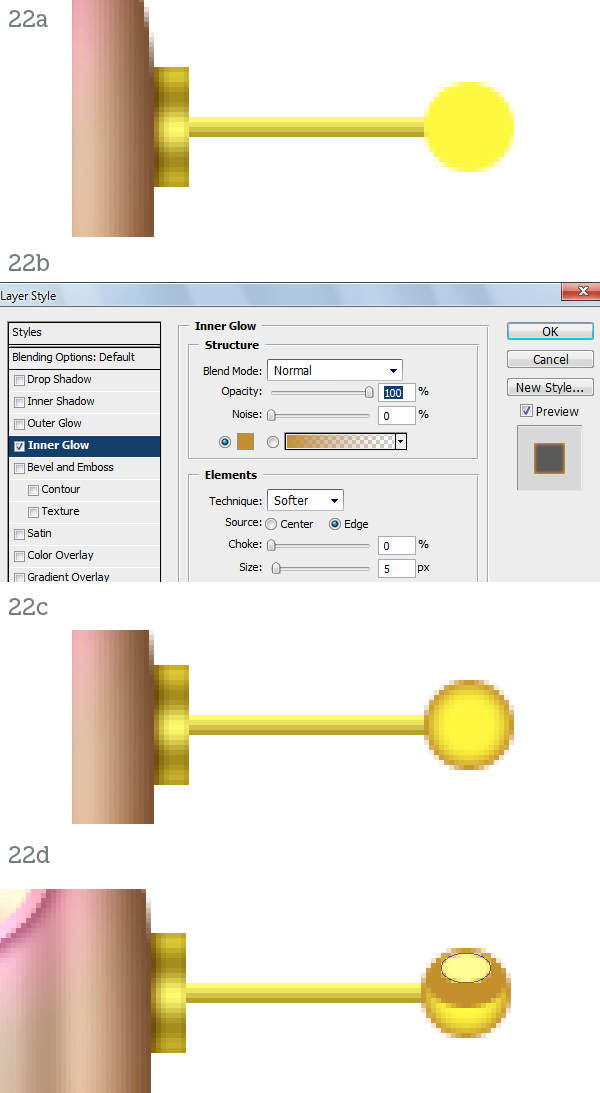
Draw a yellow circle at the end of the stick (22a) and use an Inner Glow to make it round (22b. 22c). Create two squashed ellipses, one dark brown and one bright yellow, to complete the ball (22d).
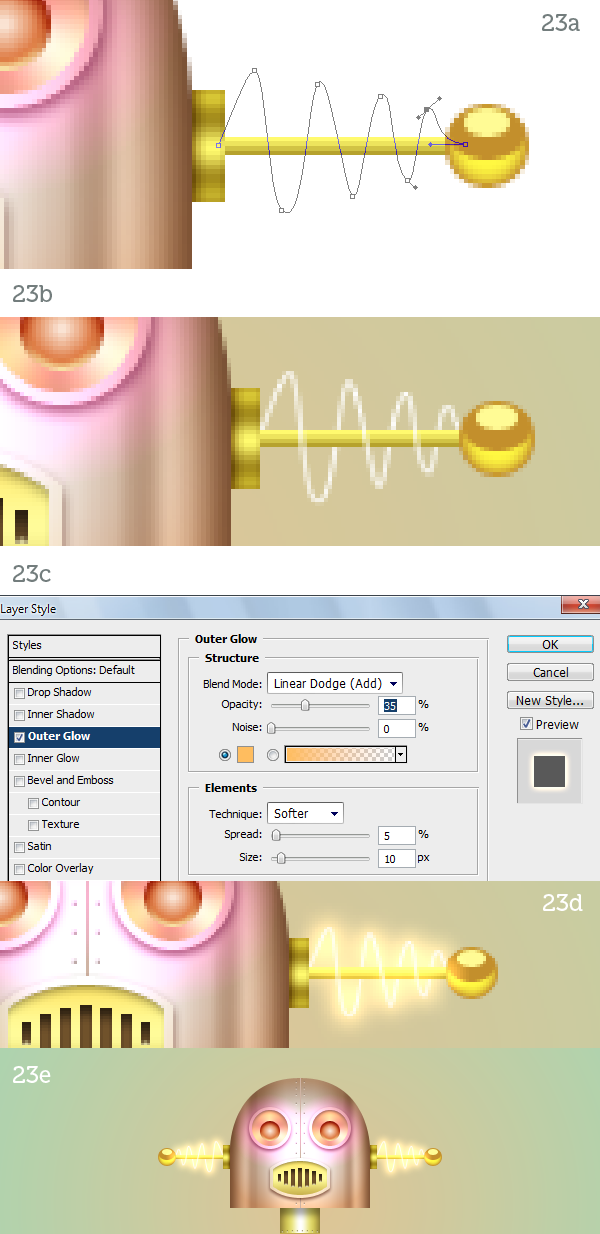
Step 23
Create the small antenna the same way you created the arm. Draw a path (23a), stroke it in white and mask it (23b). Apply an Outer Glow style set to Linear Dodge (23c) to create a very bright glow (23d). The left “ear” is finished so simply mirror the right one (23e).
Step 24
For the leg draw a small rectangle with rounded corners (24a). Fill it with a copper Gradient Overlay (24b, 24c), an Inner Glow (24d) and an Inner Shadow (24e). Duplicate this module several times to complete the leg (24f).

Step 25
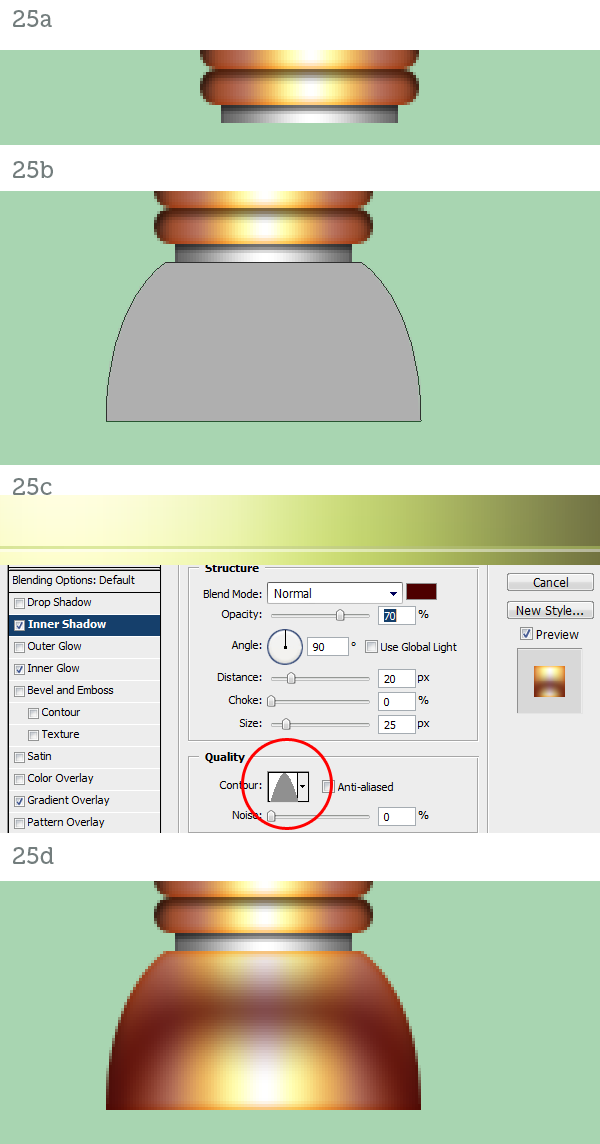
The foot joins the leg by way of a small steel ring. You know how to create it by now (25a). Create the foot as a Shape Layer path (25b) and copy and paste the layer style from the leg module. Just modify the Contour of the Inner Shadow (25c) to alter the color variation (25d). The leg is finished so group everything and create the other one.
Step 26
The fembot is finished but it looks too polished. She needs some realistic textures to be really complete.
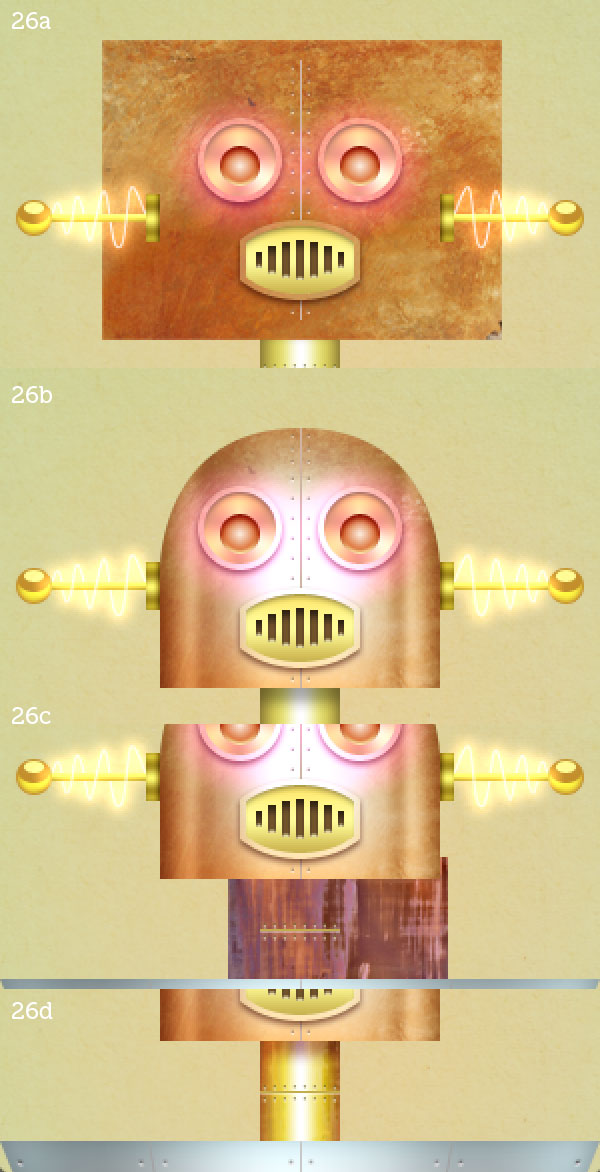
Place the Rust #1 texture in the document and resize it to fit the head (26a). Set its blending mode to Soft Light and crop it with the head’s vector mask (26b). For the neck use Rust #2 (26c) set to Overlay mode (26d).
Step 27
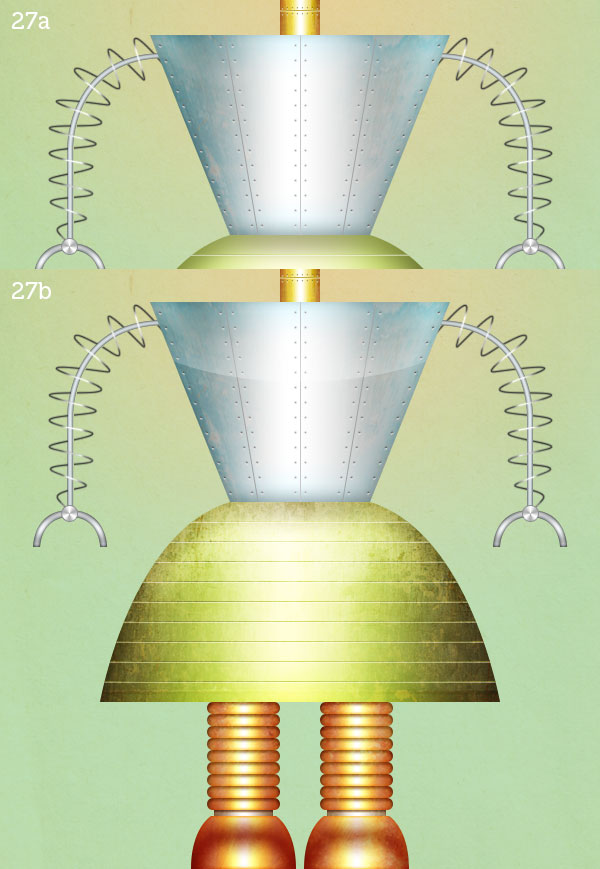
Place the Rust torso texture on the torso, of course. Set it to Soft Light (27a). The skirt gets both Skirt #1 and Skirt #2 placed on top of each other while the legs and feet get the same rust applied to the head (27b). The fembot looks much better now.
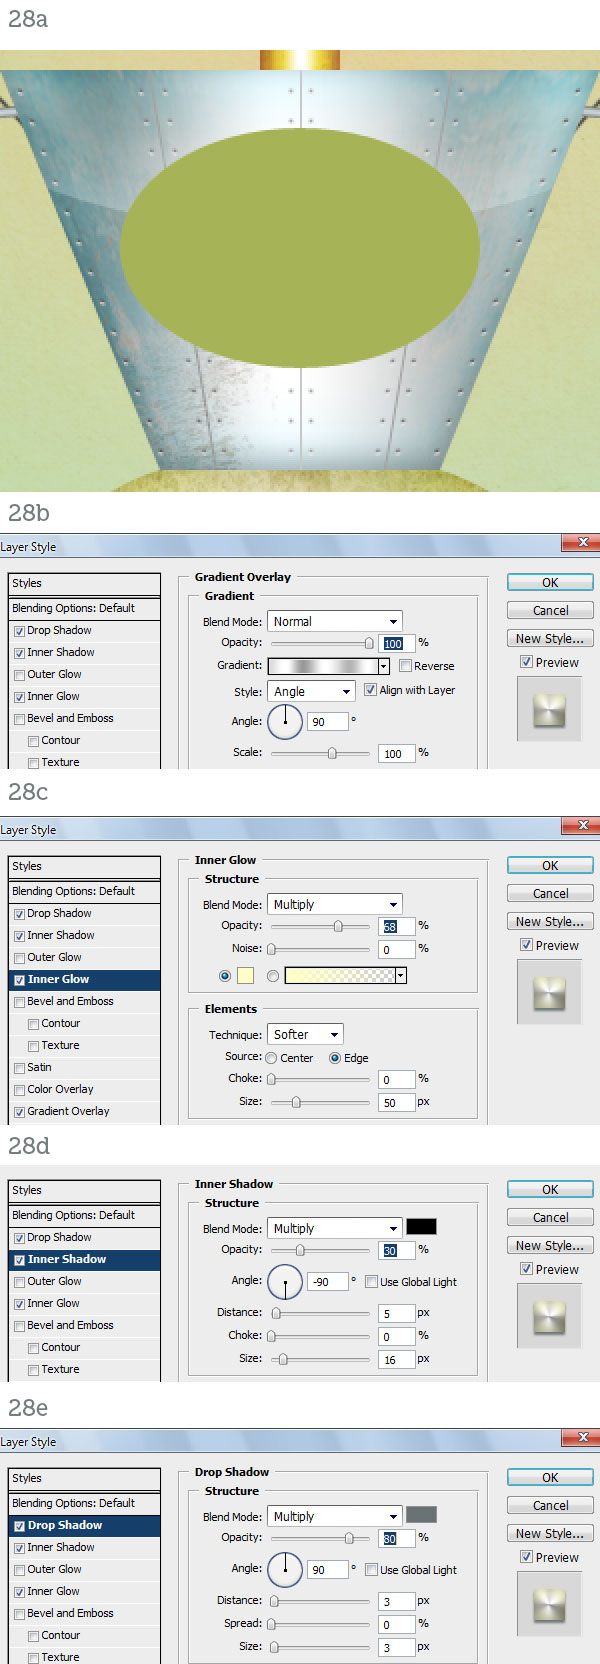
Step 28
No respectable robot has a bare chest, especially a female one. Let’s give her a control panel.
Draw an ellipse (28a) and apply an Angle Gradient Overlay to it (28b). Also add the usual Inner Glow (28c), Inner Shadow (28d) and Drop Shadow (28e).
Step 29
Complete the oval plate by texturing it with Copper (29a). The display is a smaller ellipse (29b) with a bunch of layer styles applied to it (29c).

Step 30
The blank screen (30a) can be filled with a warm “hello” and a couple of status icons (30b). Also add a reflection on the glass by drawing a white crescent set to Screen, 35% Opacity (30c).

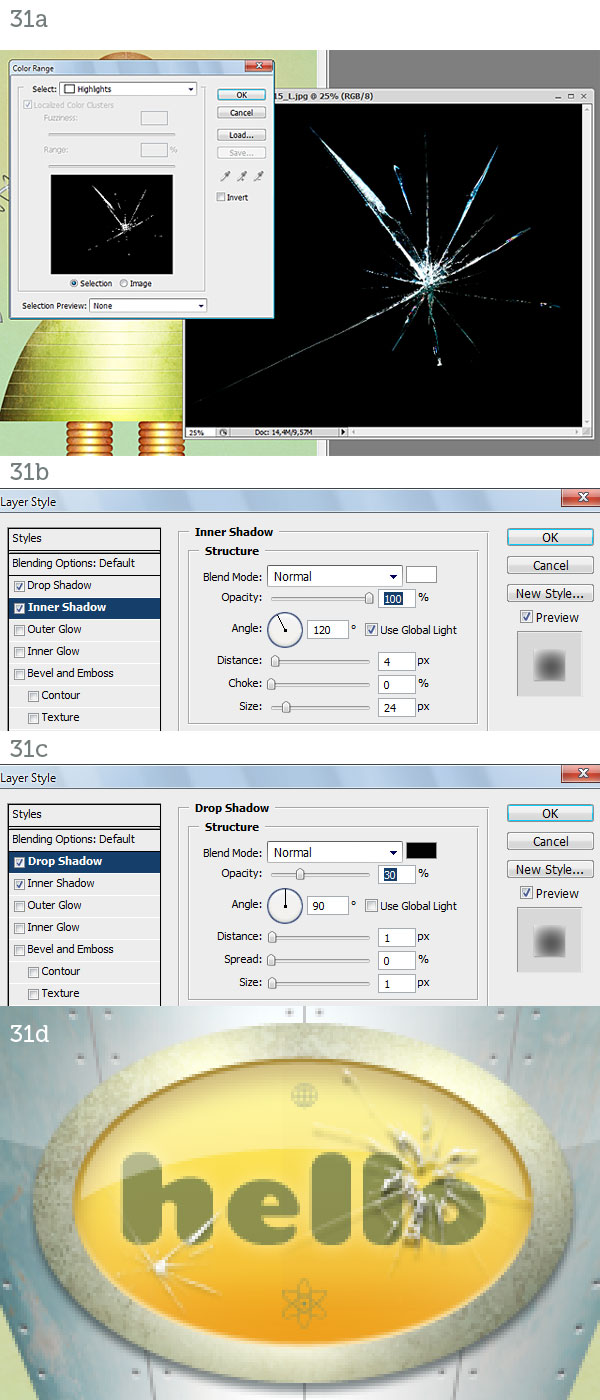
Step 31
This step is optional. Open the Broken glass #1 image and go to Select > Color Range. Select Highlights (31a). Hit Command + J to create a new layer from the selection and drag this layer over the fembot’s glass screen. You can add a white Inner Shadow (31b) and a dark Drop Shadow (31c) to simulate depth and of course use Broken glass #2 the same way (31d).
Step 32
Just add a background and a floor of your liking and the fembot will finally be complete.

Conclusion
In this tutorial we used very simple vector shapes and well-thought layer style combinations to create a fun female robot made of metal parts. Since the result was too polished and plastic-looking we added a layer of realism by simply juxtaposing rusty, corroded and dirty textures. Not only do they add life to the materials, they also heighten the realism by providing subtle color changes, realistic surfaces and ambient reflections.
The beauty of this workflow is that the entire character is made of infinitely scalable vectors. For the most part the layer styles will scale with the body parts and the few elements that don’t, the textures, can be obtained in high resolution and require little effort to be applied again should you change the size of the document.
I hope you had fun creating the robot but especially I hope you learned a useful method for creating scalable characters in a raster-based application like Photoshop.