In this tutorial I’m going to show you how to create your own student’s desk in a top-view. In order to make it we are going to use the Rectangle Tool, Ellipse Tool, and we’ll use a texture for the desk and the floor that we are going to make. This tutorial is great for beginners, let’s begin!
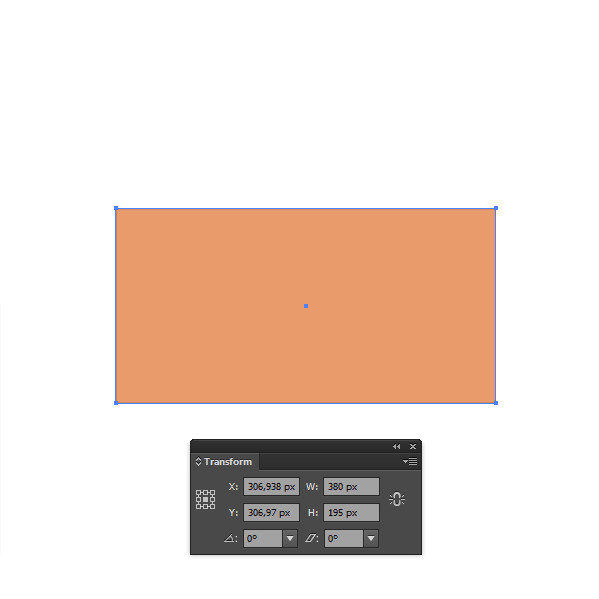
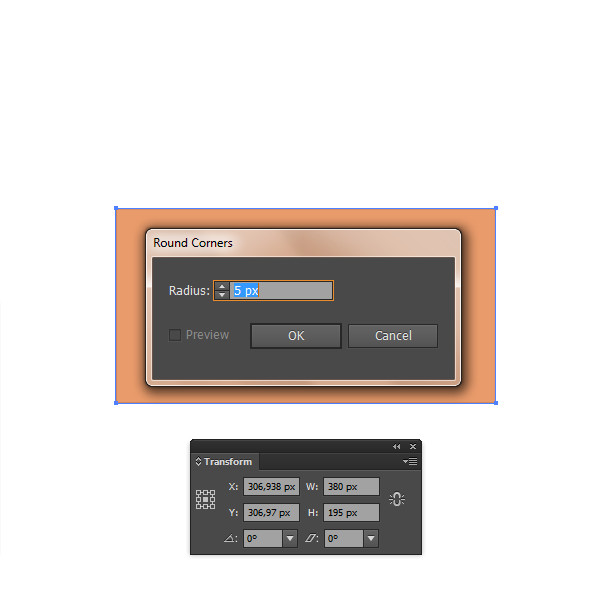
Step 1
Open a new document at any size you want. I used size 600 x 600px then increased it because I increased the size of the desk after Step 14. Take the Rectangle tool (M) and draw a rectangle with size W: 380px H: 195px and rounded corners: 5px.
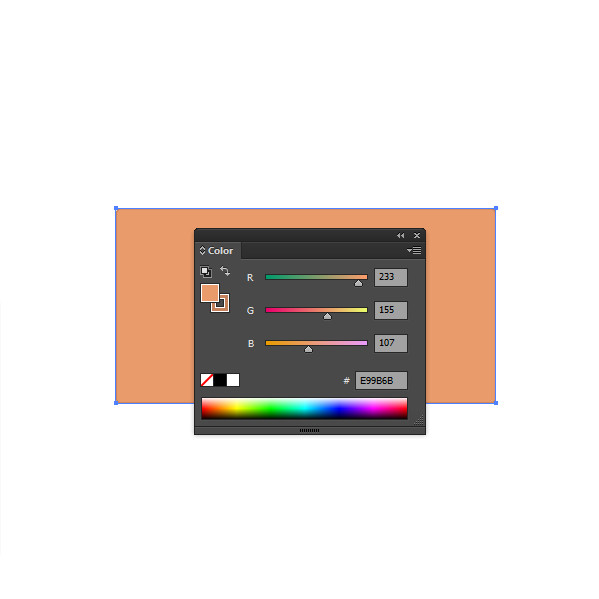
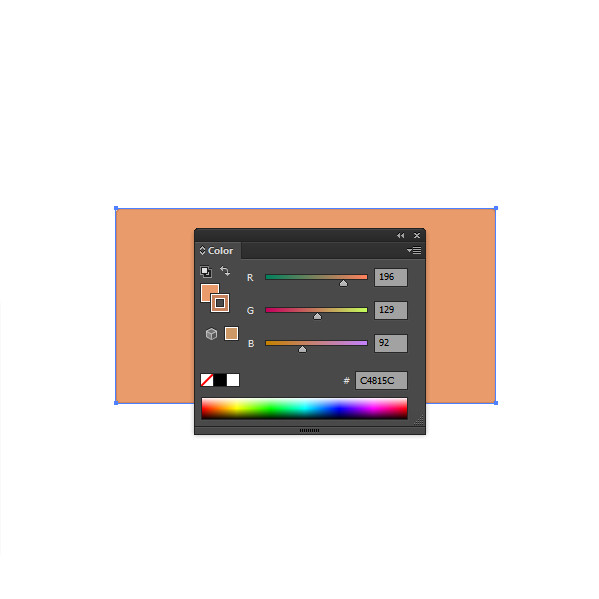
Step 2
As the rectangle from the previous step is selected add a fill color of R:233 G:155 B:107 and apply Stroke: 1px with R:196 G:129 B:92 color.
Step 3
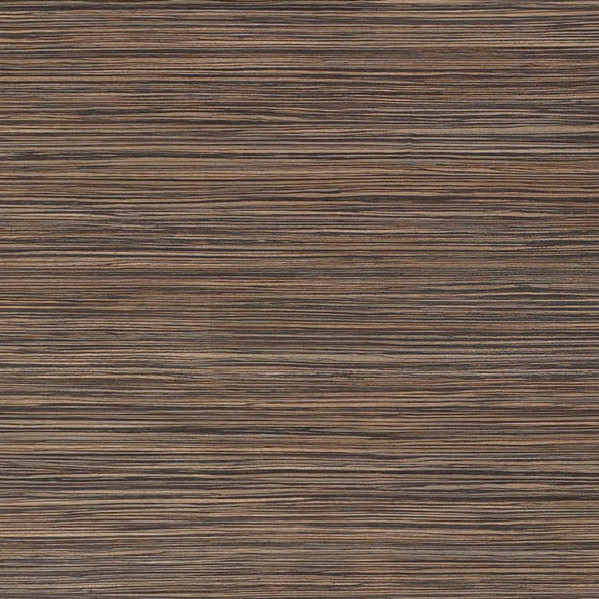
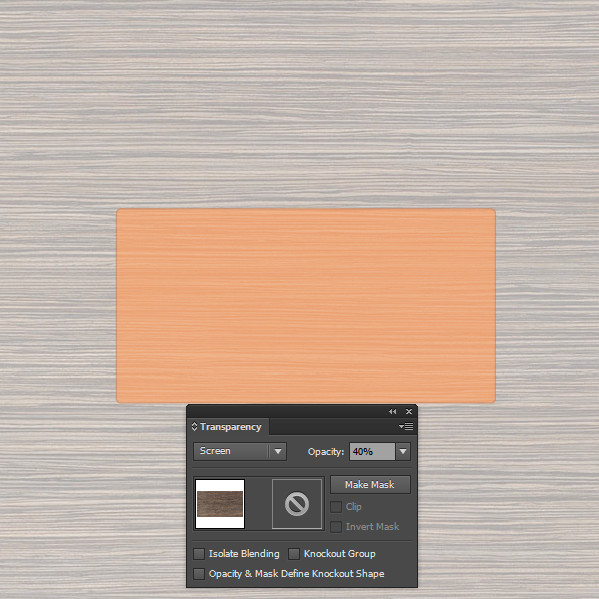
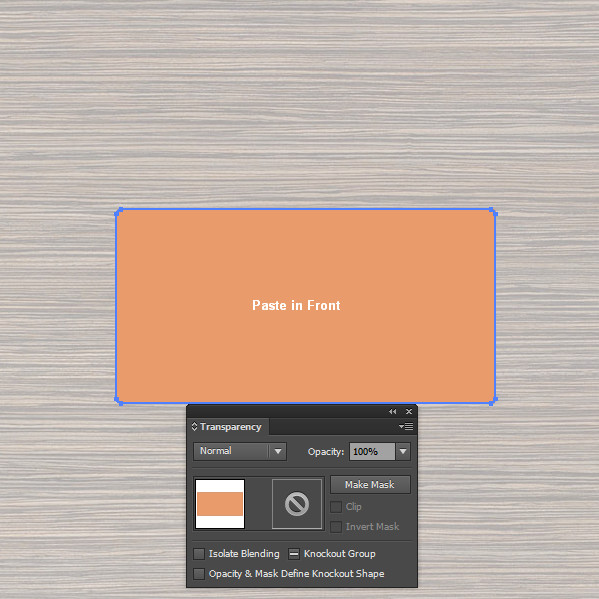
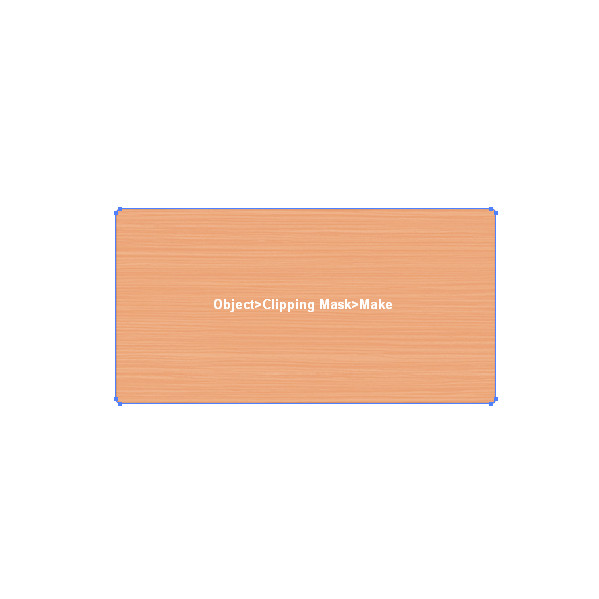
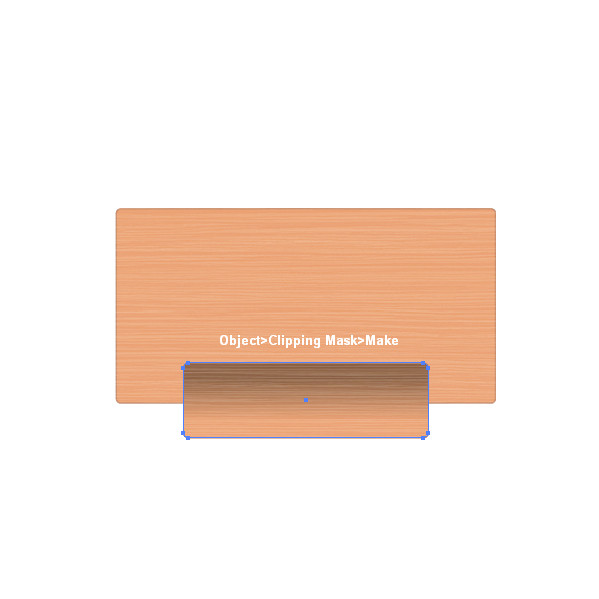
In this step we are going to need the texture that we’ll apply to the desk. Download the texture and place it to the shape from the previous step, change the Blending Mode from Normal to Screen and reduce the Opacity to 40%. Then copy the shape from the previous step but first make sure you’ve set Object > Expand Appearance to the shape you rounded the corners to in Step 1 with Command+C, place over the texture with Command+F. Select the texture and the shape that you placed over it and go to Object > Clipping Mask > Make (Command+7).
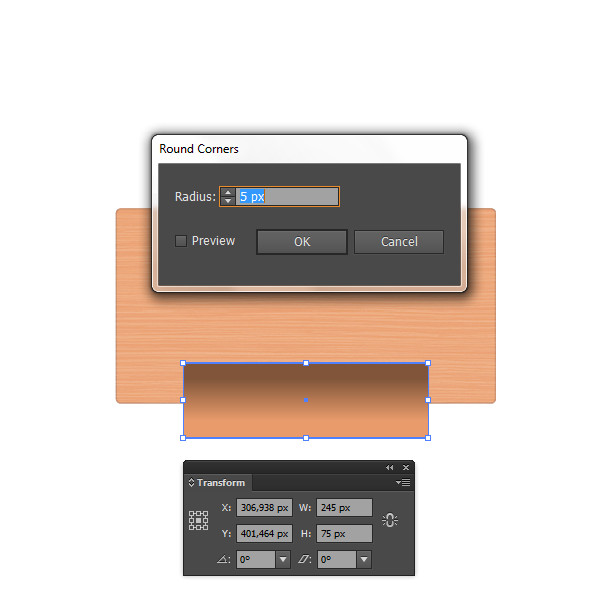
Step 4
Take the Rectangle tool (M), draw a rectangle with the size W: 245px H: 75 and rounded corners Radius: 5px and right after that click on Object > Expand Appearance.
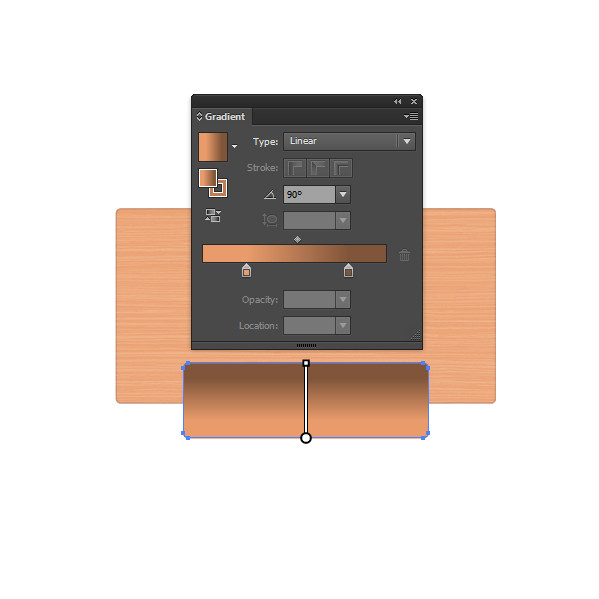
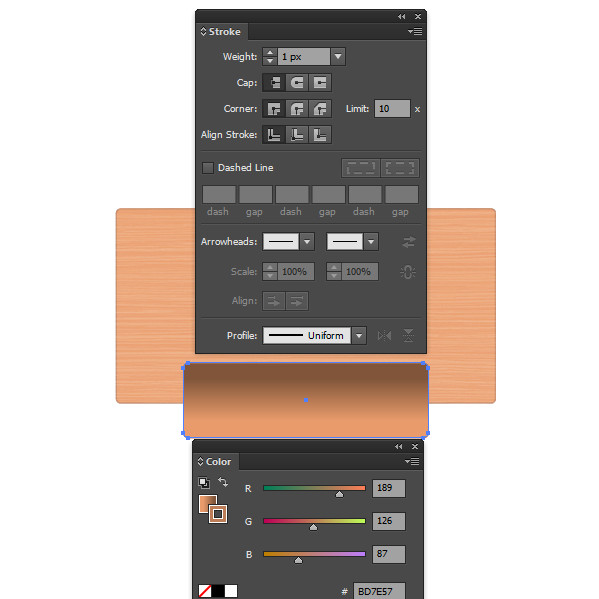
Step 5
As the rectangle from the previous step is selected fill it with a Linear gradient colors R:233 G:155 B:107 to R:128 G:85 B:57, Angle: 90 degrees and apply Stroke: 1px with R:189 G:126 B:87 color.
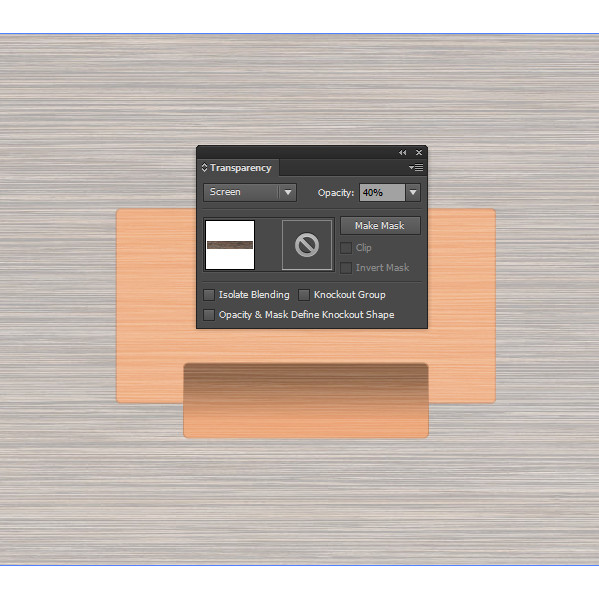
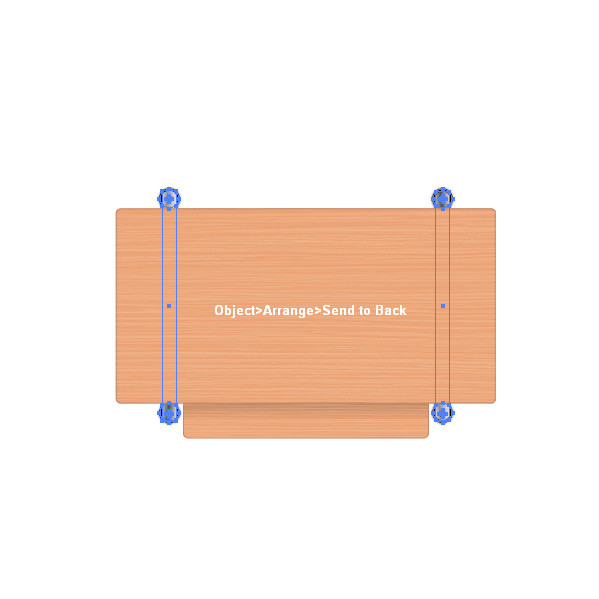
Step 6
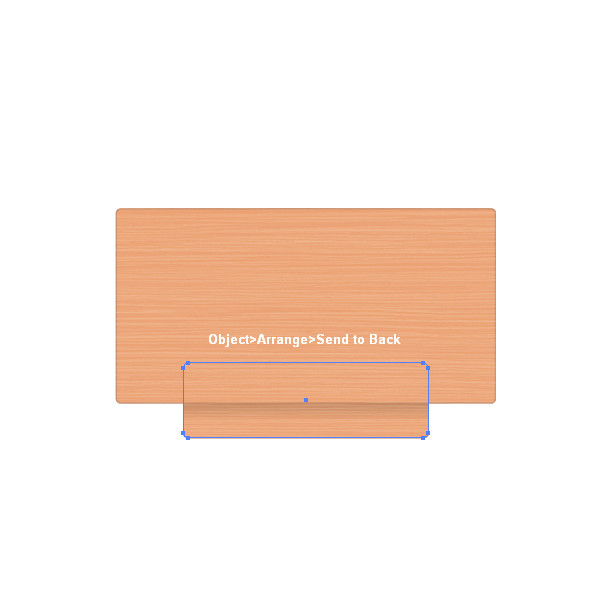
Apply the same way the same texture that you applied for the upper part of the desk as shown in the picture below and send the shape under all other shapes (Object > Arrange > Send to Back).
Step 7
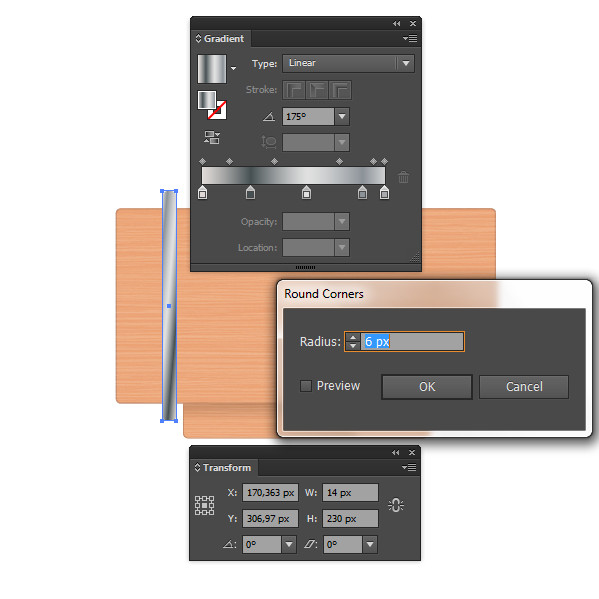
Take the Rectangle tool (M), draw a rectangle with the size W: 14px H: 230px and rounded corners Radius: 6px. Click on Object > Expand Appearance and fill it with a Linear gradient as shown.
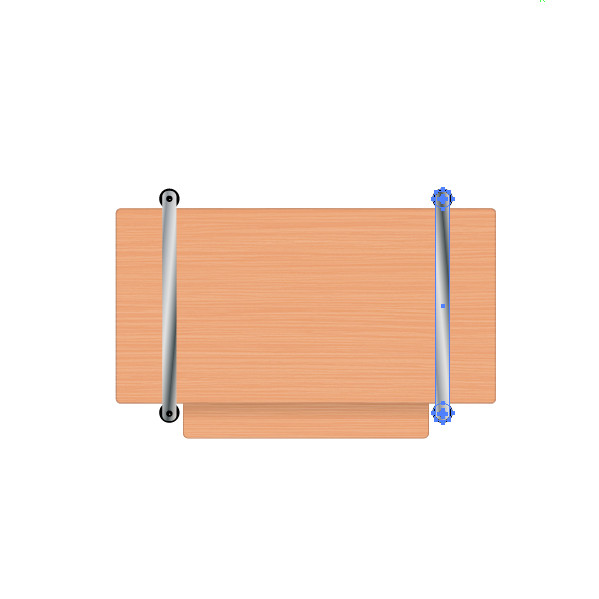
Step 8
Take the Ellipse tool (L), draw two circles with size W: 20px H: 20px with Black color and place them in position as shown in the picture below:
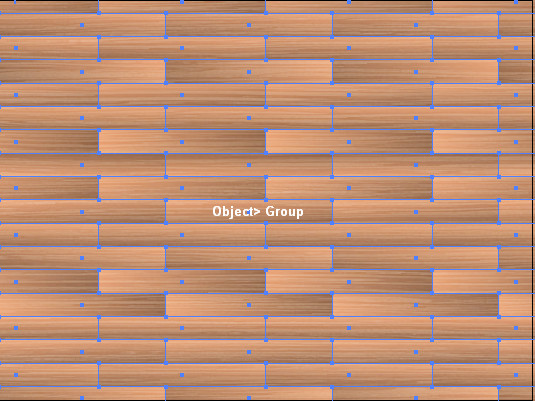
Step 9
As both shapes from the previous step are selected group them (Object > Group) and send then under the shape from Step 7 (Object > Arrange > Send Backward).

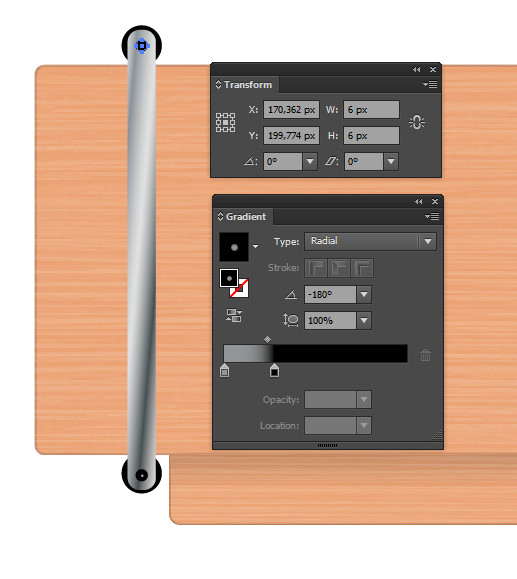
Step 10
Take the Ellipse tool (L), draw two circles with size W: 6px H: 6px in position as shown below and fill them with a Radial gradient colors Grey to Black.
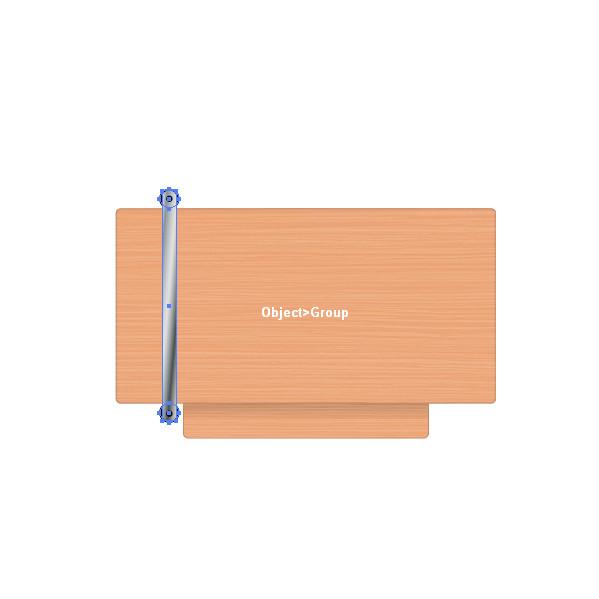
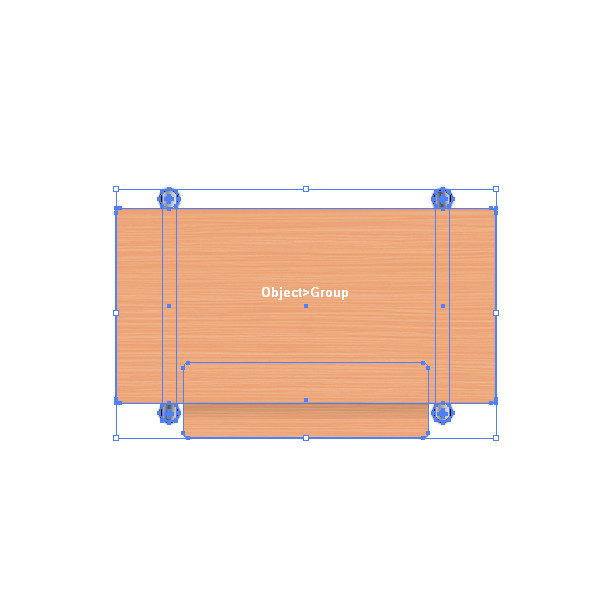
Step 11
Select all the shapes from Step 7 you made so far and group them (Object > Group).
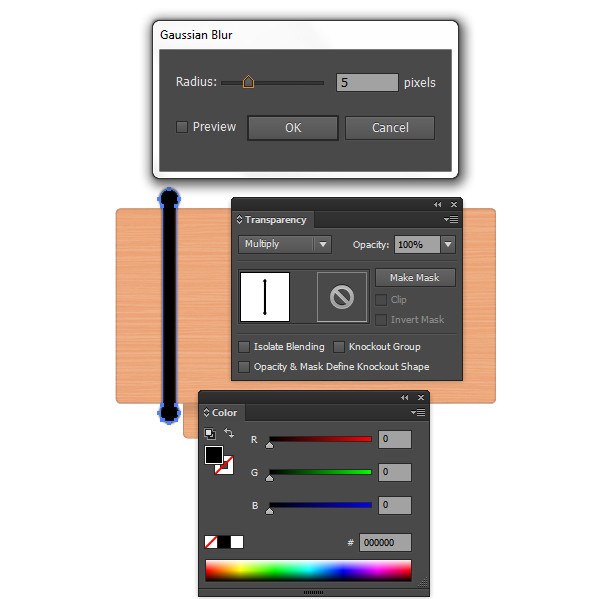
Step 12
Duplicate the group with Command + C and place behind the original with Command + B then open the Pathfinder Panel. Click on the Add to Shape Area button, change the color to Black, apply Gaussian Blur with Radius: 5px and change the Blending Mode from Normal to Multiply. After that add this shape that you applied Gaussian Blur to in the group with the leg.
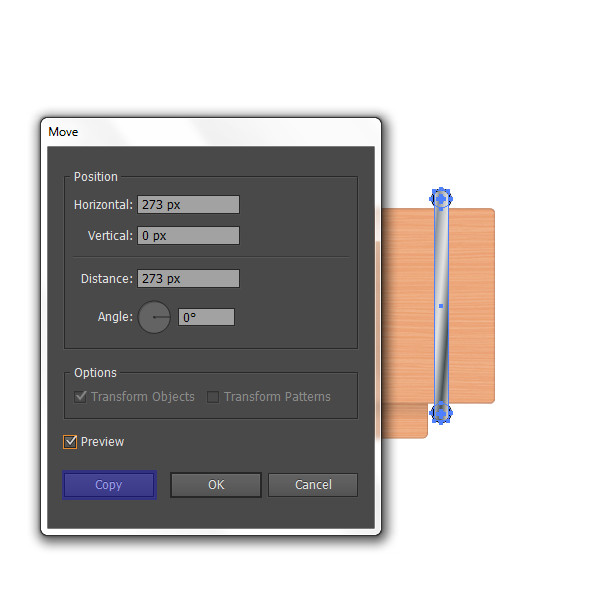
Step 13
As the leg’s group is selected go to Object > Transform > Move and in the new opening window set Horizontal: 273px and click on the Copy button. By doing this you will create the second leg of the desk as well.
Step 14
Now select the groups with both legs and send them behind all others (Object > Arrange > Send to Back).
Select all shapes of the desk and group them (Object > Group).
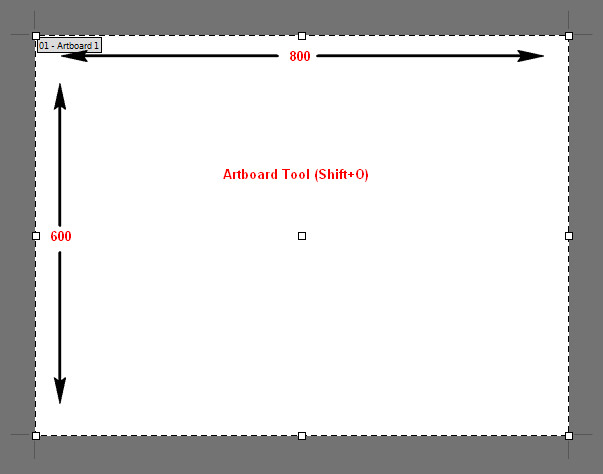
As I mentioned at the beginning now I’ve changed the document’s size to 800x600px with the Artboard tool (Shift + O).
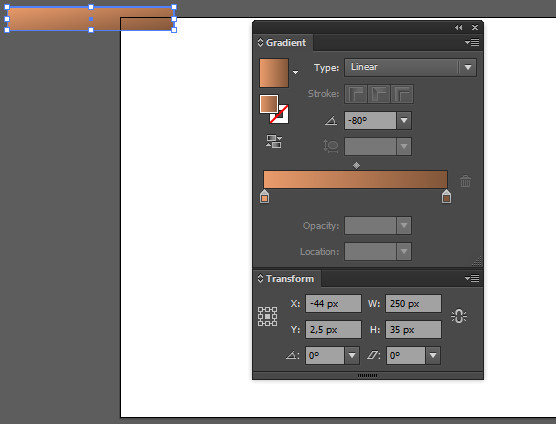
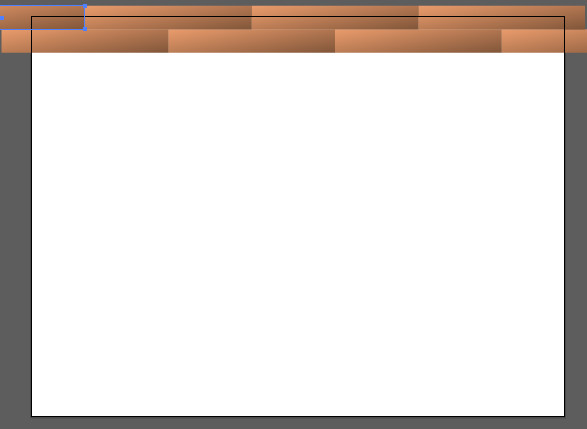
Step 15
Take the Rectangle tool (M), draw a rectangle with size W: 250px H: 35px, fill it with a Linear gradient colors R:233 G:155 B:107 to R:128 G:85 B:57 and place it in the upper part of the document as shown below:
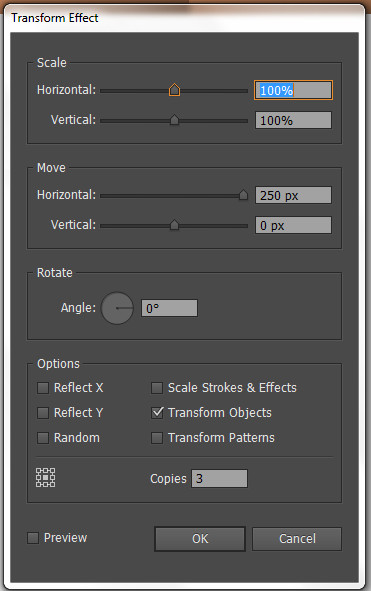
Step 16
As the rectangle is selected go to Effect > Transform > Transform and do the following settings: Move Horizontal: 250px, Copies: 3 and click Ok.
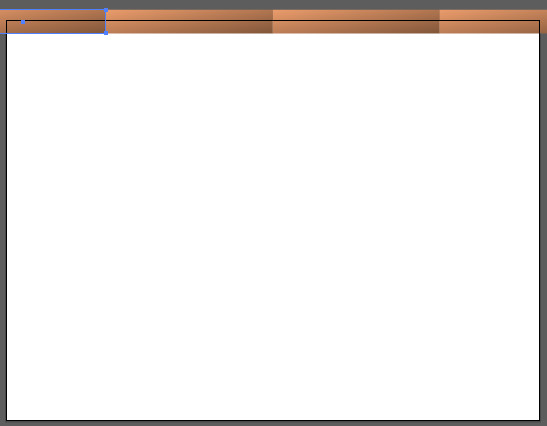
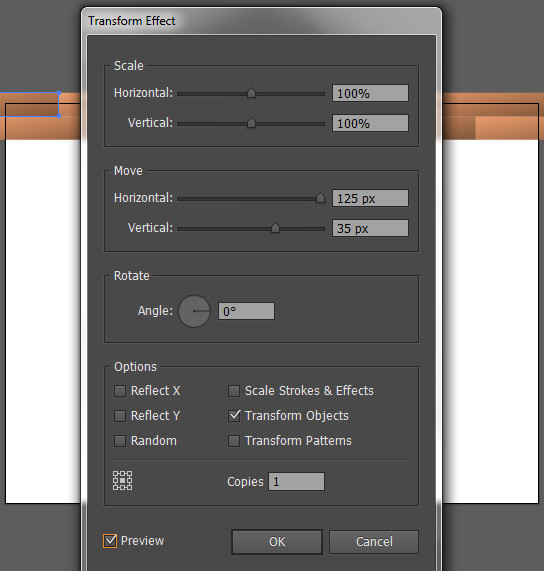
Step 17
As the new shape that appeared in the previous step is still selected again go to Effect > Transform > Transform. A window will open in which you need to click on Apply New Effect then do the following settings: Move Horizontal: 125px, Vertical: 35px, Copies: 1 and click Ok.
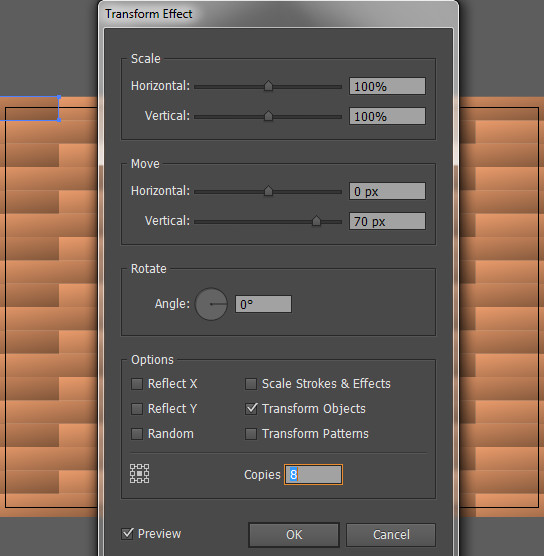
Step 18
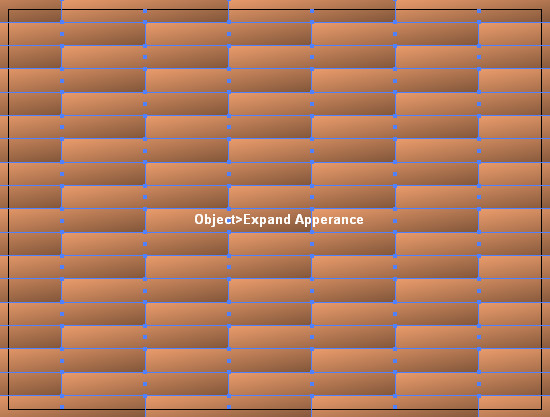
Again go to Effect > Transform > Transform. A window will open in which you need to click on Apply New Effect then do the following settings: Move Vertical: 70px, Copies: 8, click Ok and right after that go to Object > Expand Appearance.
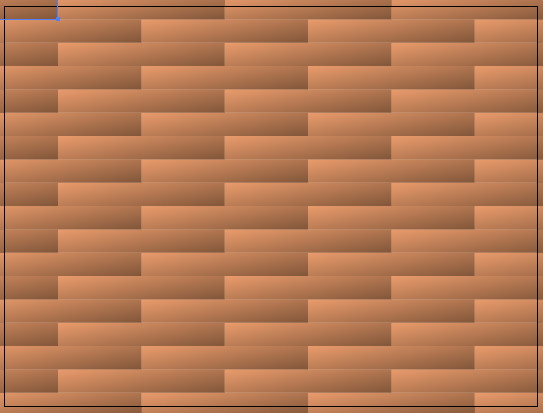
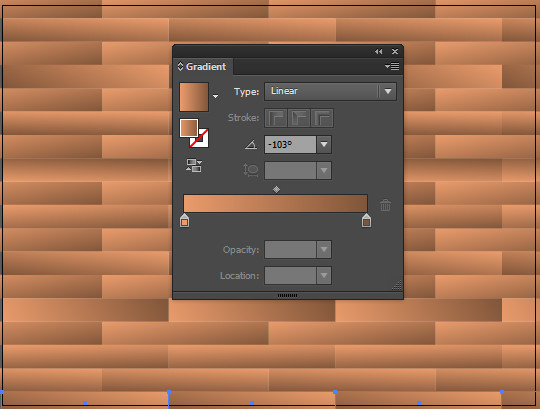
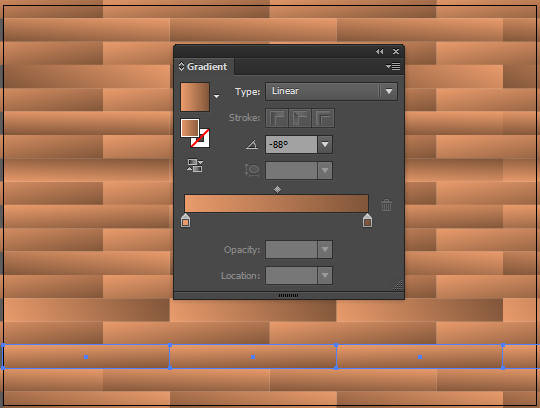
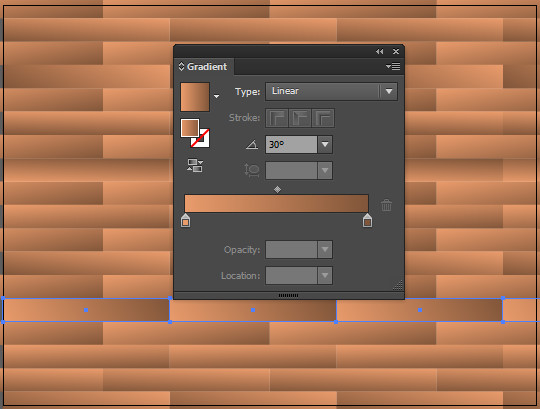
Step 19
Change the gradient’s inclination in each line of the shapes with the Gradient Panel as shown in the picture below:
Step 20
In this step we are going to apply the same texture that we used for the desk. In order to do it place the texture over the shapes you created earlier, change the Blending Mode from Normal to Screen and reduce the Opacity to 50%.
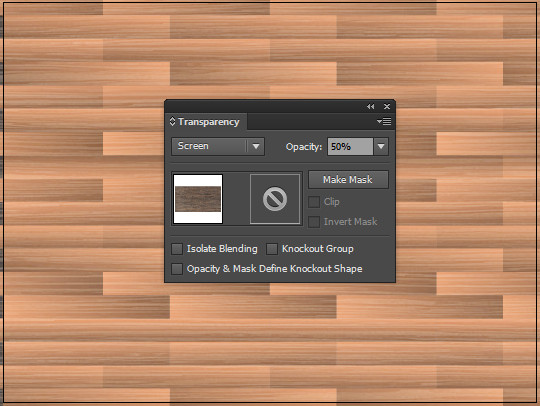
Group the texture and the shapes from Step 19 that you changed the gradient’s inclination to (Object > Group).
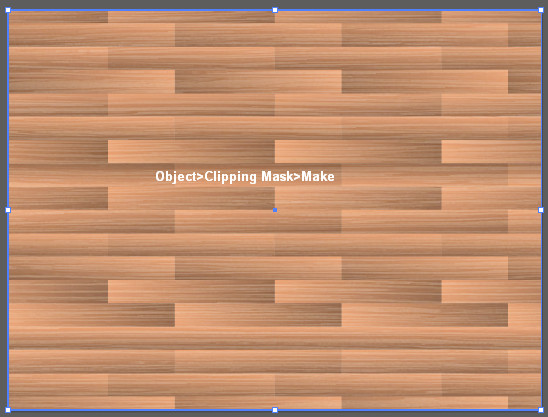
Step 21
Draw a rectangle over the group you created earlier with the size of the document which in this case is 800x600px. Then select the group and the rectangle you just created and go to Object > Clipping Mask > Make.
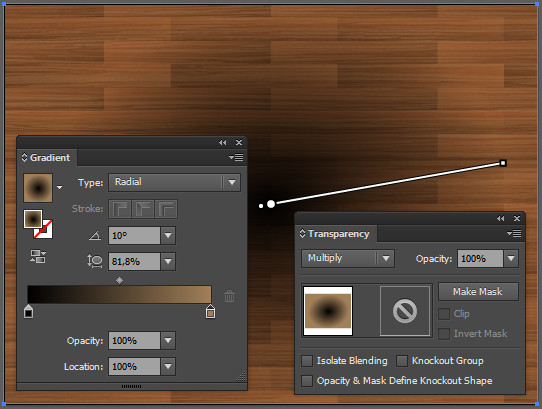
Step 22
Draw another rectangle with the same size 800x600px, fill it with a Radial gradient colors Black to R:161 G:127 B:89 and change the Blending Mode from Normal to Multiply.
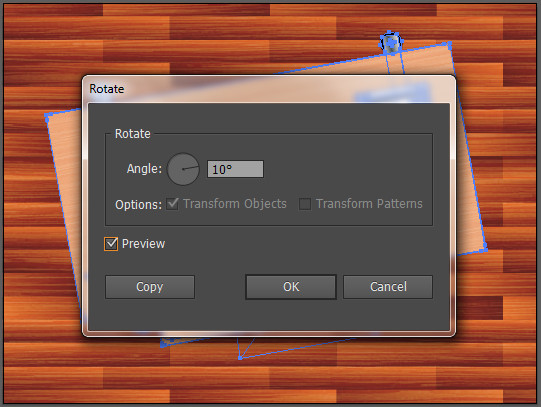
Step 23
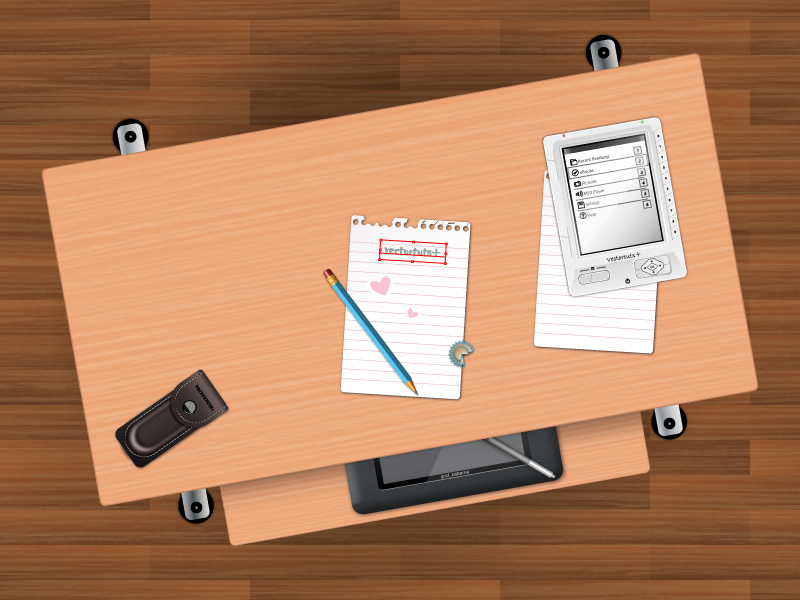
In this step you can add whatever is necessary on the desk, to increase the size and to rotate it to the desk that’s necessary for you. I increased the desk with 160% (Object > Transform > Scale 160%) and rotated it (Object > transform > Rotate 10 degrees).

And with that we are done and here is the final result:
{excerpt}
Read More