In this tutorial we will show you how to make a neon text effect in Photoshop using layer styles and textures.
Let’s get started!
Tutorial Assets
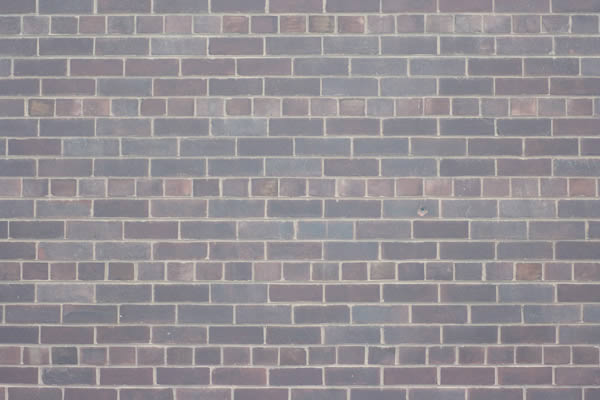
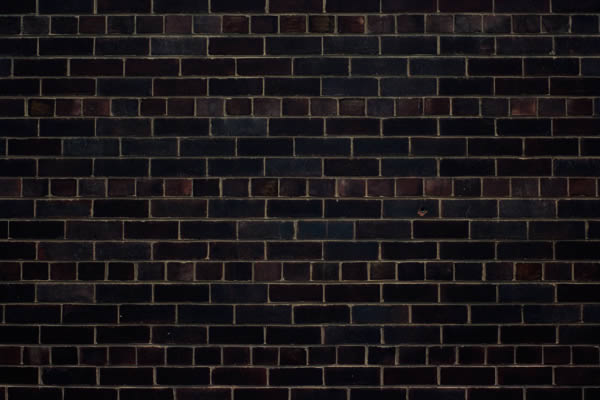
The following assets were used during the production of this tutorial.
Step 1
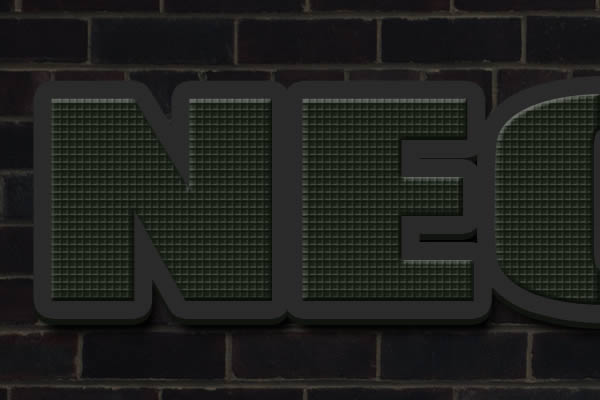
First make a new PSD document 1200 x 600 pixels resolution 72 Dpi. Now open the brick wall texture and copy and paste it into your new PSD document. Command/Ctrl-T (transform) the texture and resize it until you are happy with it. Make the brick wall texture darker with levels – Image – Adjustments – Levels or Command/Ctrl – L.
Step 2
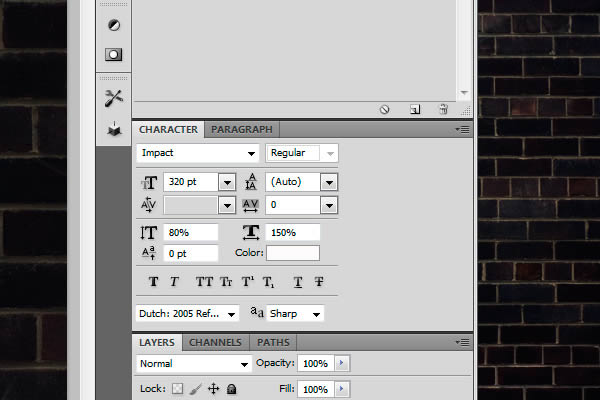
Now make your text with the font "Impact." I used the settings below.

Step 3
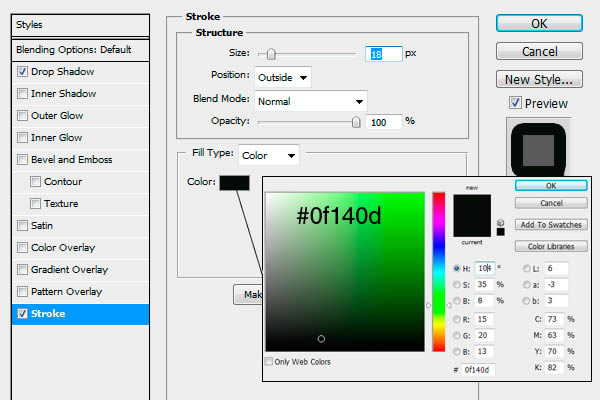
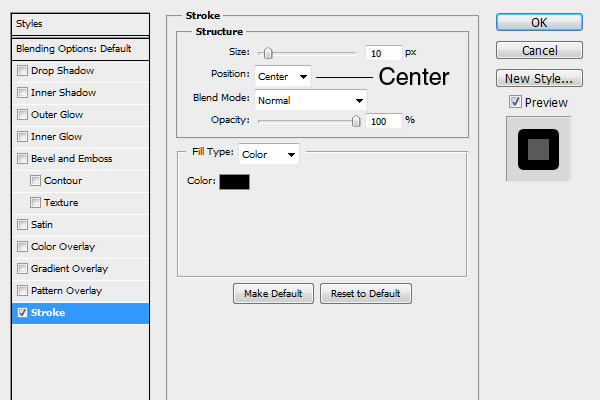
Now we are going to apply some layer styles. Double Click on the text layer to open Layer Styles. Select Stroke and use the settings below.
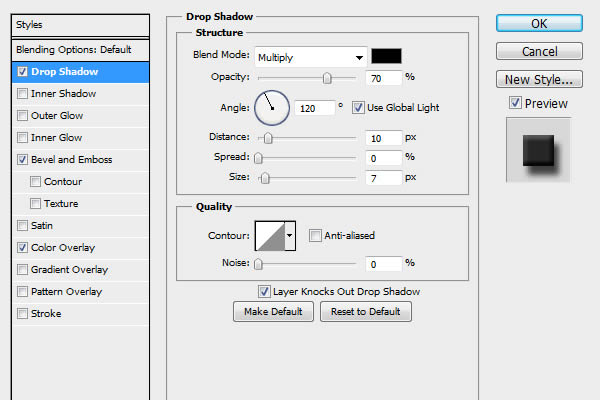
Now select Drop Shadow
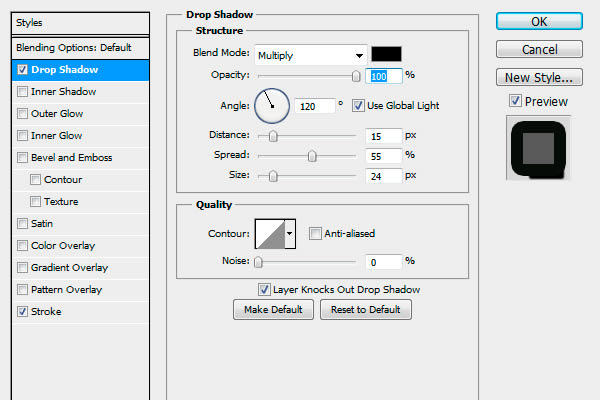
Step 4
Now we are going to make the grill texture. Make a new document 10 x 10 pixels 72 Dpi. Enlarge the document to 3200% by pressing Command/Ctrl – +. Use a hard brush size 1 px to make 2 lines of black like below. Now save this pattern by going to "Edit – Define Pattern" and name it Grill Pattern. Close this document.

Step 5
Copy the text layer, right click on the text layer and choose "Duplicate Layer." Now remove the layer styles on this layer by right click on the layer and choose "Clear Layer Styles." Double Click on the text layer to open Layer Styles. Use the settings below.
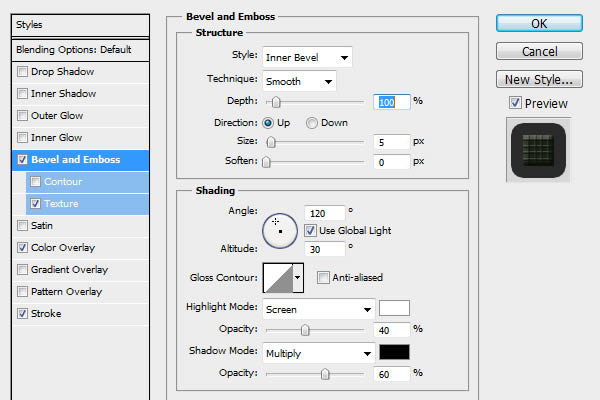

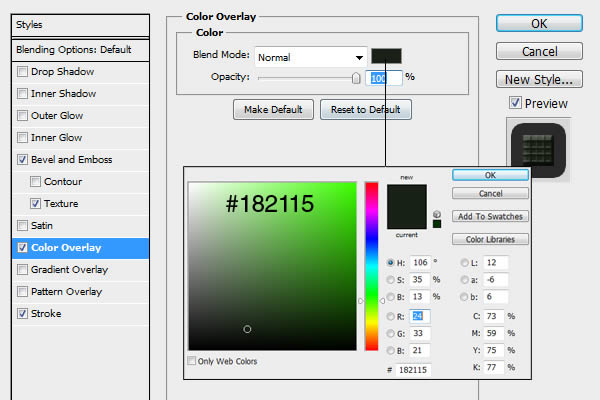
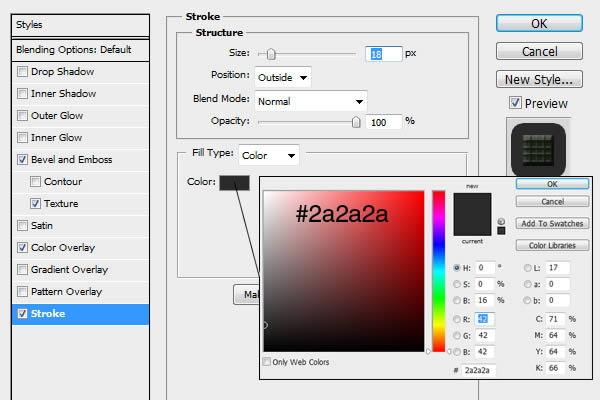
Step 6
For the little 3D effect on the text move the second text layer 5x up with the arrows on your keyboard with the Move Tool (v) selected.
Step 7
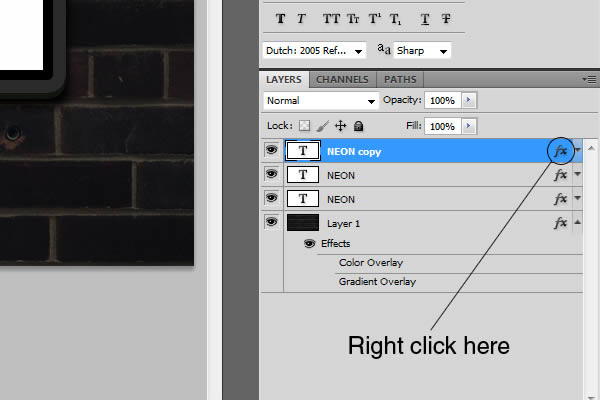
Now we are going to make the neon. Again copy the text layer, right click on the text layer and choose "Duplicate Layer." Now remove the layer styles on this layer by right click on the layer and choose "Clear Layer Styles." Use the settings below.
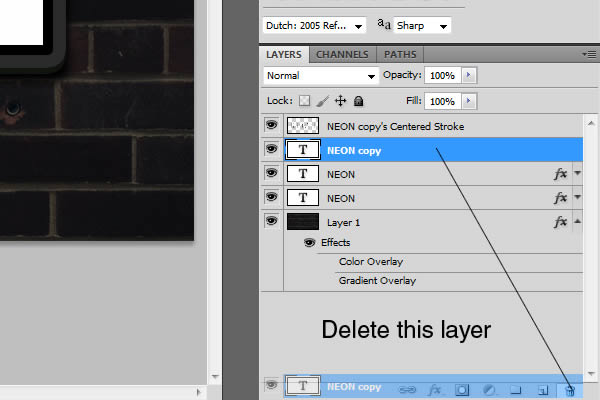
Click on OK. Right click on the "fx" of this text layer and choose "Create Layer"
Step 8
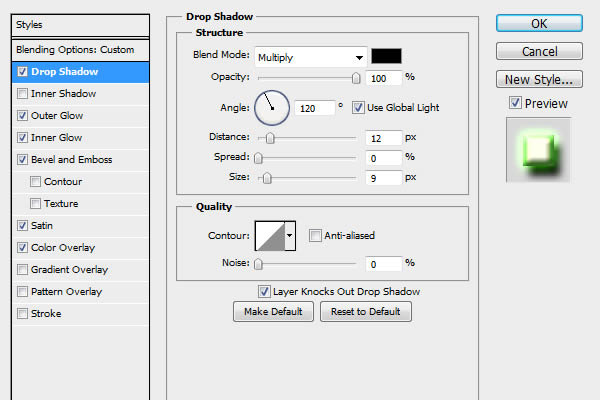
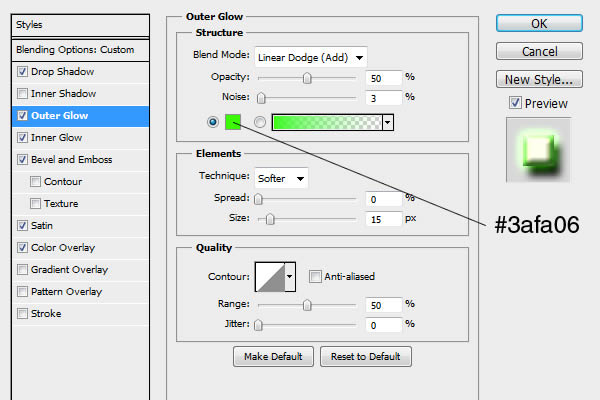
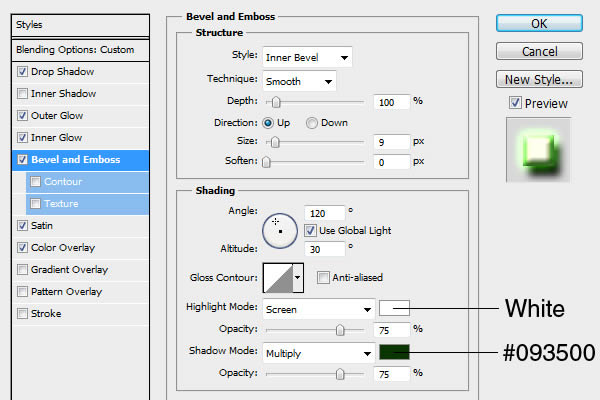
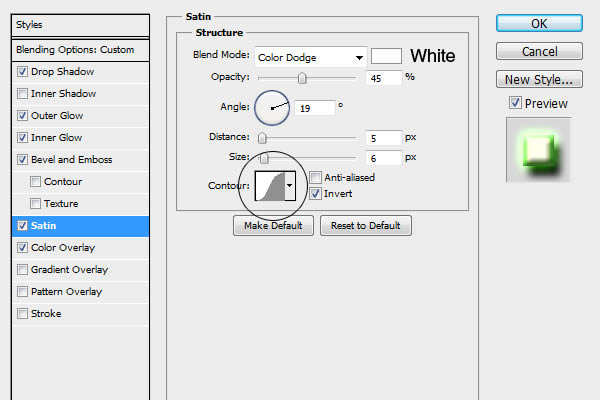
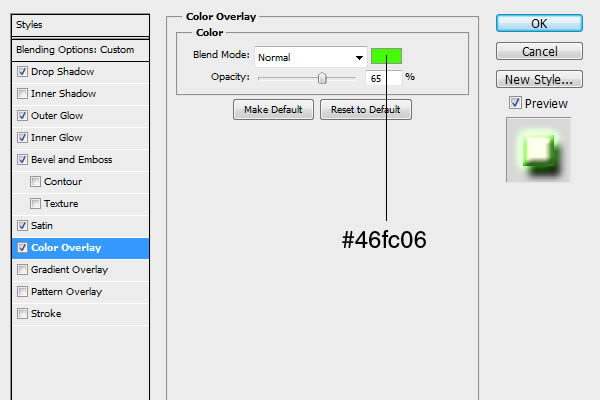
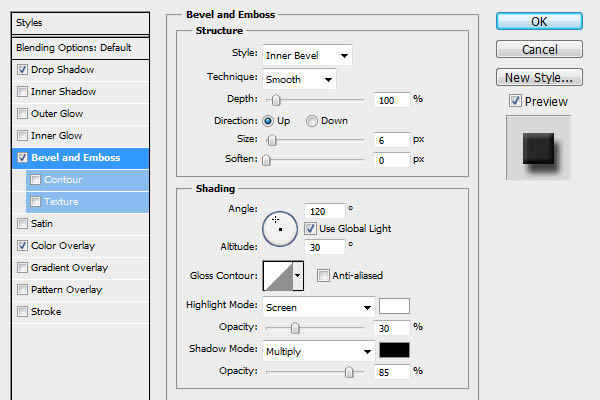
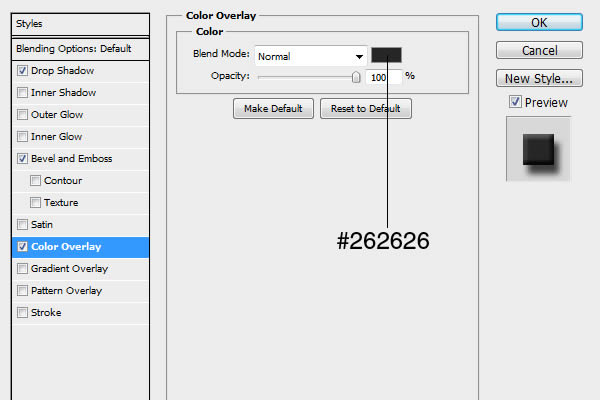
Now we are going to make the layer styles for the neon on the layer we just made. Use the settings below.
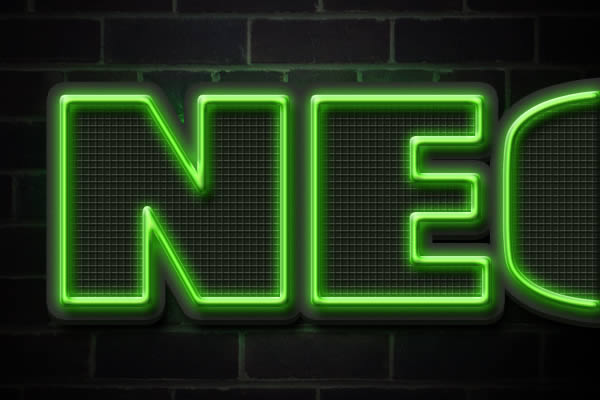
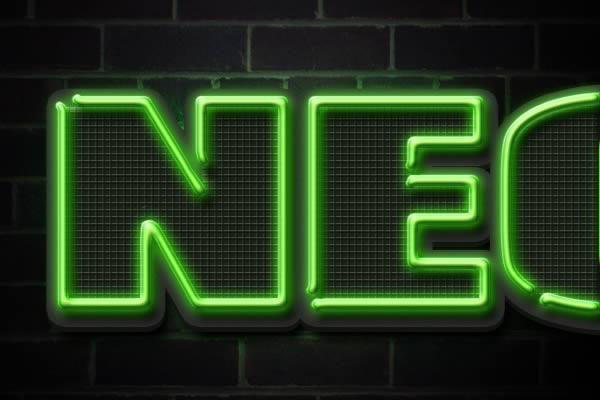
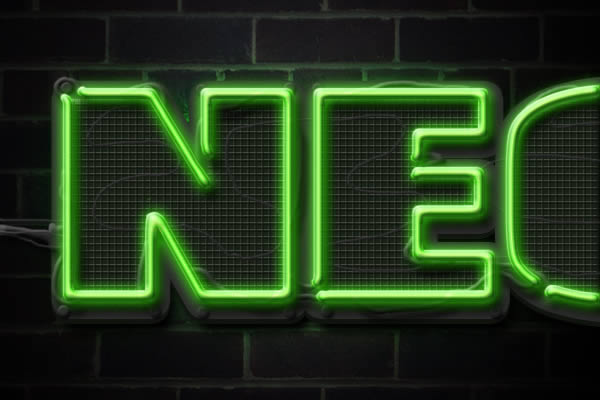
Step 9
Select the "Eraser Tool" (e) and erase some parts from the neon for a realistic look. You can also draw on this layer with a hard Brush for some curves.
Step 10
You can draw some wires if you like. Make a new layer (put this layer below the neon layer). Use a hard brush size 7 and size 4 to draw the wires. Use the setting below
Step 10
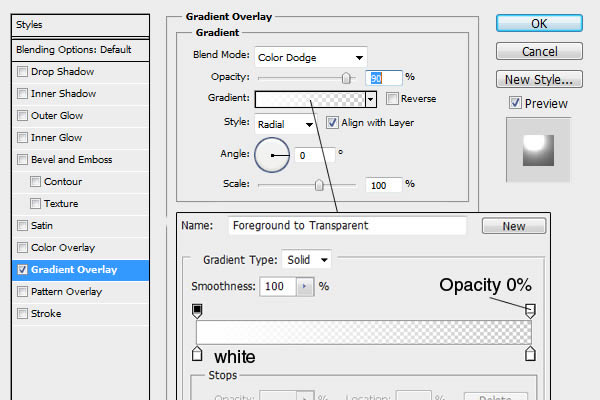
Put a gradient fill on the background. Double click on the brick wall layer and use the settings below
Final Image
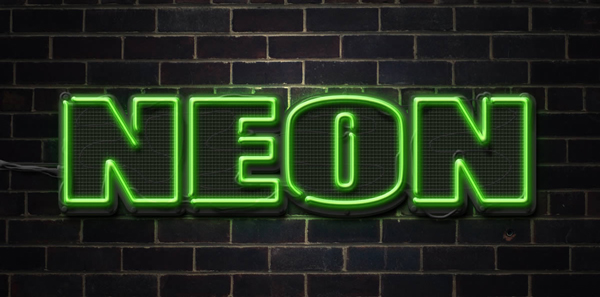
{excerpt}
Read More