In this tutorial I’m going to show you how to create a detailed case icon step by step using Illustrator tools, such as: the Rectangle tool, Ellipse tool, gradients, pathfinder, as well as a judicious use of Gaussian Blur and blends.
Step 1
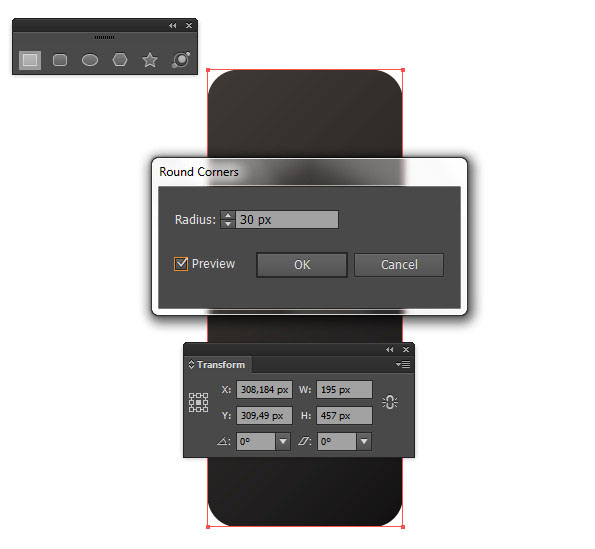
Open a new document. Now take the Rectangle Tool (M) and draw a rectangle the size W=195 by H=457 with rounded corners and a Radius of 30px.
Step 2
With the shape from Step 1 selected fill it with a linear gradient, using the colors R=61 G=56 B=52 to R=22 G=20 B=21.

Step 3
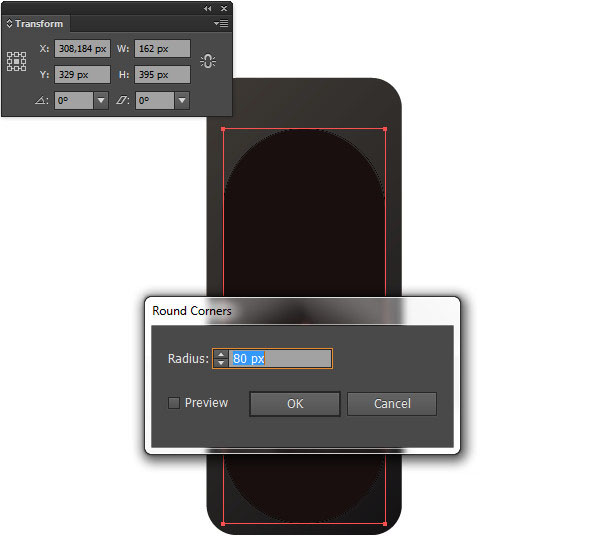
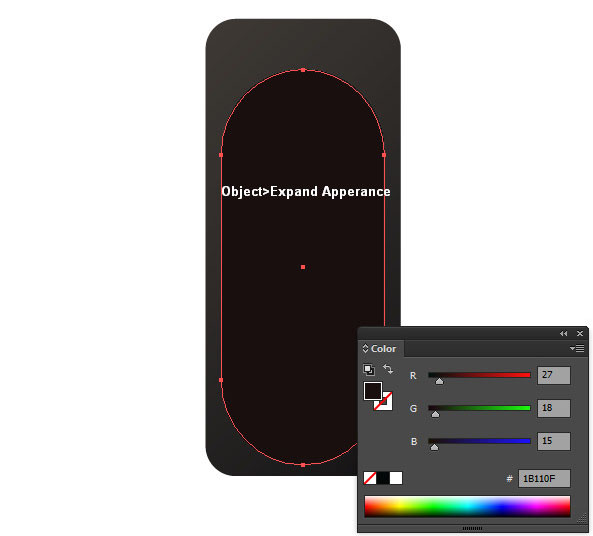
Take the Rectangle Tool (M) and draw another rectangle the size W=162 by H=395 with rounded corners Radius of 80px. Right after that go to Object > Expand Appearance and fill the shape with R=27 G=18 B=15 color.
Step 4
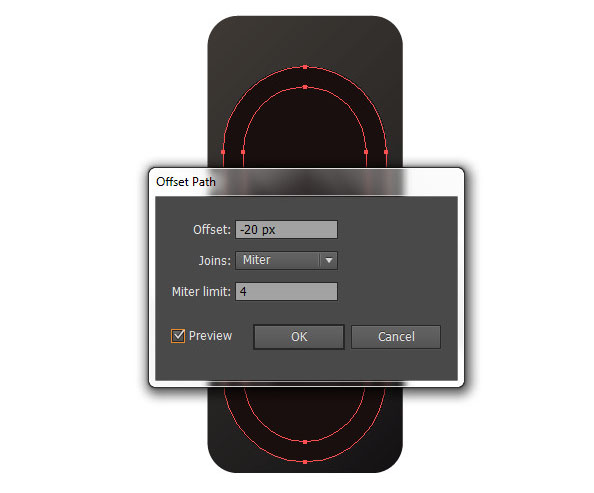
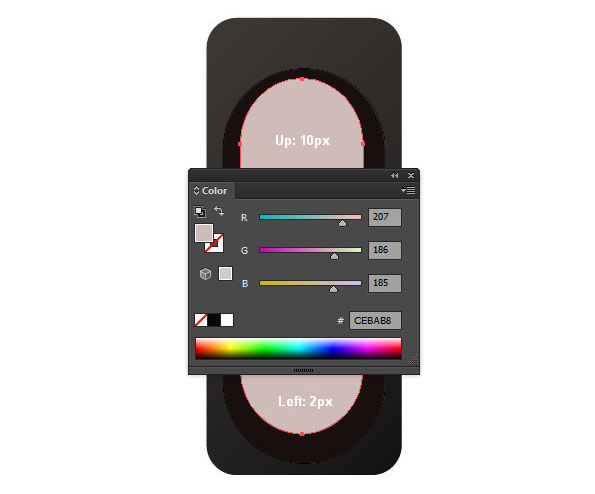
Select the shape from the previous step and go to Object > Path > Offset Path. Set the Offset to -20px, click OK, and then change the color of the new shape to R=207 G=186 B=185 and move the shape 2px to the left and 10px up.
Step 5
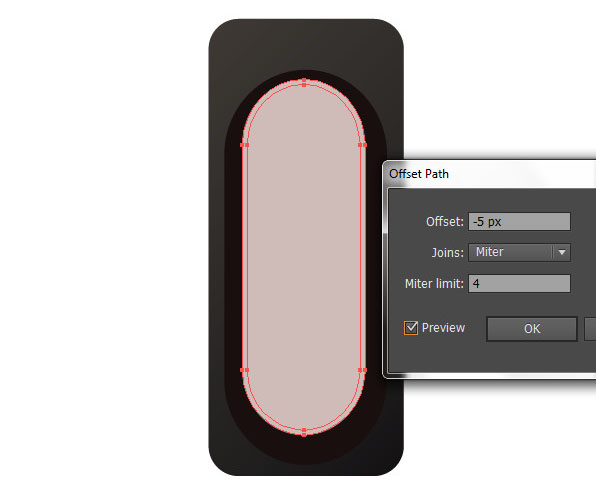
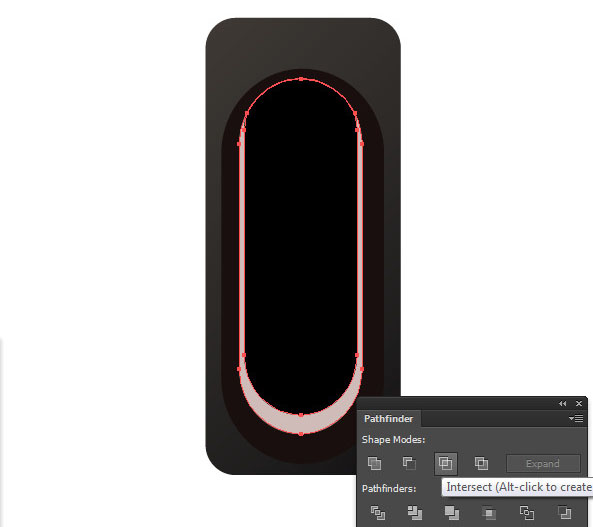
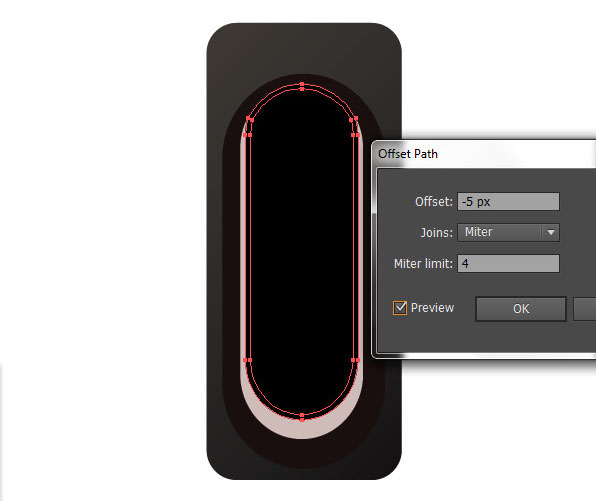
With the shape from the previous step selected, again go to Object > Path > Offset Path. Set the Offset to -5px, click OK, move the shape 14px up, and change the Fill color to Black. Now make another copy of the shape with the lighter color, then select the copy and the shape you moved 14px up. Open the Pathfinder Panel (Window > Pathfinder) and click on the Intersect button.

Step 6
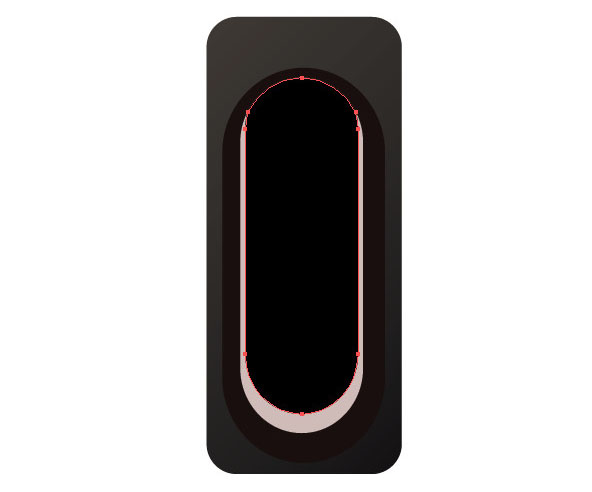
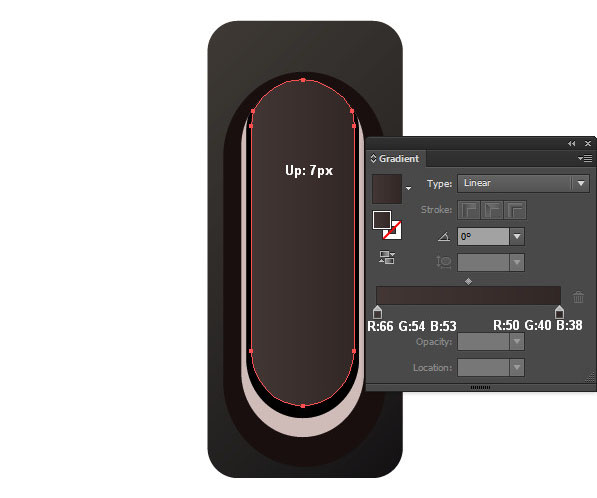
Select the shape from the previous step that you filled with a Black color and again go to Object > Path > Offset Path. Set the Offset to -5px, click OK, and move the shape that appeared after applying Offset 7px up. Now fill it with linear gradient colors R=66 G=54 B=53 to R=50 G=40 B=38.
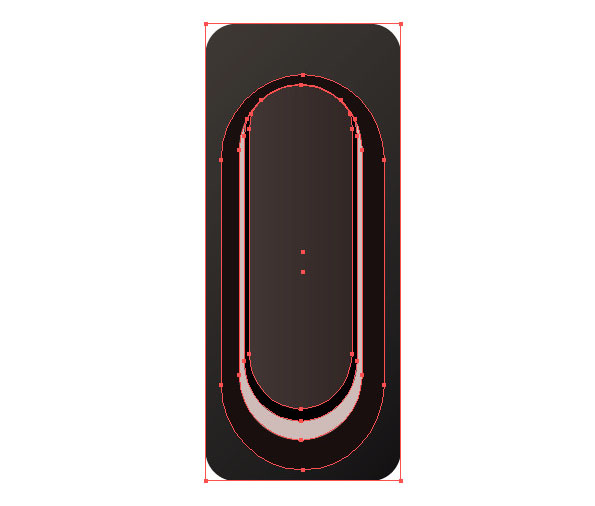
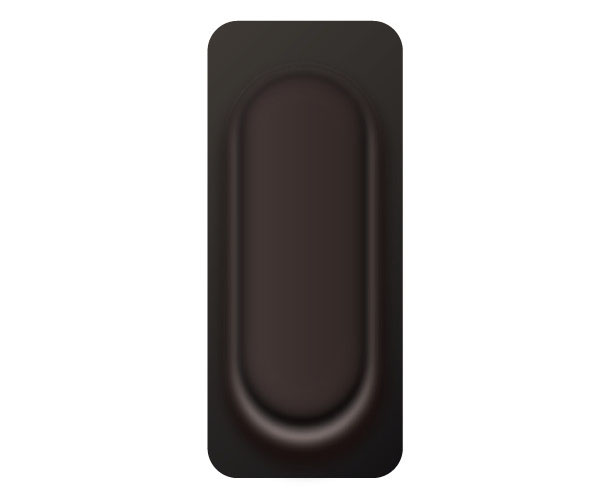
So far it should look as shown below. It still doesn’t look like a case of course, but in the following steps we’ll give it the look of a case and add detail.
Step 7
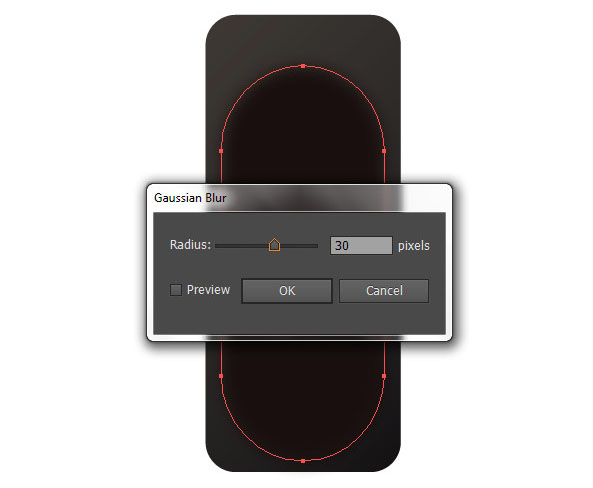
Make a copy of the shape from Step 3 with Command + C, then paste with Command + F, and make it invisible by clicking the eye next to the copy’s path. Now select the shape from Step 3 and apply Gaussian Blur to it with a 30px Radius.
Step 8
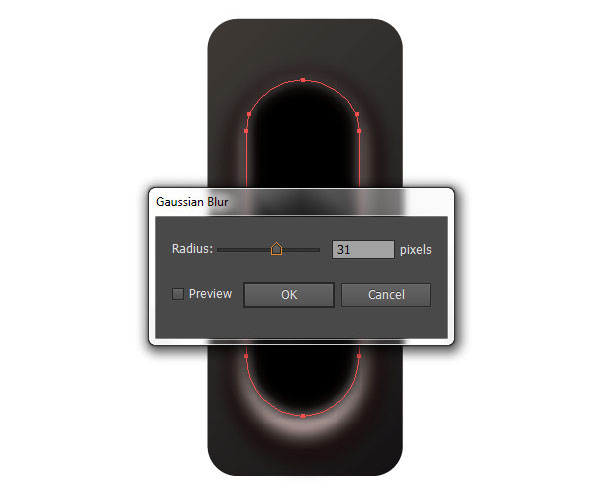
Now select the shape with the light color and apply Gaussian Blur to it with 31px Radius, as shown below:

Step 9
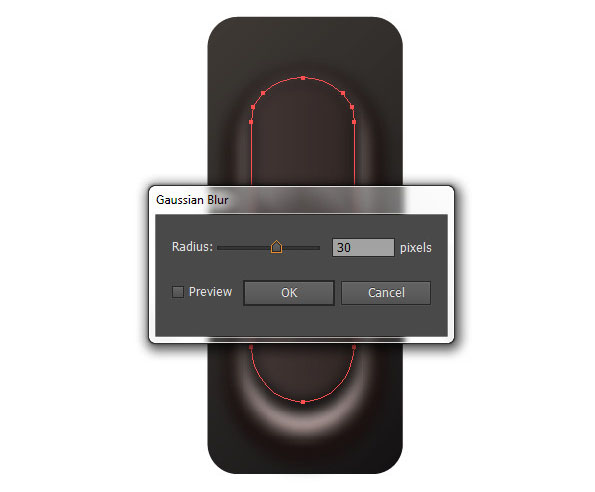
We continue applying Gaussian Blur to the following shapes, as shown in the picture below:
Step 10
We also apply Gaussian Blur to the shape on top with a 30px Radius.
Step 11
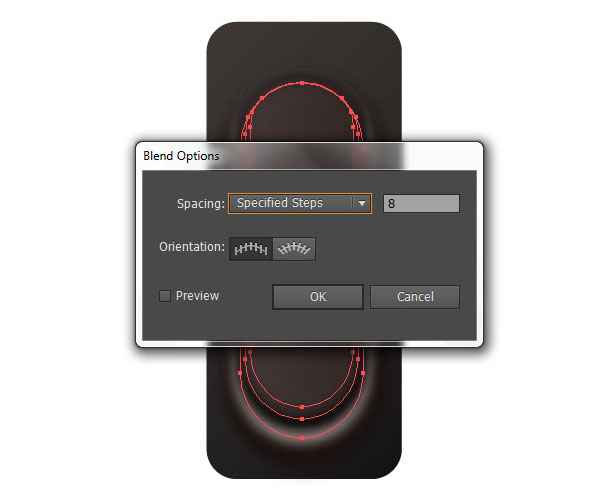
Now select the last three shapes you applied Gaussian Blur to and go to Object > Blend > Blend Options, and set the Spacing at Specified Steps of 8 and click OK.
Step 12
Now make the copy from Step 3 visible and move it on top of all others (Object > Arrange > Bring to Front). Then turn off the Fill color and apply a Stroke of 2px with a Black color.

Step 13
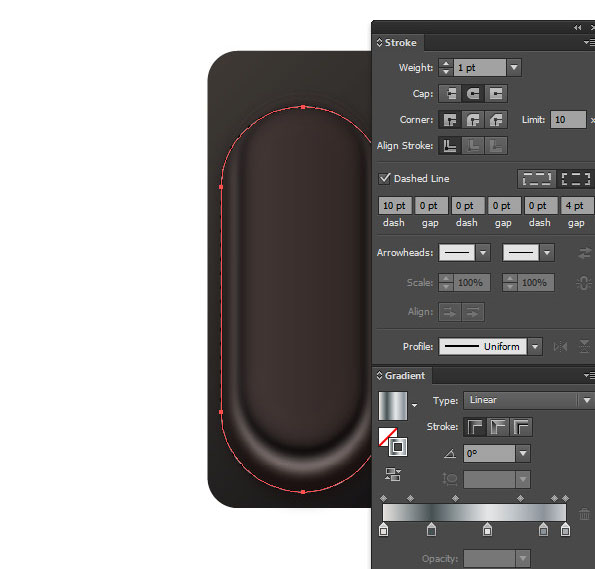
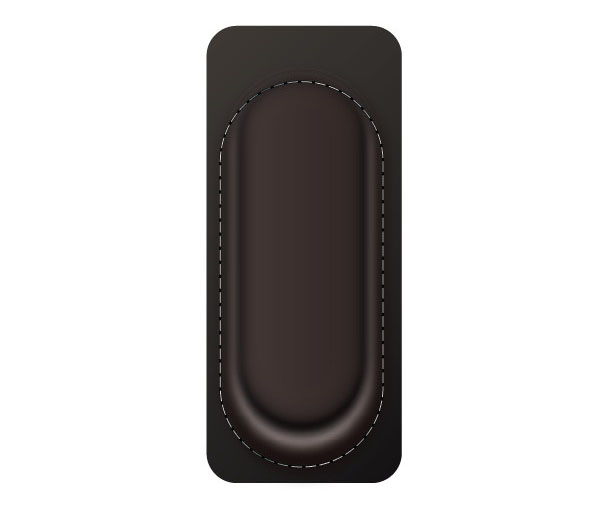
Copy the shape from the previous step with Command + C and then paste with Command + F. Now open the Stroke Panel (Window > Stroke), apply the settings as shown below, and fill it with a Linear gradient.
Step 14
Select all the shapes you made so far and group them (Object > Group).

Step 15
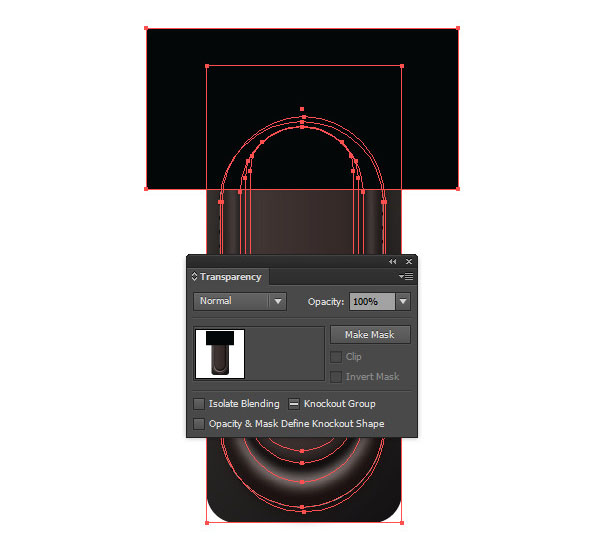
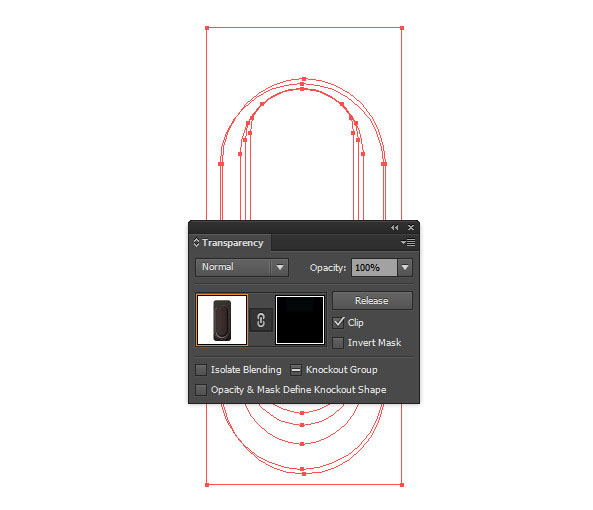
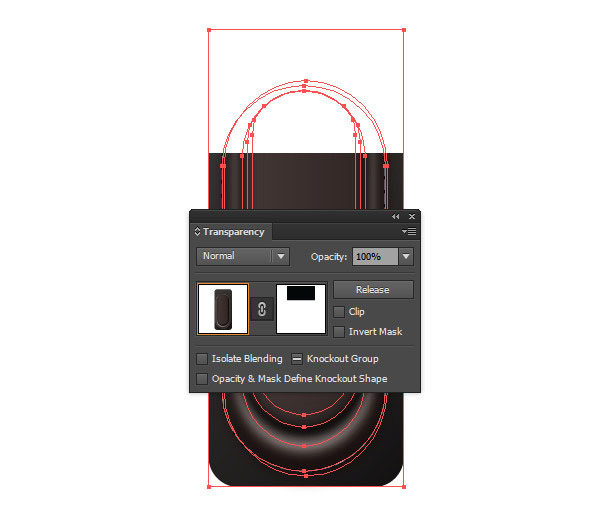
Take the Rectangle Tool (M) and draw a rectangle in a Black color in the upper part of the group. That part we’ll hide with a Mask. Now select the group and the black rectangle. Open the Transparency Panel, click on the Make Mask button, and remove the checkmark on Clip as shown.
You can skip this step, but I decided to hide the upper part of the group just in case.


Step 16
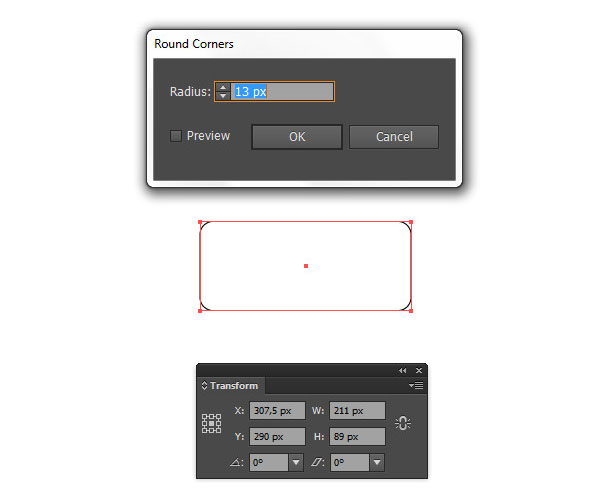
Take the Rectangle Tool (M), draw a rectangle the size of W=211px by H=89px, with 13px rounded corners. Right after that go to Object > Expand Appearance.

Step 17
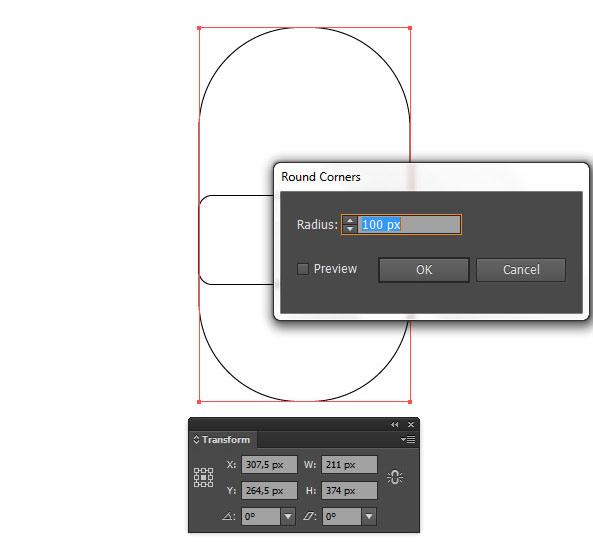
Draw another rectangle over the previous one with the size W=211px by H=374px with 100px rounded corners, and go to Object > Expand Appearance.
Step 18
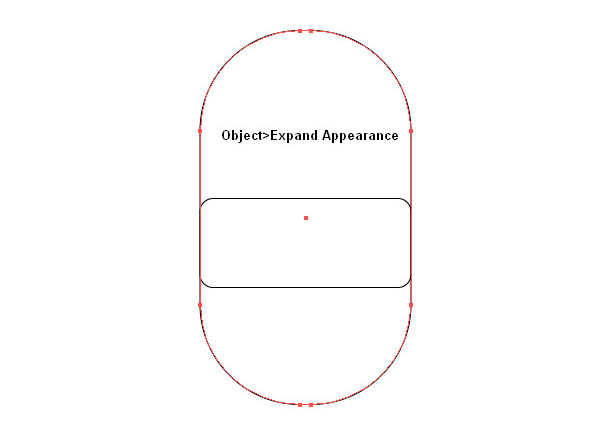
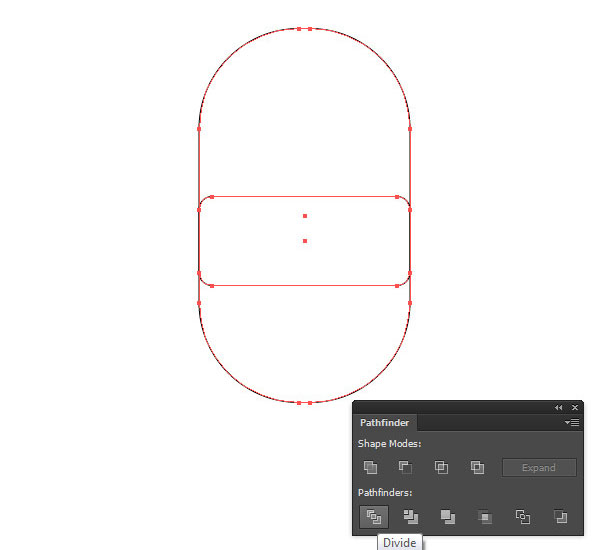
Now place the shapes one over another as shown below, then select both shapes, open the Pathfinder Panel and click on the Divide button.
Step 19
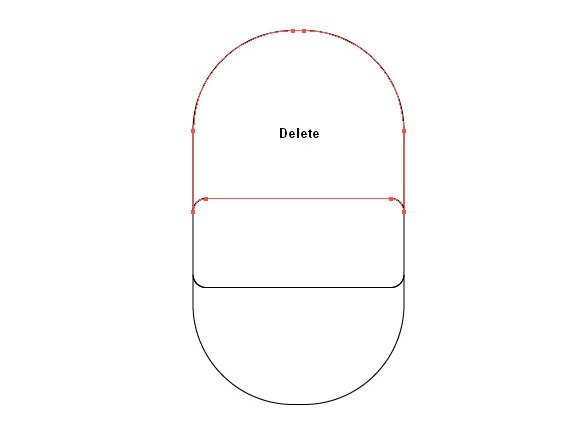
Now we got to delete the upper part of the shape. In order to do this open the group that appeared after applying Divide, find the path for the upper part and delete it.
Step 20
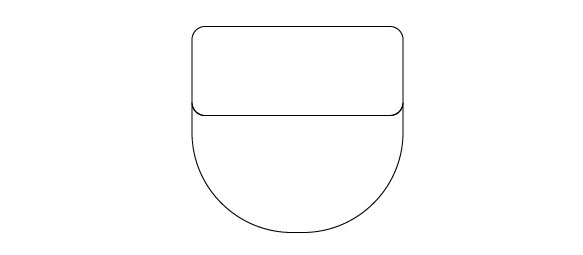
Now select both shapes, open the Pathfinder Panel, and click on the Add to Shape Area button.

Step 21
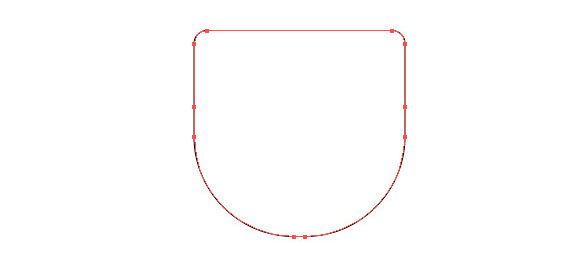
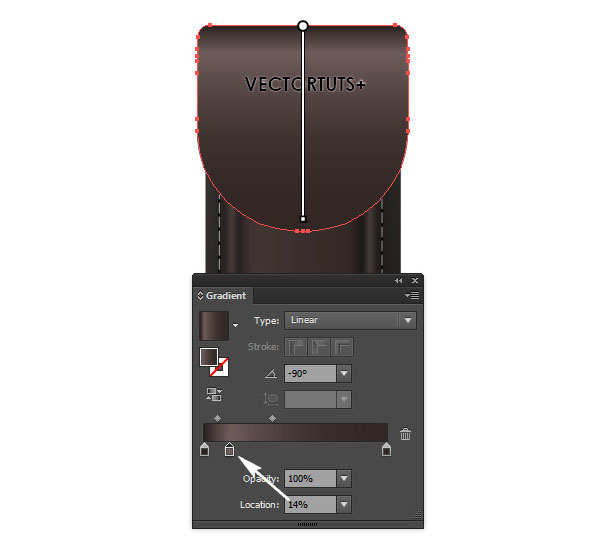
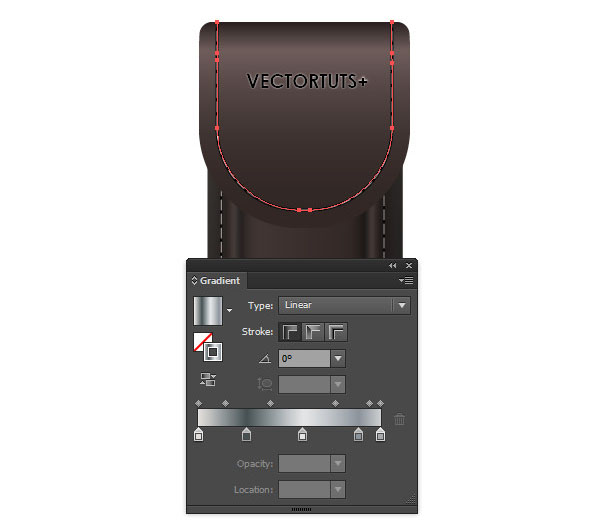
Place the shape that appeared in the upper part of the case as shown below and fill it with a linear gradient. You need 3 gradient sliders. For the first one set R=45 G=35 B=34, for the second one R=111 G=92 B=91, with location 14%, and for the third one R=50 G=40 B=38, with Angle -90 degrees.

Step 22
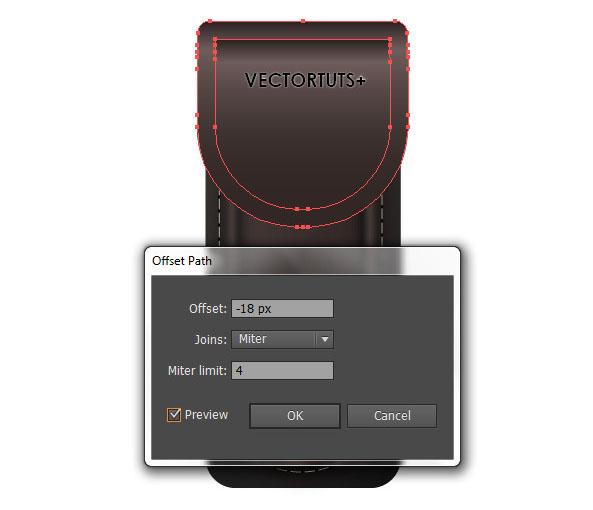
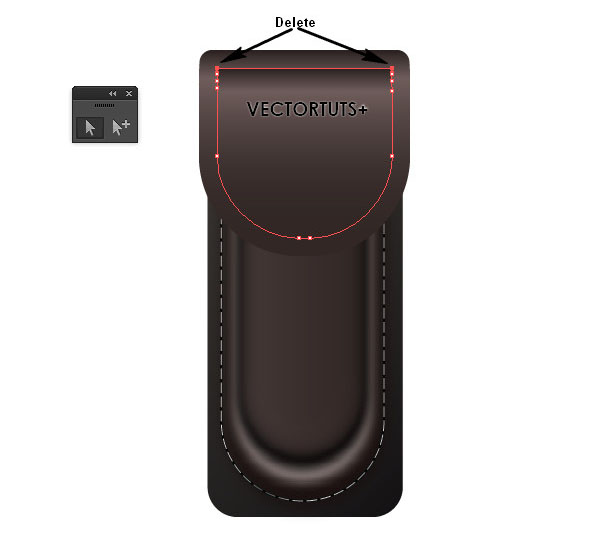
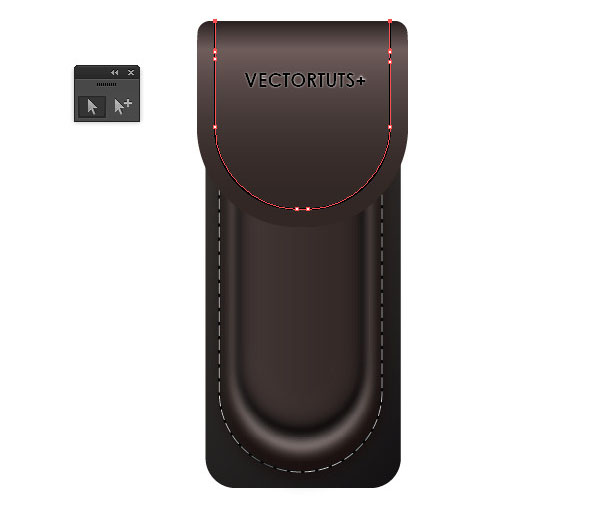
With the last shape that you filled with a Linear gradient selected go to Object > Path > Offset Path. Set the Offset to -18px, click OK, then with Direct Selection Tool (A) select the upper points of the shape and press Delete on the keyboard. Then again use the Direct Selection Tool (A) to slide the upper points of the shape to the top of the shape from step 21 as shown below:
Step 23
After you have already slided the upper points to the top of the shape from Step 21, then turn off the Fill color, and apply Stroke 3px with a Black color.

Step 24
Copy the shape from the previous step with Command + C and paste with Command + F. Now reduce the Stroke color to 1px and apply the settings in the Stroke Panel as shown below. Fill it with a linear gradient as shown:

Step 25
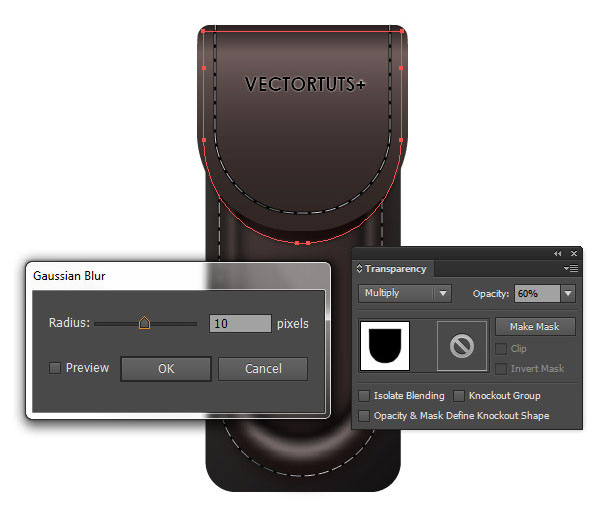
Copy the shape from Step 21 with Command + C, then place it under the original with Command + B. Change the color to Black and decrease the size a little bit. Move it a few pixels down and apply Gaussian Blur with a 10px Radius. Also change the Blending Mode from Normal to Multiply and set the Opacity at 60%.
Step 26
Take the Ellipse Tool (L), draw a circle the size W=59px by H=59px, and Black color, then place it in position as shown below:

Step 27
With the shape from the previous step selected go to Object > Path > Offset Path. Set the Offset to -3px, click OK, and change the color to R=19 G=19 B=19.

Step 28
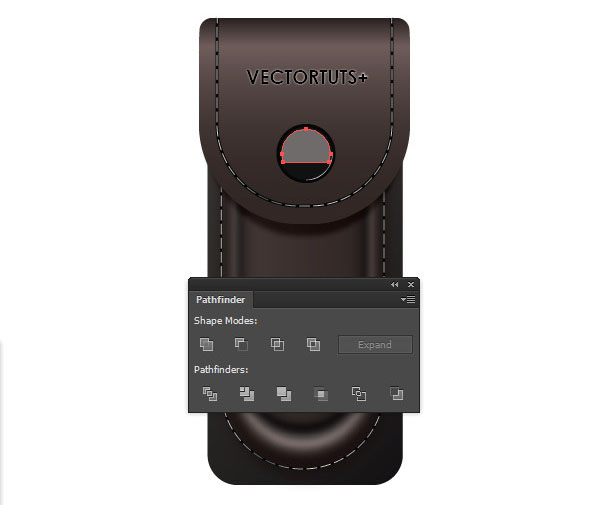
Copy the shape from the previous step with Command + C and paste with Command + F. Take the Rectangle Tool (M), draw a rectangle in the lower part of the copy, then select the copy and the rectangle. Now open the Pathfinder Panel and click on the Minus Front button. Fill the shape with a White color and set the Opacity to 50%.

Conclusion
And at the end you can add a background, reflection, and shadow in any way you want. Here is the final result:

{excerpt}
Read More