In this quick tip tutorial we will explain how to create a steel text effect using layer styles in Photoshop. Let’s get started!
Tutorial Assets
The following assets were used during the production of this tutorial.
Step 1
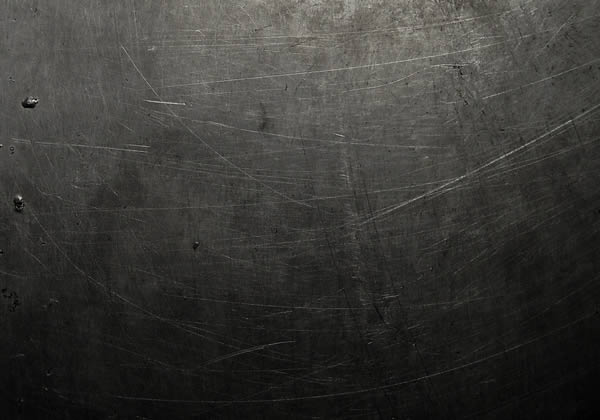
First make a new PSD document 1000 x 700 pixels resolution 72 Dpi. Now open free texture metal 1010 and copy and paste it into your new PSD document. Press Command/Ctrl+T to transform the texture and resize it until you are happy with it.
Step 2
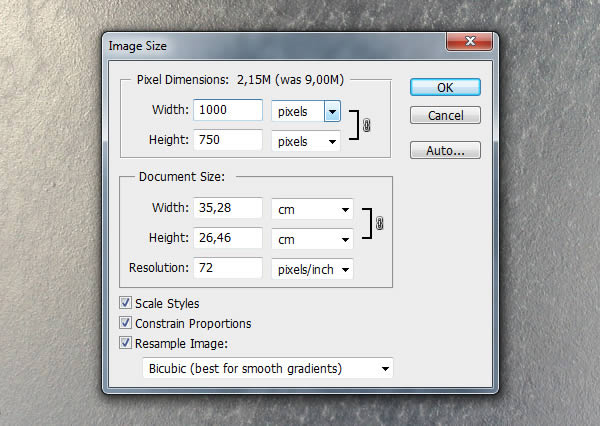
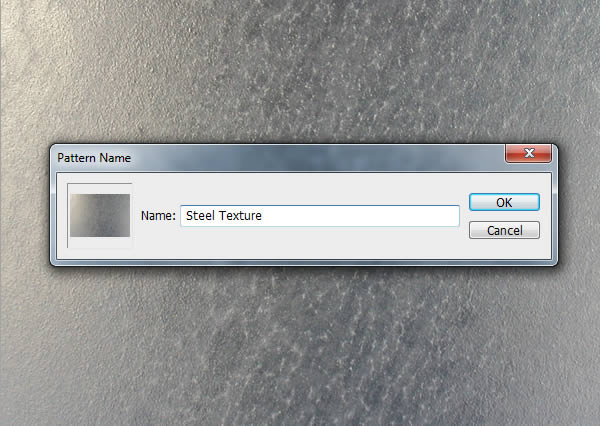
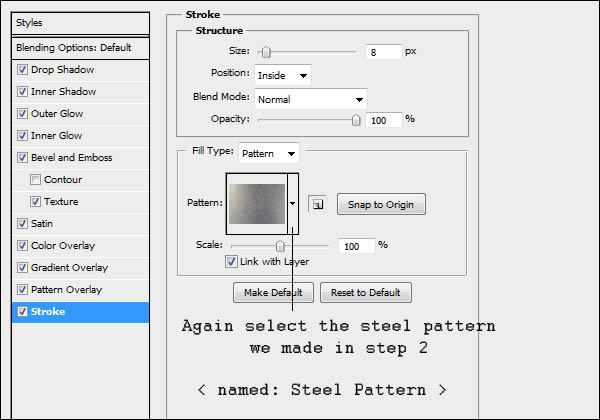
Then we are going to make the textures for the steel style. Open the Metal Texture in Photoshop. Go to Image > Image Size and apply the settings as shown below. Now go to Edit > Define Pattern name it Steel Texture and press ok. Exit this document and go back to your document from step 1.
Step 3
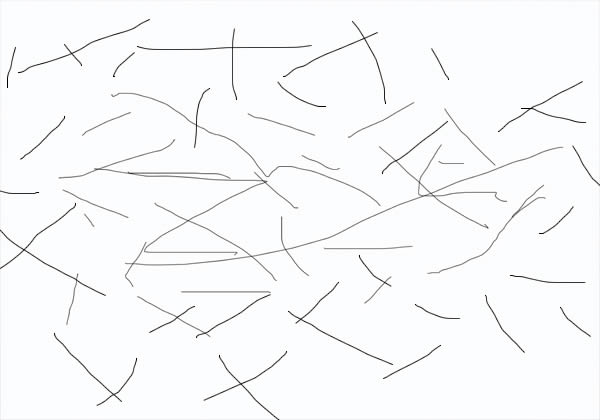
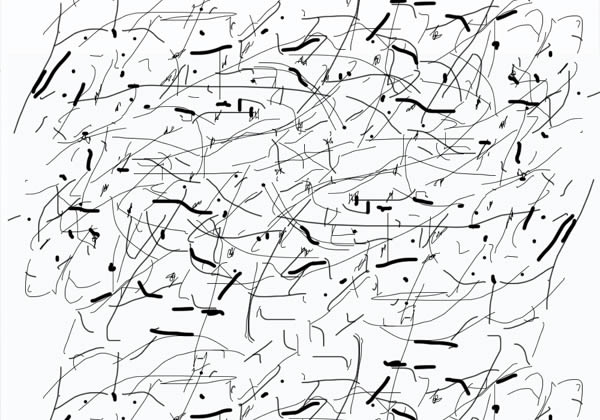
We’re going to create the following two patterns ourselves. Make a new layer in the document of step 1 by going to Layer > New > Layer. Fill this layer with white by going to Edit > Fill and choose white Now take your Brush Tool and set the brush Size to 1 px and the Hardness to 100% drawing some black lines through each other like below. The more lines, the more scratches the style gets!
If you’re ready go to Edit > Define Pattern… Name it Scratches and press ok. For the next pattern make another white layer. This time make some more scratches and use different brush sizes. If you are ready go to Edit > Define Pattern and name it Scratches 2. Now make the layers invisible. You can always use them to make another pattern if you aren’t satisfied with the result on the layer style.
Step 4
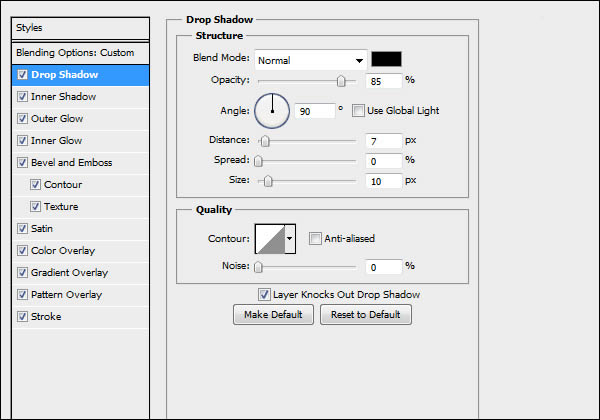
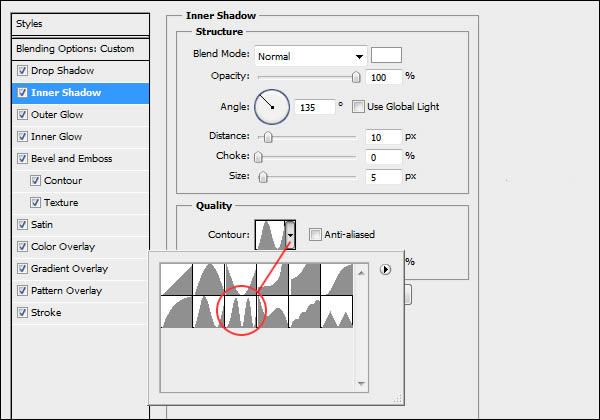
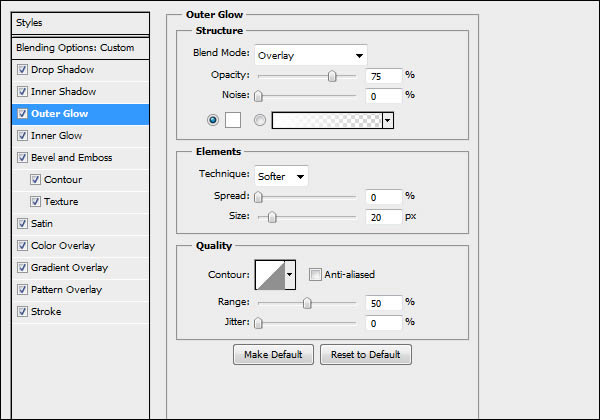
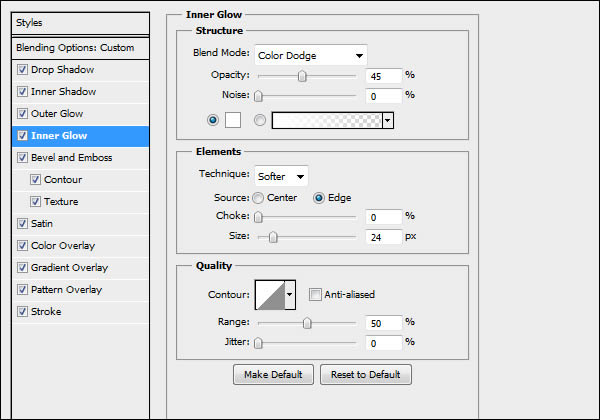
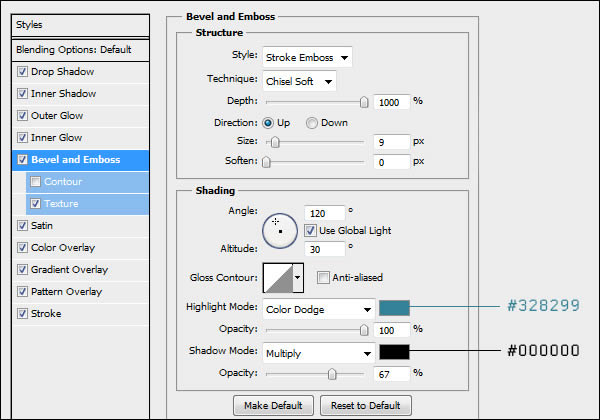
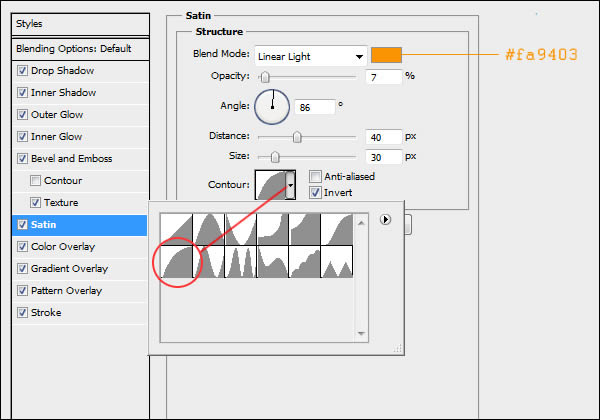
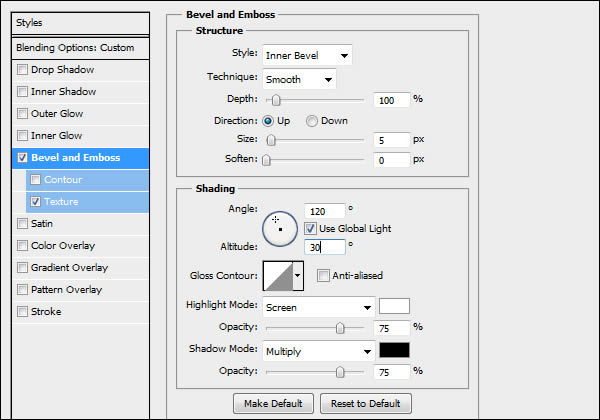
Now create your text with the font Cafe Nero M54 in white and apply the layer styles as shown below. Open layer effects: double click on the text layer or go to Layer > Layer Styles > Blending Options.

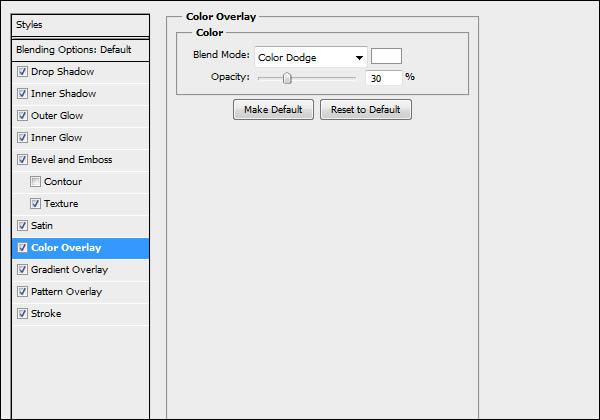
Now we are getting somewhere!
Step 5
Duplicate the text layer from step 5 Go to Layer > Duplicate Layer and then remove the Layer styles from the new text layer. Right click on the text layer and choose > Clear Layer Style.
Step 6
Now we are going to apply some new layer styles on this layer. We’re making scratches on the steel and some more shadows.
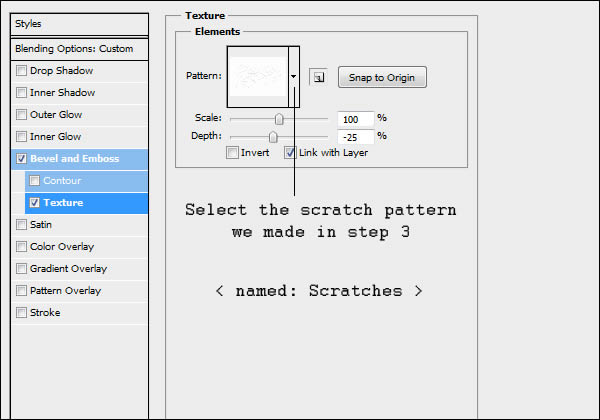
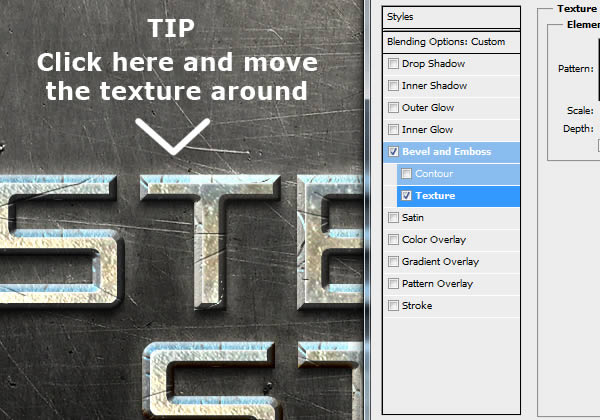
When you are in the texture section of the layer style click on your document area and move the texture around until your happy with it.
Step 7
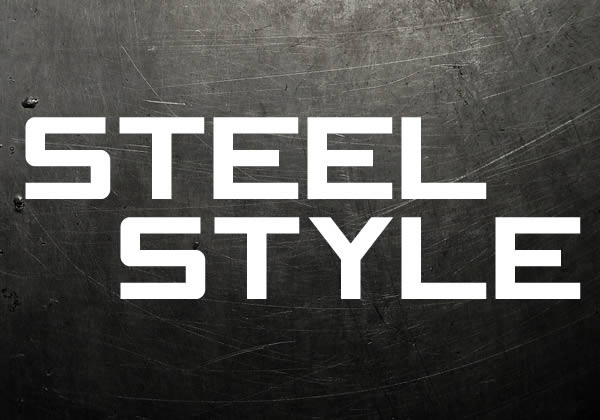
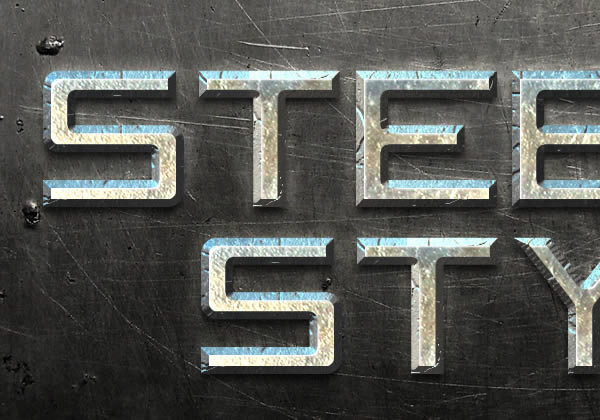
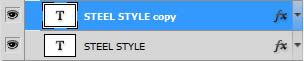
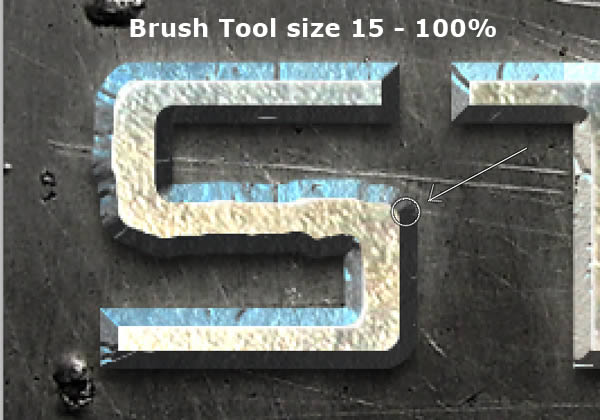
Your steel text is ready! In this step we are going to show you how to make the steel style more realistic. Make the STEEL STYLE copy layer invisible.

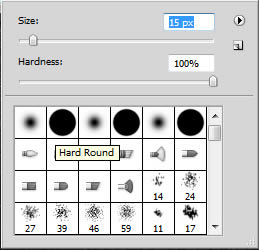
Select the STEEL STYLE layer > Copy this layer > Right click the new text layer and choose > Rasterize Type Now select the Brush Tool and take a hard brush 100% and size 15.
Zoom in and draw little around the letters with your Brush Tool. You get this effect below. Do this for all the letters.
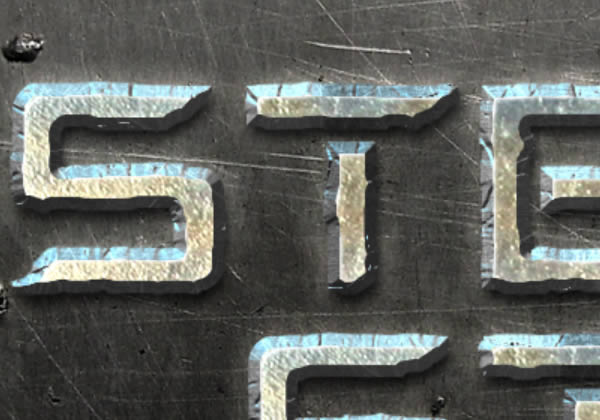
Now select your Eraser Tool and remove some of the text like below
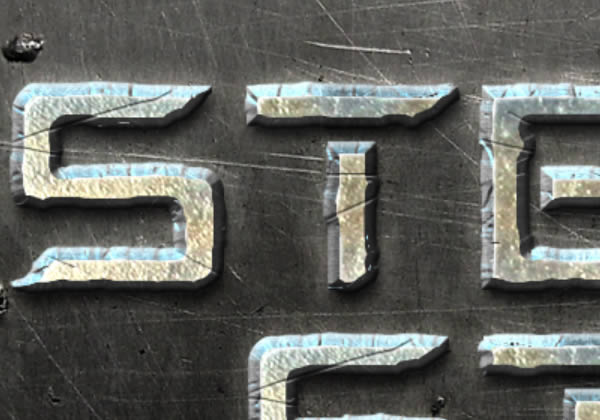
Step 8
Copy this text layer and apply the second Layer Style from Step 6 and you are done with the text! Select the Text Layer with the style from step 6. Go to layer > Layer Style > Copy Layer Style. Now select the new Text Layer you just copied. Go to layer > Layer Style > Paste Layer Style.
Final Image

{excerpt}
Read More