In this tutorial I’ll show you how to create a simple and fancy animation while playing with shapes and the Image Lounge plug-in from Red Giant Software.
Basically I used to write tons of expressions to create something like a shape repeater,
but recently friend of mine gave me a link to a great Image Lounge (free trial included) set from Red Giant Software.
It is very handy and this set can help you to save a lot of time without writing expressions.
It is compatible with Adobe After Effects CS3, CS4, CS5, CS5.5.
So go ahead and grab one.
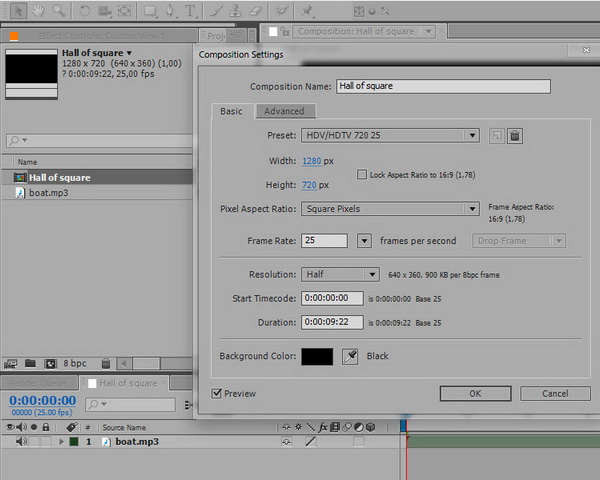
Step 1
First of all let`s create a new composition by dropping our audio to a comp icon.
Step 2
Create a new Solid by pressing “Crt + Y” on Windows or “Cmd + Y” on Mac.
Name it as “BG”.

Step 3
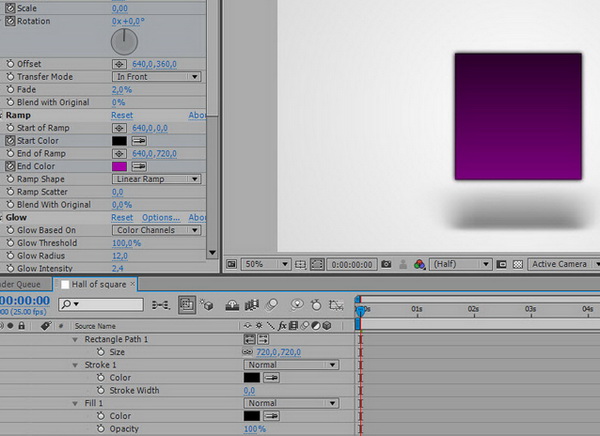
With Solid selected go to “Effect->Generate->Ramp” and apply the following settings.

Step 4
Create new shape layer by double clicking on “Rectangle Tool”

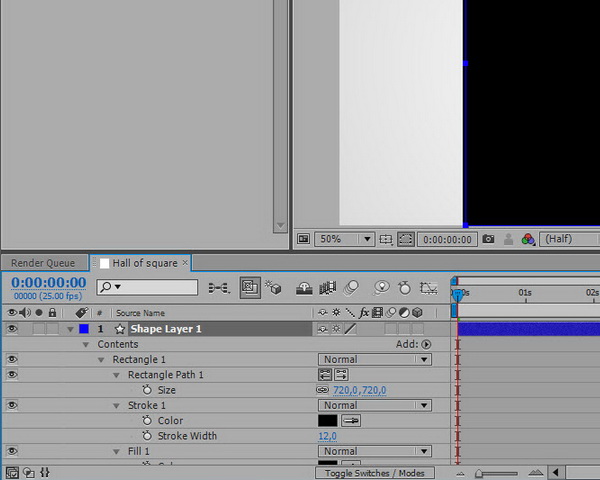
Step 5
With selected “Shape layer 1″ press “UU” to reveal it`s options.
Change Rectangle Size to “720,720″.
Stroke Width to “12″.
Step 6
Click on drop menu and reduce “Fill” opacity to 0%.

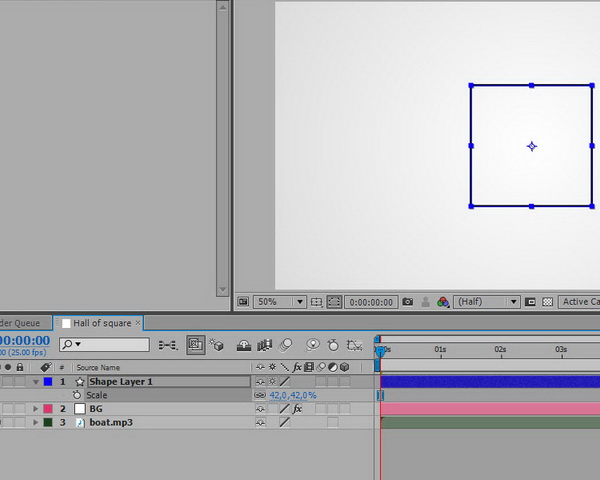
Step 7
With “Shape layer 1″ selected press “S” to reveal Scale option and reduce its value to 42%.
Step 8
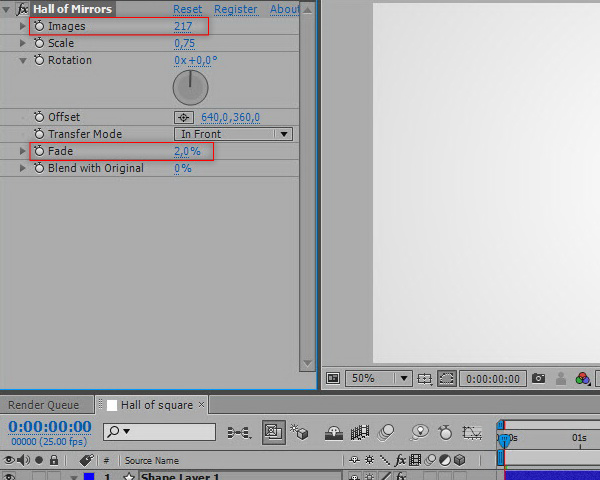
It`s time to apply “Hall of Mirrors” plug-ins to our shape by “Effect->Image Lounge->Hall of Mirrors”
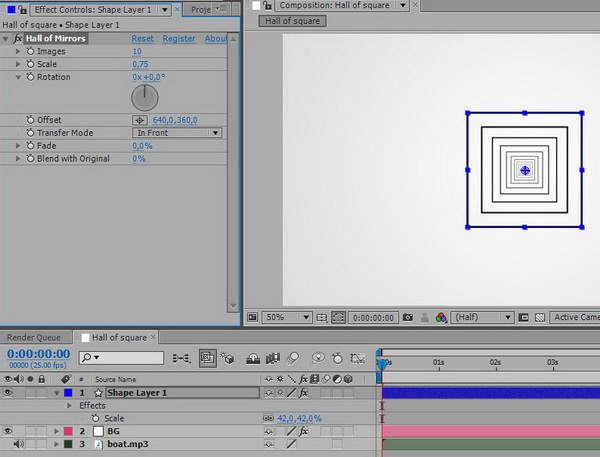
Step 9
Set “Images” to 271
“Fade” to 2%
Step 10
Make our shape layer 3D by clicking this 3D checkbox.

Step 11
Then if you`ll try to play with X or Y Rotation you`ll see that nothing happened
and image still looks like a 2D.

Step 12
So the trick how to make this thing look like a full 3D object is adding Z-anchor in Anchor Point.
Lets adjust about 360 to it.

Step 13
Nice!
Press “R” and reset X and Y Rotation to 0.

Step 14
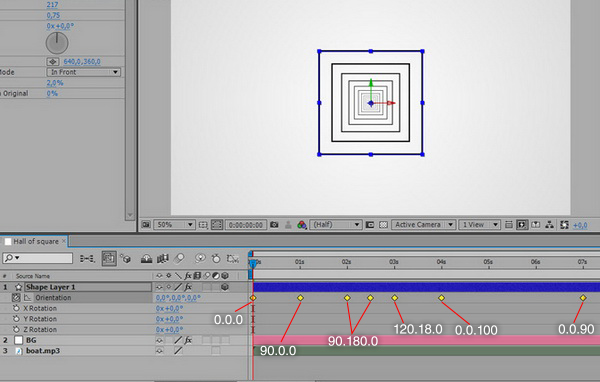
Click on Orientation stopwatch.
And make the following keyframes:
00.00.00- 0.0.0
00.01.00- 90.0.0
00.02.00- 90.180.0
00.02.12- 90.180.0
00.03.00- 120.18.0
00.07.00- 0.0.90
00.04.00- 0.0.100
Step 15
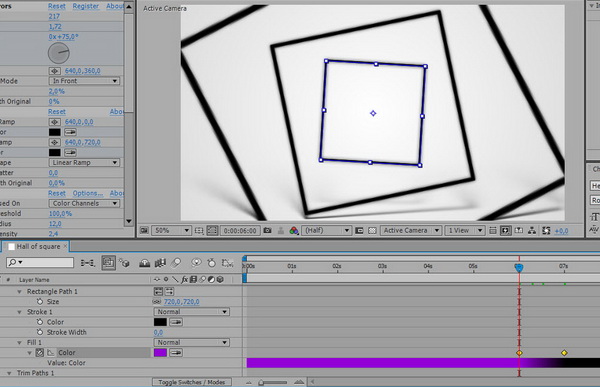
Now lets animate rotation of repeated shapes.
Go to “Hall of Mirrors” and click on stopwatch below the “Rotation” value.
Make the following keyframes:
00.02.07- 0
00.03.00- 11
00.04.00- 75

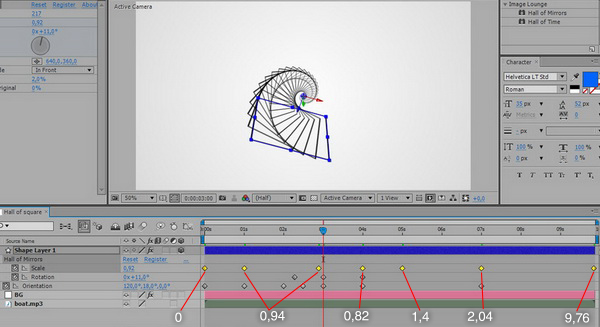
Step 16
Then add keyframes to “Scale” parameter under “Hall of Mirrors”:
00.00.00- 0
00.01.00- 0,94
00.02.22- 0,94
00.04.00- 0,82
00.05.00- 1,4
00.07.00- 2,04
00.09.21- 9,76
Step 17
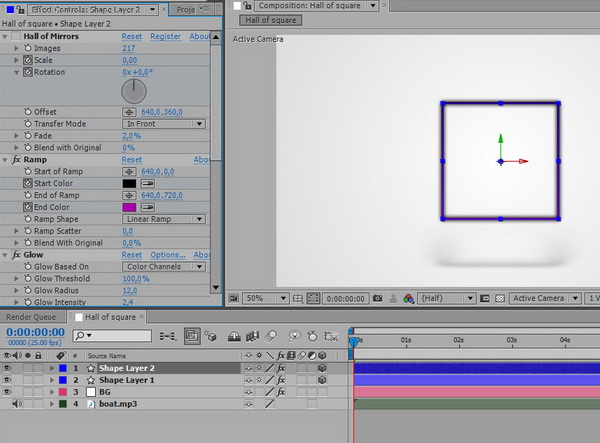
It`s time to put some colors to our shape by applying “Effect->Generate->Ramp”.
Choose the following settings for “Start of Ramp” and “End of Ramp”.

Step 18
Now click on stopwatch below the “Start Color”,”End Color” choose your color, move to next second and choose your next color..
And do all these actions till 5 second.

Step 19
Lets add some more realistic effects to our shape by adding
“Effect->Stylize->Glow” and “Effect->Image Lounge->Real Shadows”

Step 20
Change plugins settings as shown in the image below.

Step 21
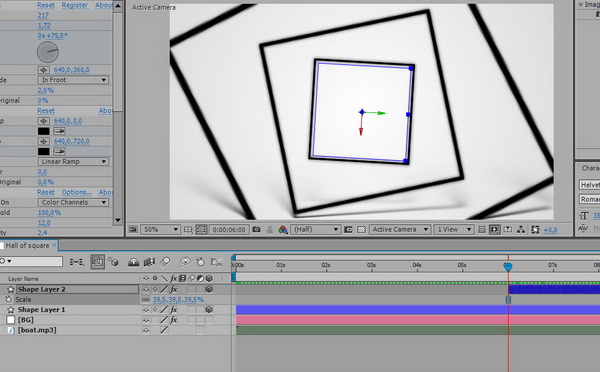
With this things done we can add a new square by duplicating our “Shape Layer 1″ (Crt+D on Windows or Cmd+D on Mac)
and switching off “Hall of Mirrors” on “Shape Layer 2″.
Step 22
With “Shape Layer 2″ selected increase “Fill” opacity up 100% and reduce “Stroke Width” to 0%.
Step 23
Go to 00.06 second and with “Shape Layer 2″ selected press “Alt+ [” to trim the beginning of this layer.

Step 24
Reveal “Shape Layer 2″ options and go to “Add->Trim Paths”

Step 25
Make two keyframes under “Start” of “Trim Path”:
06 sec – 75%
07 sec – 0%

Step 26
Disable “Ramp” effect and add two keyframes under “Fill” option:
06 sec – #9300D7
07 sec – #000000
Step 27
Reduce the “Scale” of “Shape Layer 2″ to 39,5%.
Step 28
Type your text using “Text Tool” and at time 00:06:19 press “Alt+ [” to trim the beginning of the layer.
That’s it.

{excerpt}
Read More