This week we are celebrating the launch of PhotoDune, Envato’s new stock photography website with a series of photo effect and photo manipulation tutorials that showcase the images from our new marketplace. In this tutorial we will turn a photo into a digital painting using several techniques to achieve a mixed media look. For this workflow you don’t necessarily need to be good at freehand drawing as we won’t start from scratch but use the photo as the base of our artwork. The photo used in this tutorial is available for free for Psd Premium Members. Let’s get started!
Tutorial Assets
The following assets were used during the production of this tutorial. We have granted a complimentary personal license to Psd Premium Members for the PhotoDune images used in this tutorial. They can be accessed in the source files of your premium download. If you are not a premium member, you can download the images used in this tutorial below.
Step 1
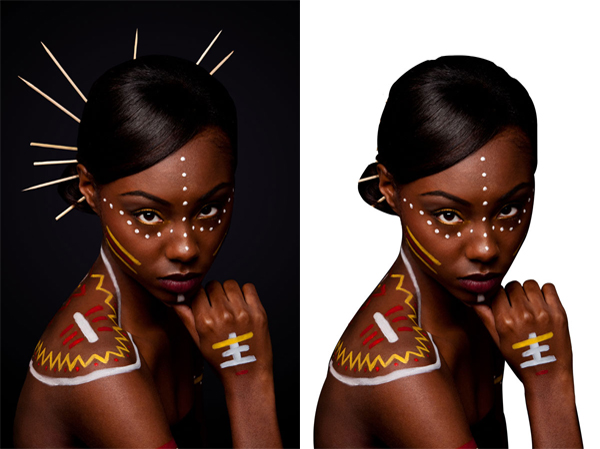
Open the Tribal beauty photo. First of all we need to extract the woman from the original background of the photograph. We don’t need to include the sticks in her hair, which makes the selection a bit easier. As the background and the foreground are too close to each other in colors we will you use the Pen tool for the selection. You can see the end result of the masking on this image:
Step 2
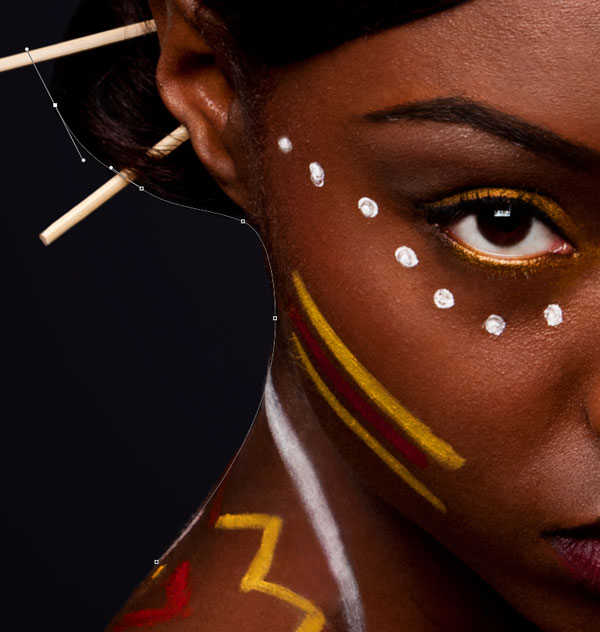
On images like this using the Pen tool is very useful as we have lots of clean curves on the edges. With the Pen tool you can create curves easily to track the outlines of the portrait. Once we draw the whole path, we will turn it into a selection and save it as a pixel mask. You should select the Pen tool and make sure you use the Path mode.

Step 3
You can choose to include the hand and the body in the selection and use it in the final composition but if you want to make the masking faster you can leave it out and only focus on the head as we will only use the head in this tutorial. Try to use the least amount of anchor points for your path but try to follow the edges preciously with your curves. If you are not familiar with the Pen tool check this tutorial out from my Photoshop for Beginners series:
Step 4
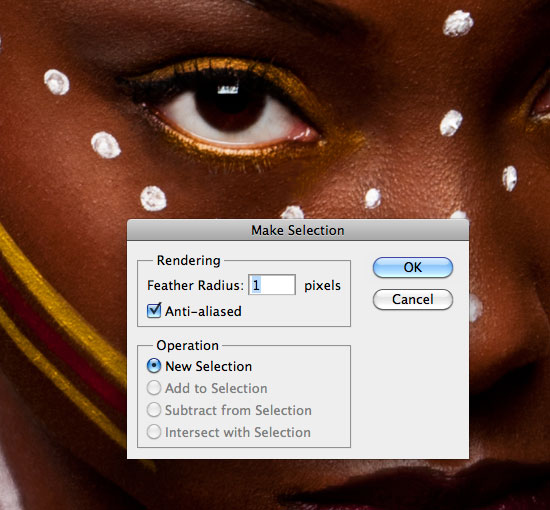
Once you go around the head with the Pen tool and you finish the path by closing it up you are ready to turn it into a selection. While still having the Pen tool selected use right click and choose Make Selection from the context menu. You can add 1 pixel feather.
Step 5
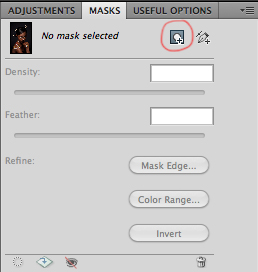
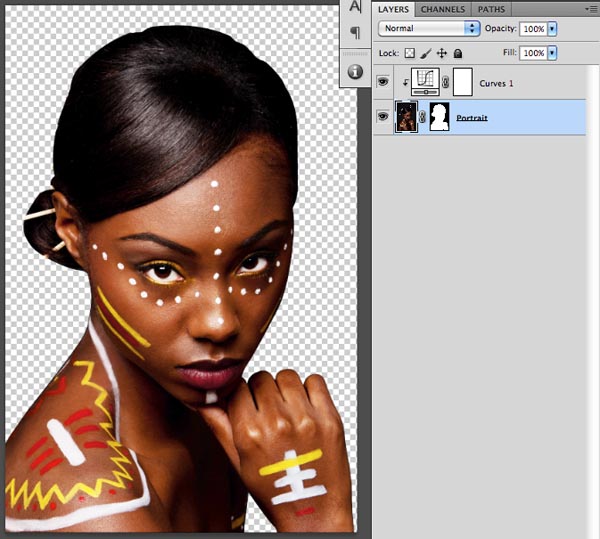
After you made your selection you will need to turn the Background layer into a normal layer by double clicking on it in the Layers panel and call the layer Portrait. After this turn your selection into a Pixel Mask by clicking on the this icon in the Mask panel or at the bottom of the Layers panel:
Step 6
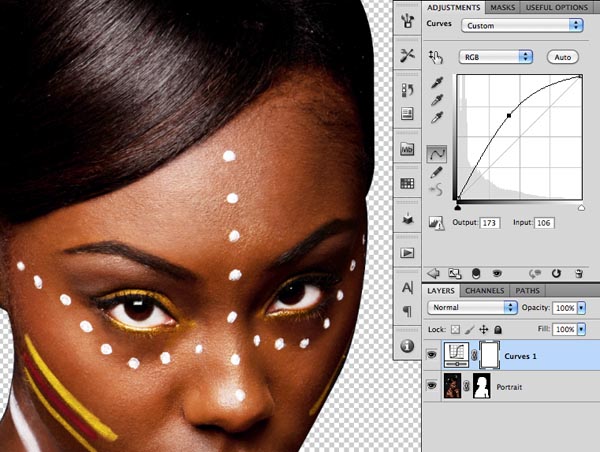
The mask will hide the original background, where you should see transparent pixels now. Next thing we need to do is to brighten up the portrait. We are going to use a Curves Adjustment layer with the following curve:
Step 7
Select the Adjustment layer and make a clipping mask between the adjustment and the portrait layers by pressing Ctrl + Alt + G / Cmd + Option + G to make sure the adjustment won’t affect other layers below. After this use the Free Transform tool from the Edit menu (Ctrl/Cmd + T) to make the whole portrait slightly bigger to fill the original frame more tightly.
Step 8
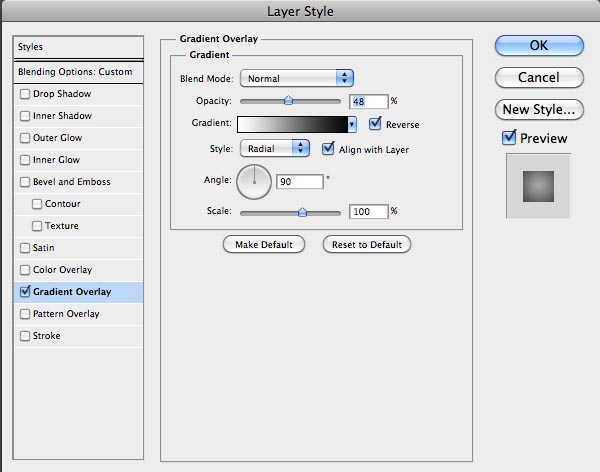
We need to create a new layer at the bottom of the layer structure. Fill in this new and empty layer with white (press D and then Ctrl/Cmd + Backspace) and then apply the following layer style on it:
Step 9
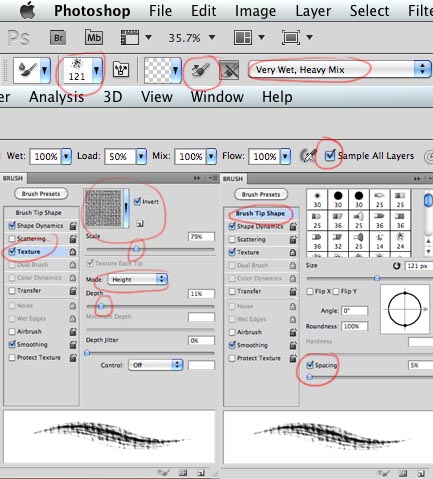
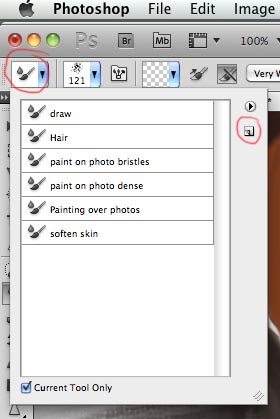
You can call this layer Background. Next step is to make a new layer on top of the other layers and call it Mixer Brush. On this layer we are going to start creating the foundation of the painting effect. You will need to download the Watercolor Splatter brush set for this step. You can find the link at the beginning of the tutorial. Once you have the brush file, just double click on it to install it. After that the brush set should be available in Photoshop. First of all you will have to select the Mixer Brush tool (CS5 only) and set up the following options for it:
- Choose Splatter 24px (from the Watercolor Splatter brush set)
- Set the brush size to 121 px
- Turn off the ‘Load brush after each stroke’ option
- Choose Very Wet, heavy Mix option
- Turn Sample All Layers option on
- In the Brushes panel you will have to turn on Texture, Load the Artistic Surfaces and choose Dark Coarse Weave texture (turn Invert option on)
- Under Texture set Mode to Height, Scale to 79% and Depth to 11%
- If you have a tablet use Shape Dynamics too and set the Size Control to Pen Pressure (if you work with a mouse you don’t need this)
- Under Brush Tip Shape set the Spacing to 5%
Step 10
After all these settings it is worth saving this brush setup for later use. Let’s save it as a Mixer Brush Tool preset. Click on the far left icon on the control bar and click on the new icon and name the brush Painting over photos.
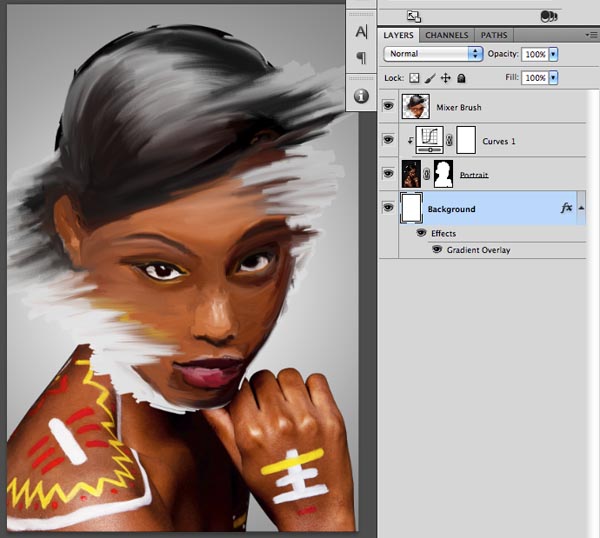
Step 11
Make sure you have the new empty layer selected before you start painting over the photo. With this setup on the Mixer Brush you will be able to paint over the portrait blend details together. The Mixer Brush will not only use the portrait layer but it will also sample from the background, which will help us to break up the original edges of the face to make it a bit more artistic, painterly. Try to keep the details on the eyes, nose and mouth but you can be much more loose on the other parts of the face. Use your creativity in this step.
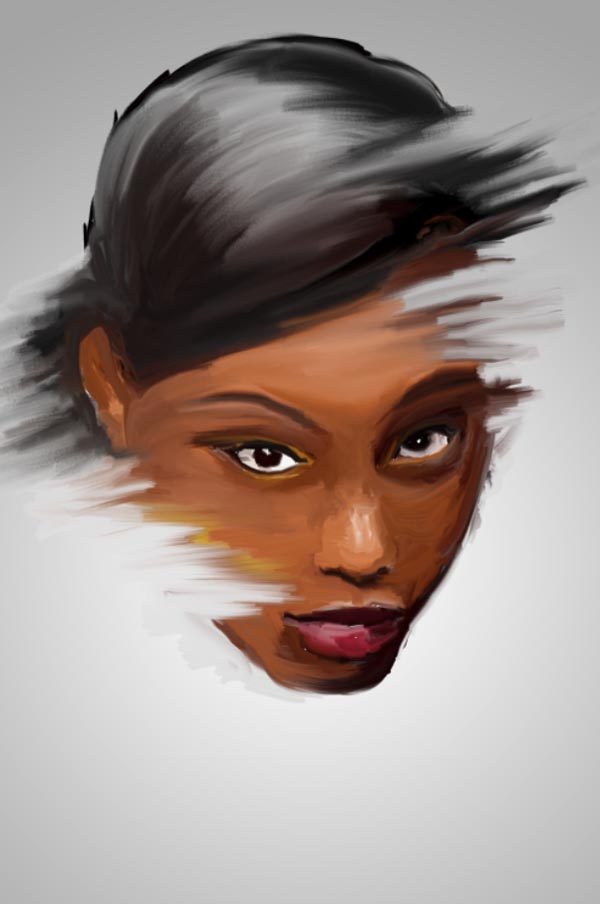
Step 13
After this point you can turn off the Portrait layer, which will also turn off the clipped Curves Adjustment layer. We don’t need them anymore, but it is good to keep them in case we want to add some more detail to the Mixer Brush layer (like the hand for instance).
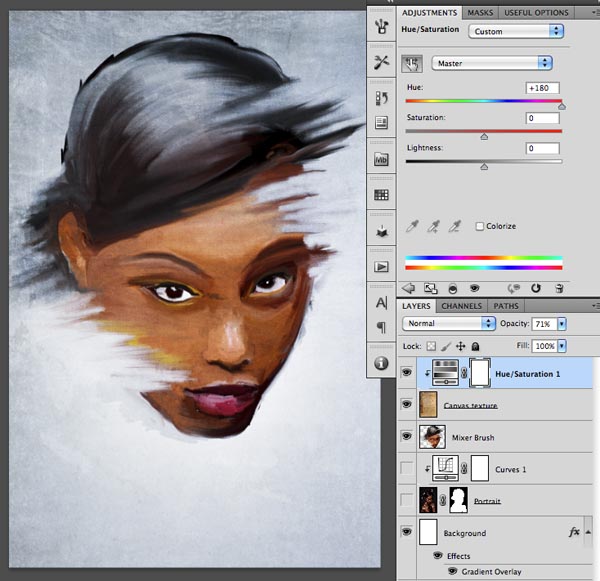
Step 14
It is time now to add more canvas feel to our painting with the image you can download from the link I included at the start. Open up this image and drag it on top of our composition and name the layer Canvas Texture. Set the blend mode to Overlay and then create a Hue/Saturation adjustment layer with the following options (this adjustment layer has to be clipped to the texture layer):
Step 15
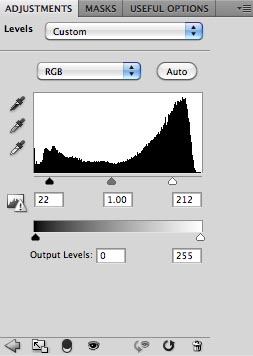
To increase the contrast lets add a Levels Adjustment Layer on the top with these values:
Step 16
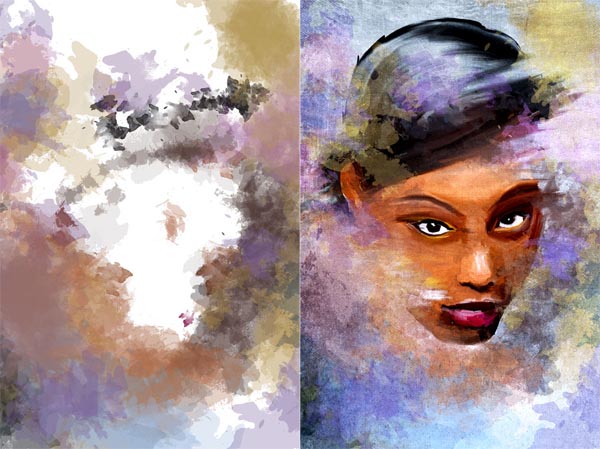
It is time now to make the whole painting more dynamic and interesting by using the Splatter brushes with Brush tool. Create a new layer under the Canvas Texture and call it Colors. There is no correct way to set the options for this step as you will get interesting effects no matter what options you use. It is useful to work with more than one brush tip shape from the brush set and also to use Jitter on the size and angle to get more variation. I was changing my color a lot and I tried to introduce interesting and vivid tints like purple, yellow and blue. On the left you can see the Colors layer separated and on the right the way it looks together with the other layers. This step took roughly 20 minutes, but it is the fun part of the process.
Step 17
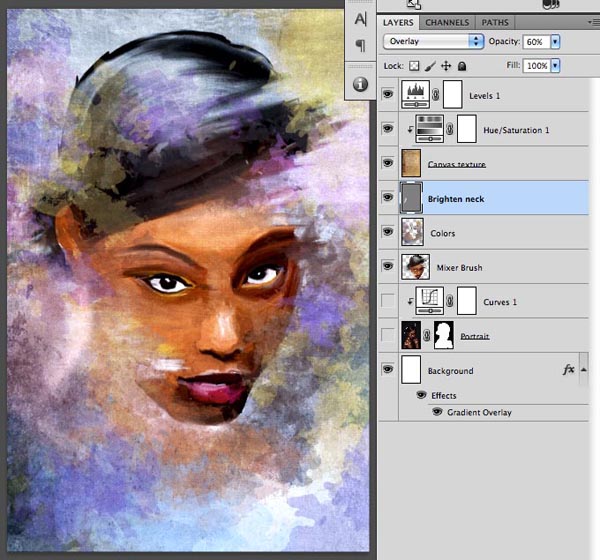
Now we need to show the neck somehow. An interesting way to do it is to brighten the background instead of outlining the curve of the neck. This technique is very similar of using a sponge or a cloth to smudge and brighten up parts of your painting. The way we can easily do it in Photoshop is to make a new layer above the Colors and below the Canvas Texture, then fill this layer with 50% gray (Edit/Fill option with 50% gray option), set the blend mode to Overlay and the opacity to 60%. Once you are ready with this you will need to use the Brush tool with a soft edge brush set to white color and 20% opacity on this layer. Simply brush over the neck and maybe other areas as well a couple of times where you feel a bit of brightening would help the overall look. Optionally you can also darken with this layer if you change your brush color to black.
Step 18
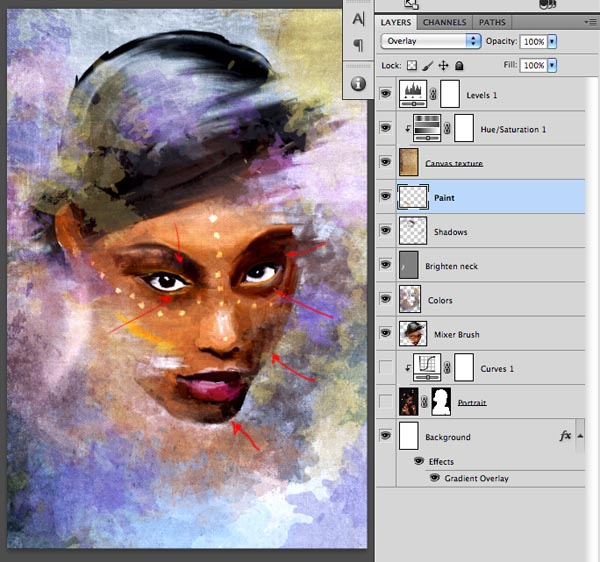
Next step is to add more detail onto the face. I wanted to emphasise the eyes so I decided to create two new layers. I used a layer to paint some dark details (marked with red arrows) and another layer set to Overlay blend mode for adding bright paint spots on the face. These spots are actually following the design of the original makeup from the photograph.
Step 19
The last layer we need to create is for adding more detail to the whole portrait. On this layer I will use a simple default circular brush with hard edges and draw over parts of the image. You can place this layer below the Canvas texture and you call it Ink as it is similar to using ink over paint. Here are two close ups to see the details of this new layer:
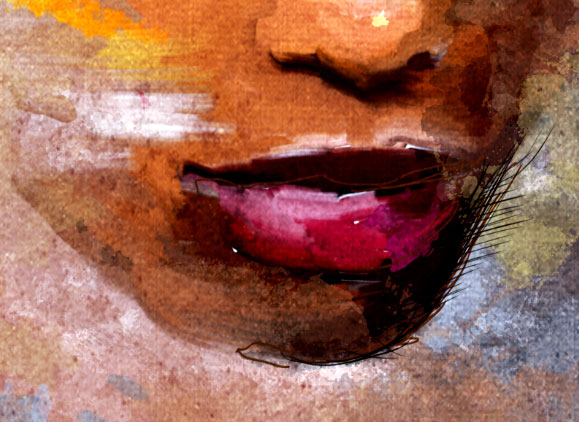
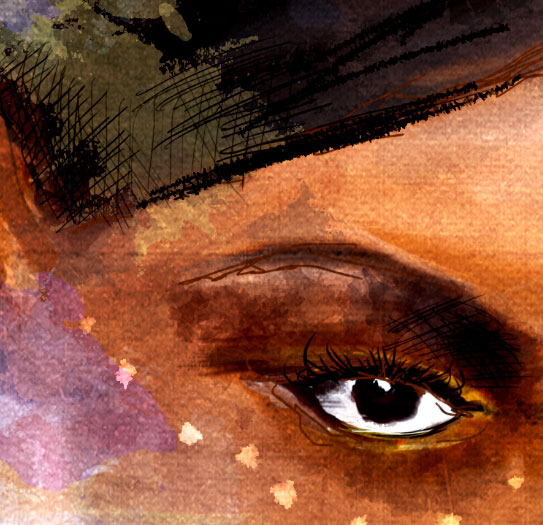
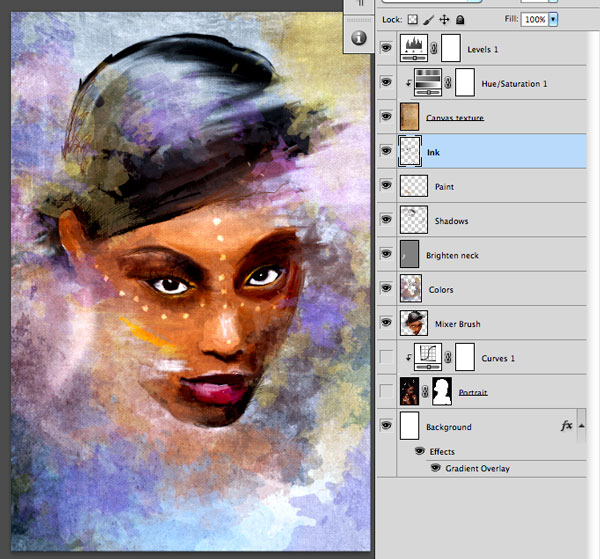
Step 20
After this point it is up to your imagination how to finish the whole piece. Hopefully it was inspiring to go through these steps together. On the image below you can see the final layer structure:
Final Image
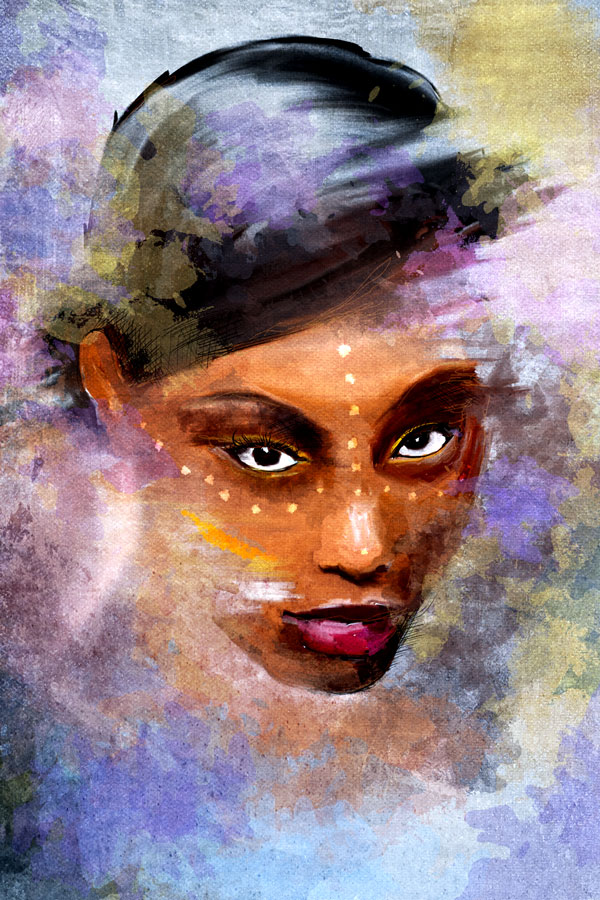
{excerpt}
Read More