Let’s imagine your boss gives you a commission to create a simple flyer advertising an event. Nothing fancy – just a plain image, some bubbles and a tiny bit of text. The only reservation is that the text must punch out a section of the bubbles and reveal the image underneath. The only problem is that your boss is not exactly sure what they want. Let’s go ahead and see how the situation develops…
Introduction
The following assets were used during the production of this tutorial.
- Fonts (Dekar, Dream Orphans, Antipasto)
- Background image: http://www.sxc.hu/photo/587212
So far it’s going smooth…
Your flyer is ready. It has all the elements your boss requested, the only thing left is to convert the text to outlines and use them as a cookie cutter.

Are you sure you want it this way?
Ok, you start with the text. Converting the text to outlines is (dangerously) easy – you just select it, go to Type menu and select Create Outlines (or simply press Shift + Ctrl + O). Now all you do is you select both the text outlines and the underlying shape and press Ctrl + 8 to create a compound path. Now the letters reveal portions of the image underneath. Piece of cake!

Now, the boss takes a look and he loves it, that is just what he wanted. There is just one problem – he forgot to tell you that the event takes place 10/01/2011. Oh boy, well, you can trash what you have done so far and start all over but what guarantee do you have that in 10 minutes he won’t want it to be "See" instead of "Visit" or "witness" in place of "discover"? There has to be more efficient way to do this.
Luckily there is. We are going to use the text to mask out portions of the image.
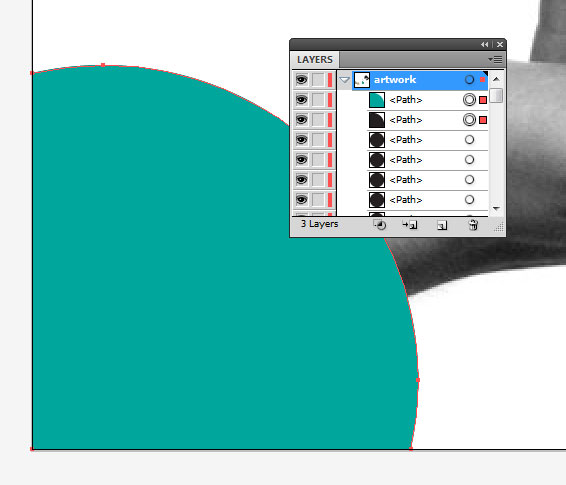
Step 1
Start by creating a graphic that will be punched out – in my case that is a portion of a circle in the bottom left corner. Make a copy of it and place it on top of the original. Next grab the Text Tool (T), click on the outline of the shape on top and input your text. I used a 22pt Dekar font- feel free to pick something to your liking here.
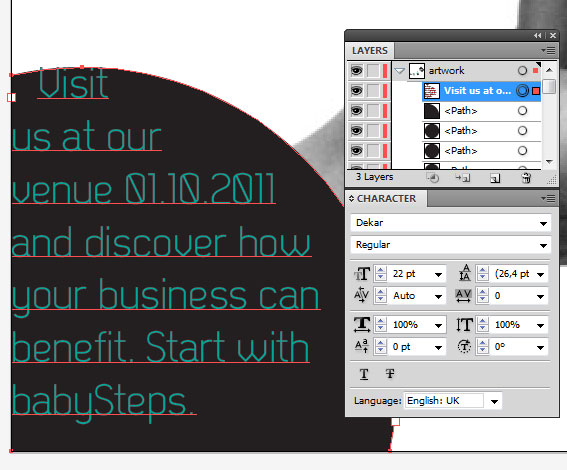
Step 2
The text isn’t quite there, but we can easily adjust it by making some minor tweaks. Open the Paragraph palette and change the Left indent to a value that works well – in my case it’s 10pt. If you decide to lower or raise the text, you can easily do so by bringing up the Character palette and changing the baseline, although in this example it isn’t necessary.

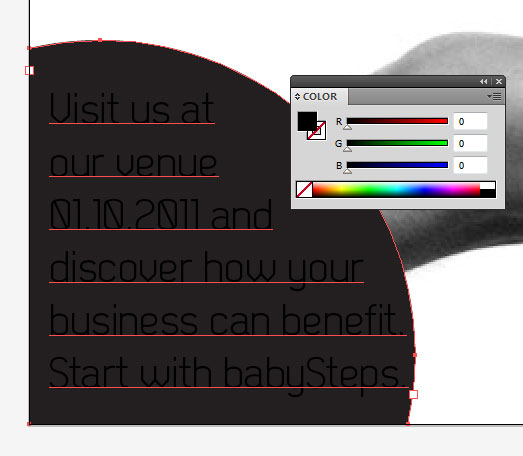
Step 3
Select the text and fill it with pure black. Now, it makes a difference for Illustrator whether you’re working with RGB or CMYK color space right now. For RGB make sure that your text color is FFFFFF (in other words, zero for red, zero for green and zero for blue). For those of you who decide to print their artwork later, all CMYK values of the text should be cranked up to 100%.
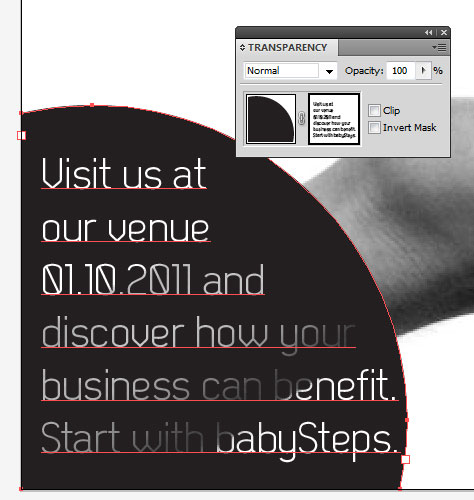
Step 4
OK, this is where the magic starts. Select your text object and cut it (Control + C). Next click the object underneath and open the Transparency palette. There will be a little preview of the currently selected object. Double click to the right of it and press Ctrl + F to paste the text into the mask. Also make sure that the Clip Box option is un-checked.
Step 5
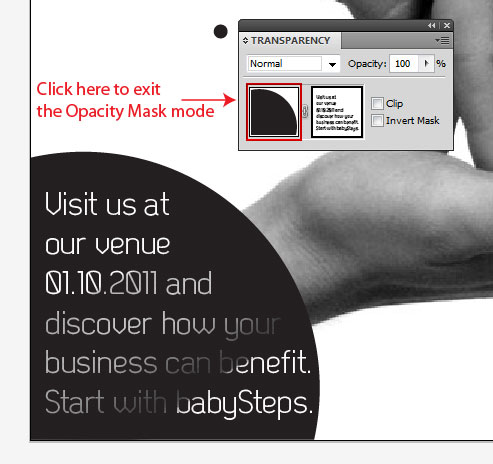
You will notice that, when you edit your mask all other objects become locked. This is because you are still in the Opacity Mask Mode. If you need to tweak other elements of the flyer, bring up the Transparency palette and click the rectangle representing the masked object, just like in the image below:
Step 6
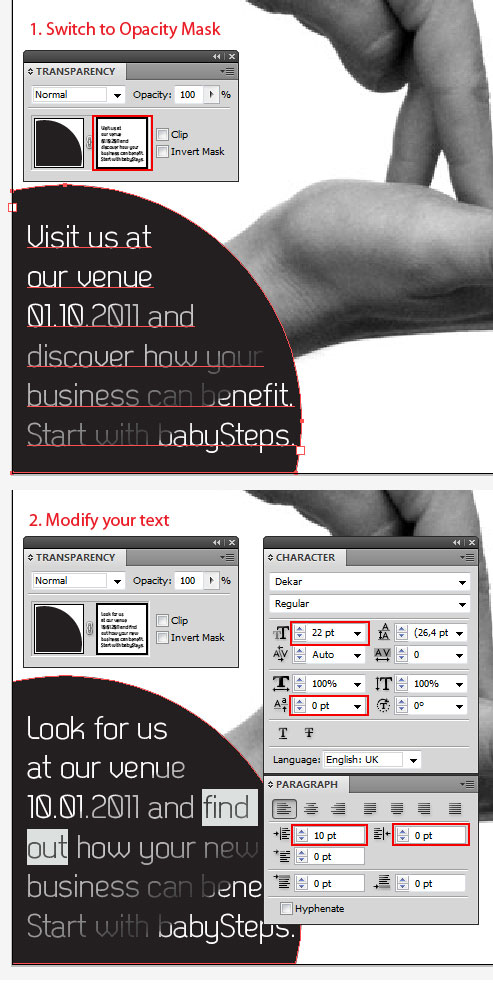
You’re almost done. However, if somehow you still have to adjust the text, there’s nothing easier. Once again bring up the Transparency palette, switch to Opacity Mask Mode and apply your modifications. Don’t forget to go to leave the Mode once you’re done!
You can also change the formatting – simply refer to Step 2. I decided to go ahead and change a couple of words.
Step 7
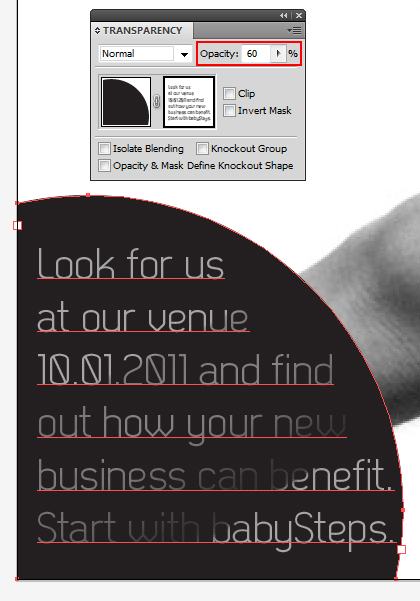
There is yet one trick you can apply to your text. You may decide that you don’t like the ‘complete’ (100% transparency) punch out effect and you would like to reduce it to, say, 60% opacity. Just select the mask (in the Opacity Mask Mode), click on the text field and reduce its Opacity. Done!
Conclusion
Now adjusting your flier five minutes before it is sent to the printing house should be no problem and you will save yourself a lot of fuss.